How to build a corporate directory with SharePoint search

Table of contents
Whether you’re using SharePoint for your next Intranet or building Team Sites to collaborate on documents, one request has always stayed and that’s the Corporate Directory. A people company phone book if you will, to quickly find someone using whatever filter you want. SharePoint 2010 had introduced some kind of org chart to help us with that as well as the My Profiles and it has stayed almost unchanged in SharePoint 2013.This article will look at building our own corporate directory with SharePoint Search and Display Templates.
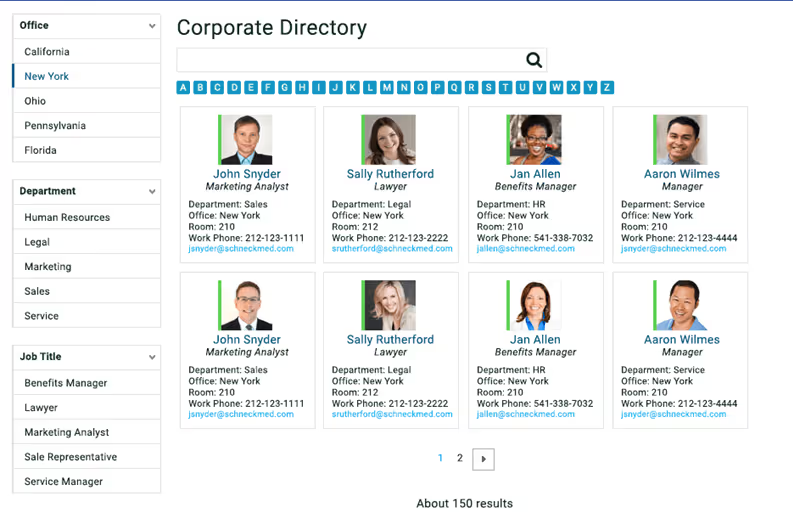
A big thanks to Stacy Deere-Strole from Focal Point Solutions for her hard work with the Display Template and allowing me to write this post today. You'll find the downloadable file at the end of this article.
Making Sure the People Properties Are Available and Searchable
Before you start even thinking about the people directory and how you’re going to build the SharePoint Display Template for it, you have to make sure you know what properties you’ll want to see and use.Here's a common list of properties though not listed in any particular order or with their actual Managed Property names.
- Name
- Department
- Phone
- Location
- Job Title
- Picture
You want to think of all the properties you’d like to show or allow users to filter and search by. Then, figure out how these properties are going to have values in them. Is it up to the user to edit his or her profile or will it be imported from Active Directory or some other source?Once you figured out what the properties are going to be and how their values are entered or collected the next step is the most important one, making them searchable.I’ve already written a few articles on using SharePoint Search to build things in SharePoint and it always comes down to the same thing, Managed Properties. If you want to display or refine by properties you have on people profiles or on documents, you need to make sure they're available as Managed Properties.Before you continue on with this article, make sure you understand what Crawled Properties and Managed Properties for SharePoint are.
Here are other SharePoint Search articles to look at:
- Leverage SharePoint Search to Boost User Adoption
- Learn to Build a Cool SharePoint 2013 Search-Driven Animated Menu
- Display Content with SharePoint Search Filtered by User Properties
- A Slick Display Template for Your SharePoint
- SharePoint search not working? Data management might be the culprit
- Facilitate Your Work with SharePoint Display Templates
Building the SharePoint Search Page for the Corporate Directory
We’ve thought about what will be displayed and how we’re going to allow visitors to filter, so now we need to prepare the page for this SharePoint corporate directory.The choice is yours. We’re going to need a page with the Search Box, Refinement and Search Results Web Part to do this.
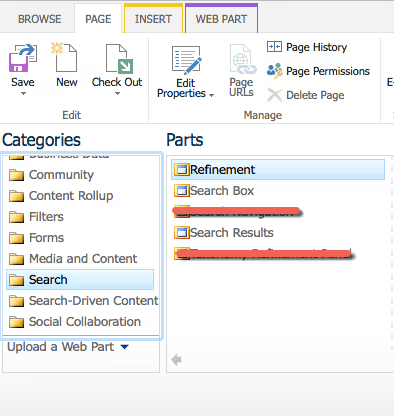
What we're building is a Search Driven page in SharePoint, so if you want to have some fun with this, you can add the Content Search or more Search Results Web Parts on the page to enhance the experience.For now, I'm going to keep it simple and use the Search Web Parts shown in the screenshot above, which should give you the following. But feel free to place them where you want, you can also use whatever Site Template you want. I took the Enterprise Search Center template and created a new Site Collection. I then went to set the People Results page to the Site’s homepage.

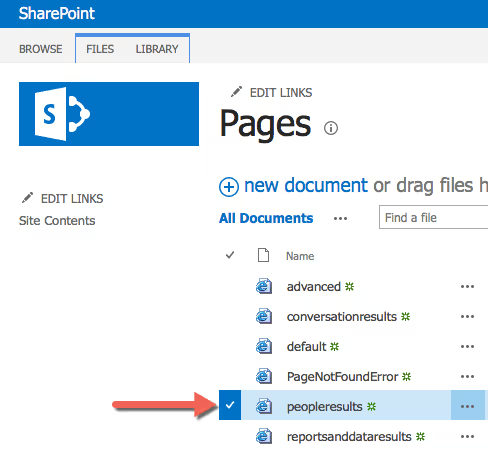
This is the page you should see and, if you want, can set as the homepage.
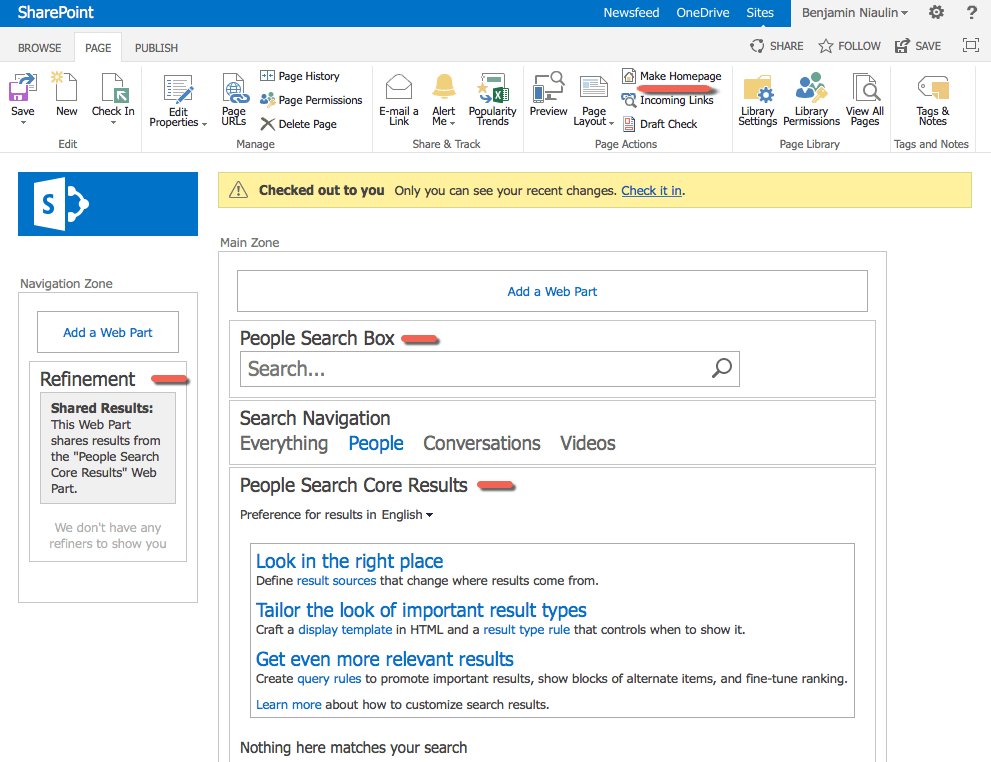
I removed the Search Navigation as I don’t actually want this to be a Search Center, but rather my People Directory however, it’s completely up to you.Now that we have the page set up, we’ll need to make sure that it’s set up to show all users by default when we navigate to the page. To do this, you’ll need to edit the People Search Core Results Web Part and click on Change Query. This will bring up the Query Builder window and there, we’ll make sure that it’s set up to show People Results by default.
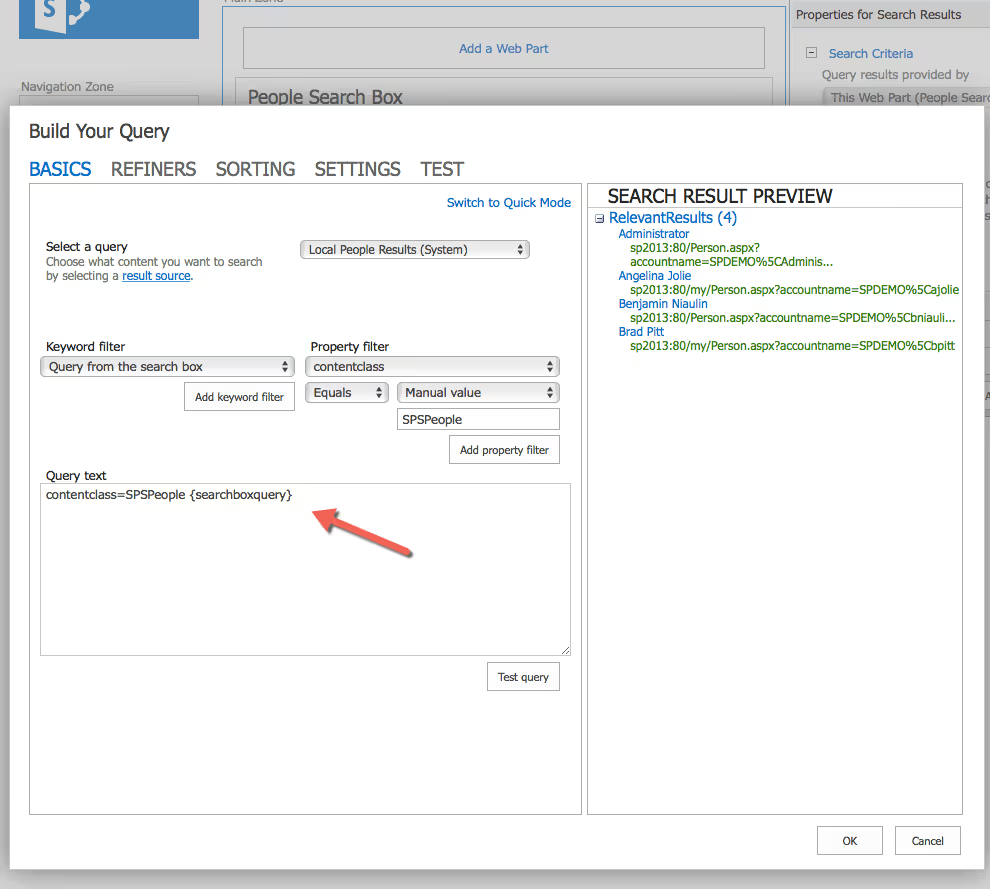
You can easily do this by adding contentclass=SPSPeople to the query text of this Search Results Web Part, but you’ll want to leave the {searchboxquery} so that the results will filter based on what's entered in the Search Box.Once this is done, you’ll already see all the people profiles show up as search results and the refinement panel already working for you with the default properties. Feel free to edit the Refinement Web Part to add the properties you wish to filter by.
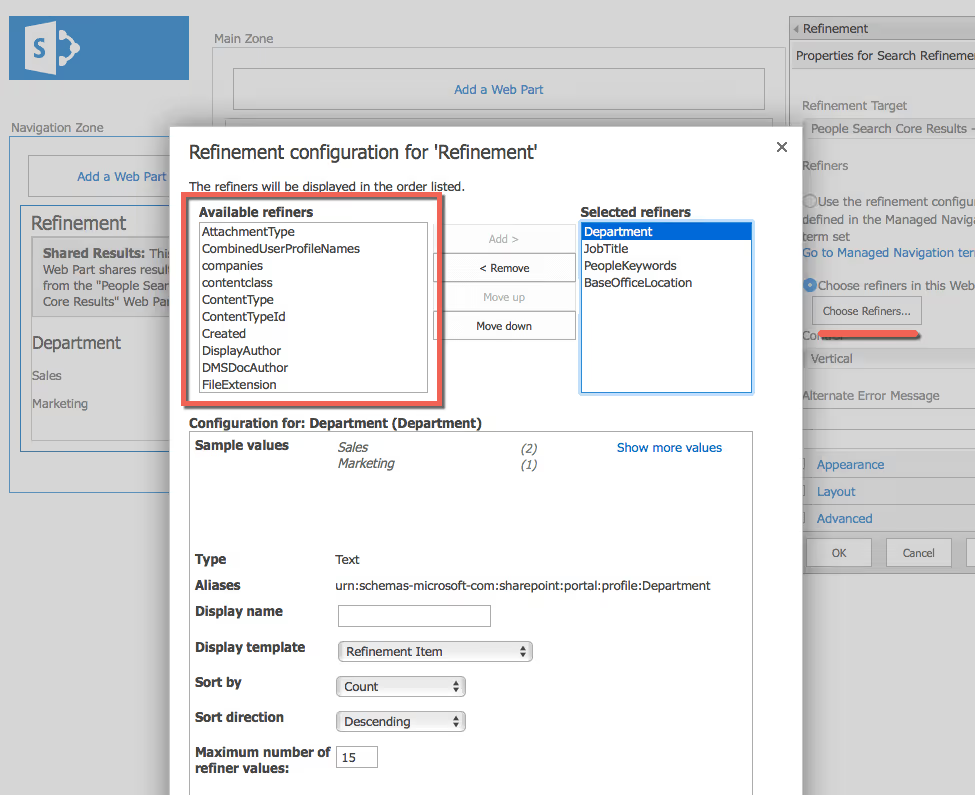
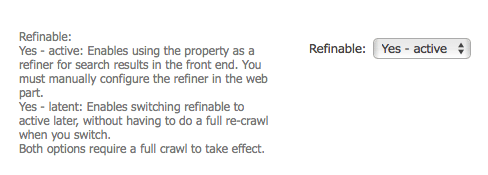
If you don’t see a Managed Property you wanted to filter by, make sure that it’s set to Refinable in the Search Schema.
At this point, you have a very basic people directory and all that’s needed now is a little branding. Whenever we speak of branding the Search Results in SharePoint, we’re talking about Display Templates.
Creating the SharePoint Display Template for Your Corporate Directory
This is the more complicated part! It’s relatively easy to create user profile properties and assign them to Managed Properties and even easier to set your Search Results to show People when you land on the page. But making the results look the way you want them to, that’s another story.Luckily, the Display Template is ready for you to download at the end of this article. However, it’s always good to go through it and try to understand what's going on to make necessary adjustments if needed.
What Is a Display Template Again?
Good question! Basically, it’s a way of creating an HTML design for your Search Results. It’s called a template because it’s completely reusable. You create it once and every item that comes out of the search results uses it to place its properties in the allocated spot in your design. So here, we’re creating an HTML design so that the properties we want of a person, like their name and picture as well as department, looks the way we want and is repeated to all results.Here's an example on how I would usually add the Title Managed Property of an item as part of a span in my HTML design.

The thing is, if you want Hit Highlighting (for the word that the person searched for to be highlighted in bold) it's completely different. You need to use a different method and this is what was used in the Display Template.

Note the use of: Srch.U.getSingleHHXMLNodeValue(hhProps, "department")
Adding New Properties in the Display Template
First, you’ll need to make sure that the Managed Property you’d like to use is declared at the beginning of the Display Template file in the head tag under ManagedPropertyMapping.Then, you’ll need to copy one of the lines used, say for the Department Field above, and use it for this new property.As for branding, well that’s the CSS file.
Download the SharePoint Corporate Directory Search Display Template
Once again, a big thank you to Stacy Deere-Strole from Focal Point Solutions for providing us with this downloadable and ready to use Display Template for a Corporate Directory.

Stacy Deere-Strole | Twitter @sldeereWith nearly 18 years of experience in the IT Industry, Stacy is the Owner of Focal Point Solutions LLC, a Cincinnati, OH based company that provides SharePoint Solutions for the the mid-to-large Enterprises.
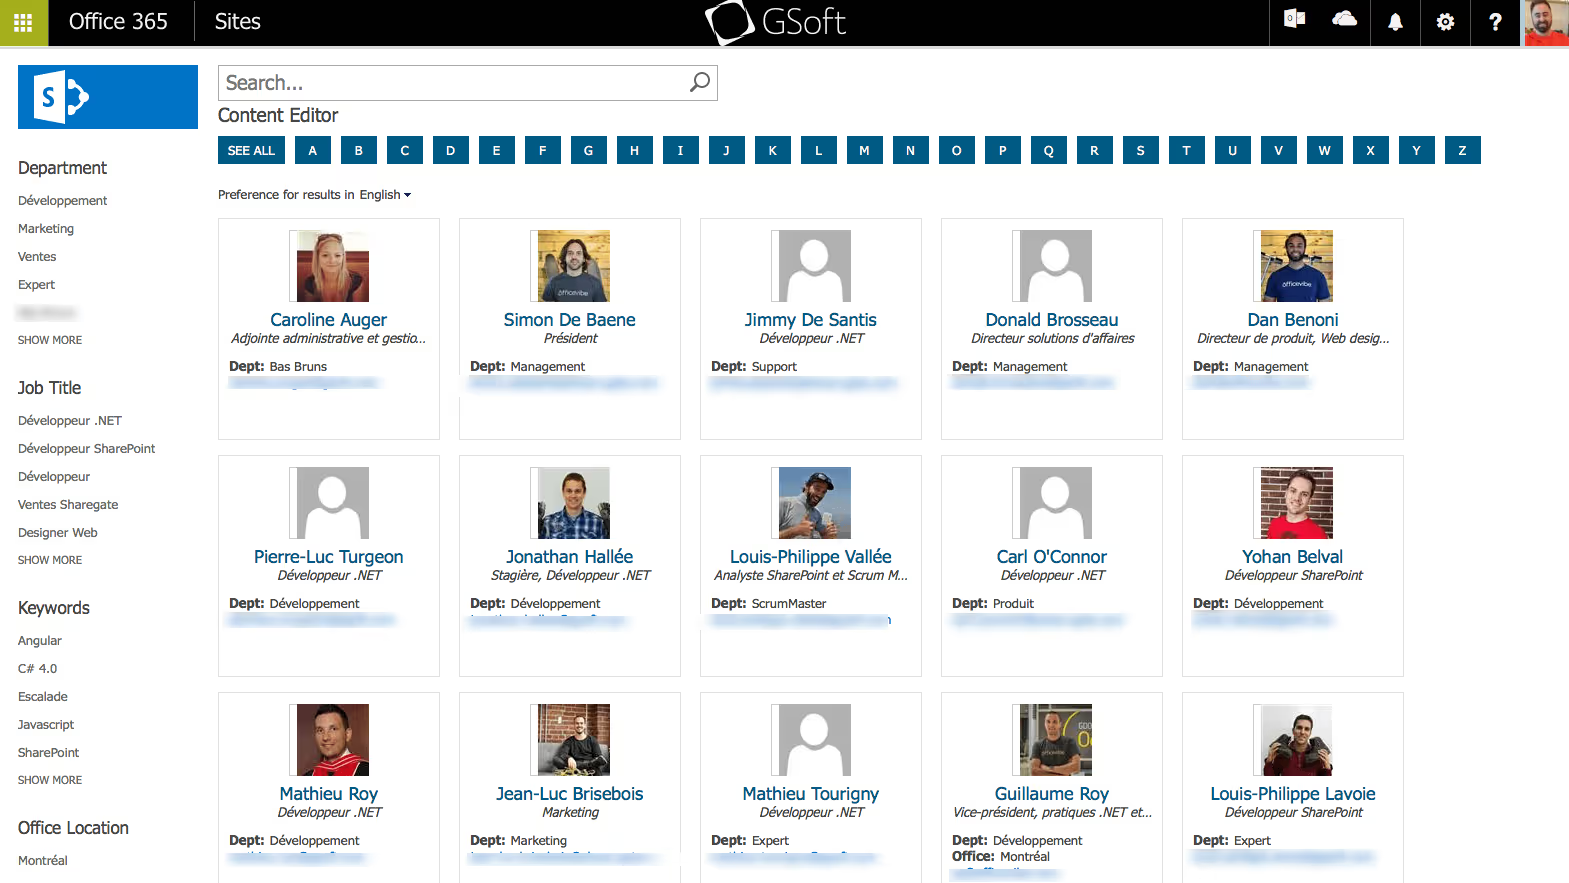
Simply download the files and place the Display Template named Item_Person_FPS under the Search folder in your Master Pager Gallery for Display Templates. Download the Files Now Then place the CSS file and the Alphabets file in the Style Library, we’ll associate the CSS file in the Site Settings of the Search Center under Alternate CSS URL in the Master Page settings.The Alphabets file is an HTML file that adds the letters to help quickly filter the Search Results shown. Add it wherever you want and add a Content Editor Web Part on the page and change the properties to link to the HTML file. Here is the result.
Let me know how it goes in the comments below!


.svg)
%20(1).avif)


.jpg)
.jpg)
