Display content with SharePoint Search filtered by user properties

Table of contents
With my numerous articles and videos on leveraging SharePoint Search to deliver beautiful results, you may be under the impression that it is my favorite feature. Well you’re right. This time, I want to show you how to use a Content Search or Search Results Web Part to show content filtered on the person visiting the page. An example would be showing intranet news announcements based on a user’s department.
Here is a video recording showing the steps explained below:
https://gsoft-group.wistia.com/medias/xmqvwixira?embedType=iframe&videoFoam=true&videoWidth=640
Learn SharePoint Search and the difference between Crawled and Managed properties
Before we even begin building a search query, you need to make sure the basics of Crawled Properties vs Managed Properties are well understood. I cannot stress how important this is; it’s like learning SharePoint columns and content types for documents. Then I encourage you to see and understand the differences between the Content Search and Search Results Web Part, so that you choose the right one for your current need. Regardless, what I am going to show you works for both.
You’ll need to prepare the content and user profiles accordingly
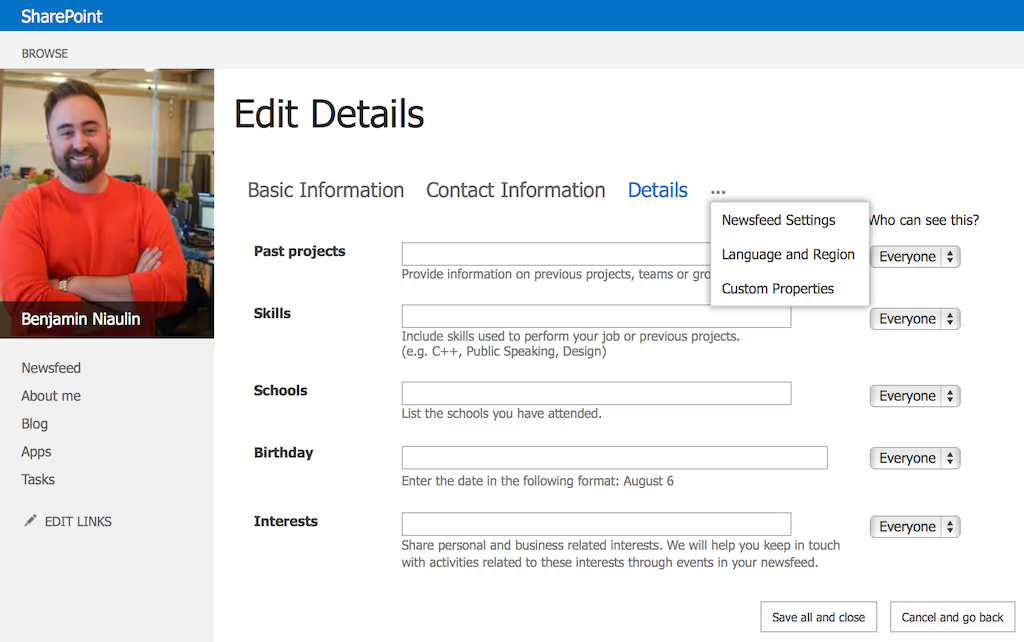
Like anything in SharePoint, you’ll need to plan this properly. For this article, I am going to use announcements targeted to users based on their profile. Users in SharePoint are accompanied by a Profile with what we call user properties. These properties contain values that are either pulled in from other sources like Active Directory or entered manually by the user through SharePoint.

You can manage these in the Central Administration of your SharePoint or in the Admin Center for SharePoint in Office 365. There, you can change which properties will be auto populated from another data source as well as create new properties that do not exist yet. For each property you create, you will be able to manage them, but don’t forget to map them to managed properties afterwards as mentioned in the article above.

Preparing for your context, you simply add or modify these properties to get the values you will want to filter by.
On the other side, looking at the SharePoint content we are going to need to prepare our list or document library so that the content entered is tagged with metadata that can be filtered by the values in users profile properties. So if I tag an announcement with “Marketing” I will be able to filter by users with that value in “department” property.
Configuring the SharePoint list with the right column
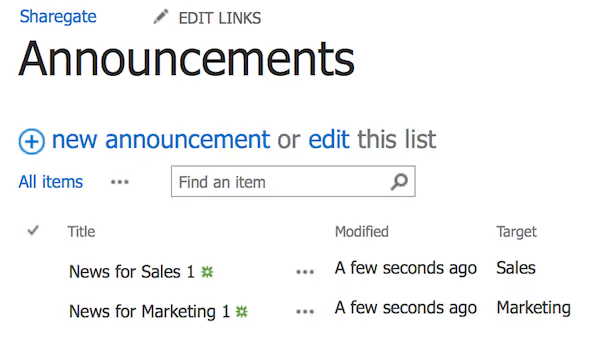
Again, this is purely to follow my current example and you will have to adjust the column type based on your needs. I created a simple Announcements list and added a Site Column called “Target”. The reason I created a Site Column as you may have guessed is because SharePoint 2013 automatically creates a Managed Property for it and saves me a step.

As you can see it is just a single line of text column and I have entered values I know I have used for departments in Active Directory. These properties are then imported with the User Profile Sync Service and associated to my SharePoint user profiles. You can of course create and use whatever you like.
Could I have used a Document Library? Of course! It’s search and that’s the beauty of it, if it’s in the Search Index we can get it.
Adding the Content Search Web Part and configuring the Search Query
In this scenario, I decided to use the Content Search Web Part but you could have just as well opted for the Search Results. But before I can start adding the Content Search and writing my query, I need to make sure I know the name of the Managed Properties I am going to use. Search only works with Managed Properties.
First, I need the Managed Property that includes the Crawled Property representing my List Column “Target”.

Then, I need the Managed Property that includes the Crawled Property representing people’s department profile property.

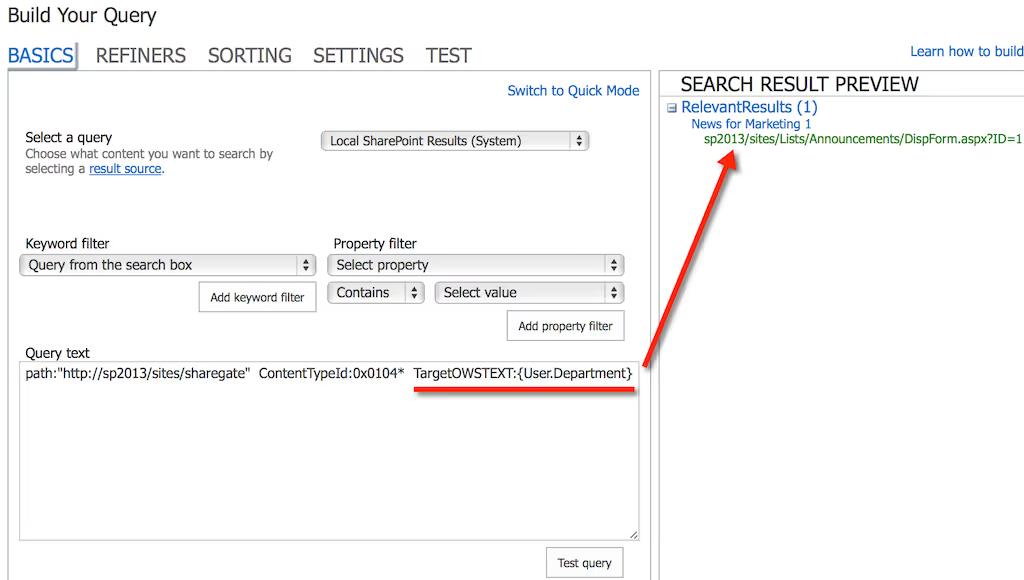
Now that I know which ones I will need to use, I should test the query to make sure I can at least get the results without any people filtering. So after adding the Content Search on the page, I edited the Query to find all items using the Announcement Content Type under a specific URL. Again, you can adapt the query to fetch what you need. I then added from

Great! Now all I have to do is add the representation of “current user logged in’s department property” and thanks to TechNet’s awesome article I know how.

All we need to do is type {User.<name of our property>}
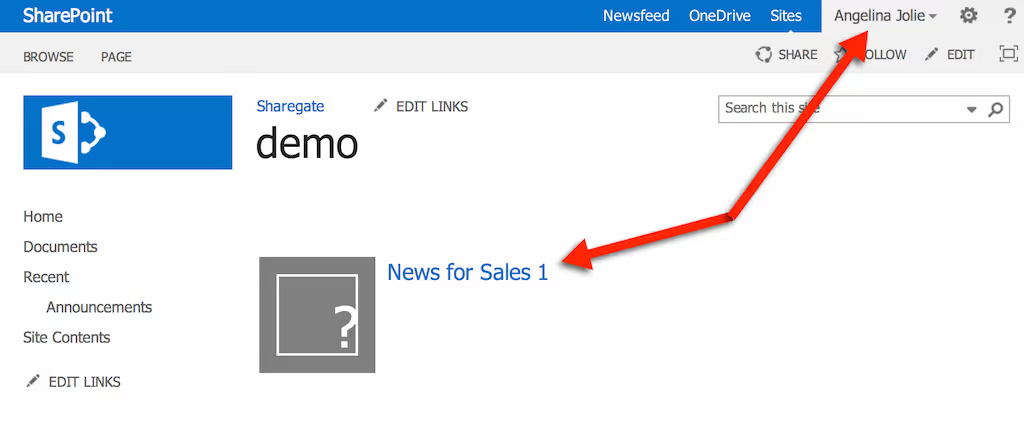
Now, depending on who visits the page and their profile property value for “Department”, the results will be different.


Adapting the SharePoint Search Results to your needs
The reason I show this is because someone asked me about Target Audience with SharePoint Search. The thing is, that doesn’t work. But Target Audience, as limited as it is, does not apply any level of security. This means that if I take the example above with announcements, even if I was in Marketing I could still technically see the Sales announcements if I had a link to them. Search however, applies security trimming and ensures no one will ever see something they do not have access to. It also provides a very good performance when loading pages for hundreds or thousands of users, as it isn’t querying for the information to the different lists or libraries at that moment, it simply pulls it from the Index.
And have you heard of Display Templates? In other words, make your results look like anything you want using HTML, CSS and JS if you need to. You can learn how to build the Display Template I provided as a free download and build your own. The beauty of it is we can take these results and quickly turned them into what we want.
I hope this helps.
What you will need:
- Use the Diagnostic Display Template or the CodePlex Search tool to see how results actually come out. If you need to filter on a value you need to know how it is being received.
- Save the TechNet article mentioned above in your favorites
- Learn Crawled Properties vs Managed Properties properly
- Access to the User Profiles to see or configure them


.svg)
%20(1).avif)


