.svg)
%20(1).avif)
Master Hacks: Migrate like a pro
Check out our video series to help you turn migration projects into masterpieces!
Table of contents
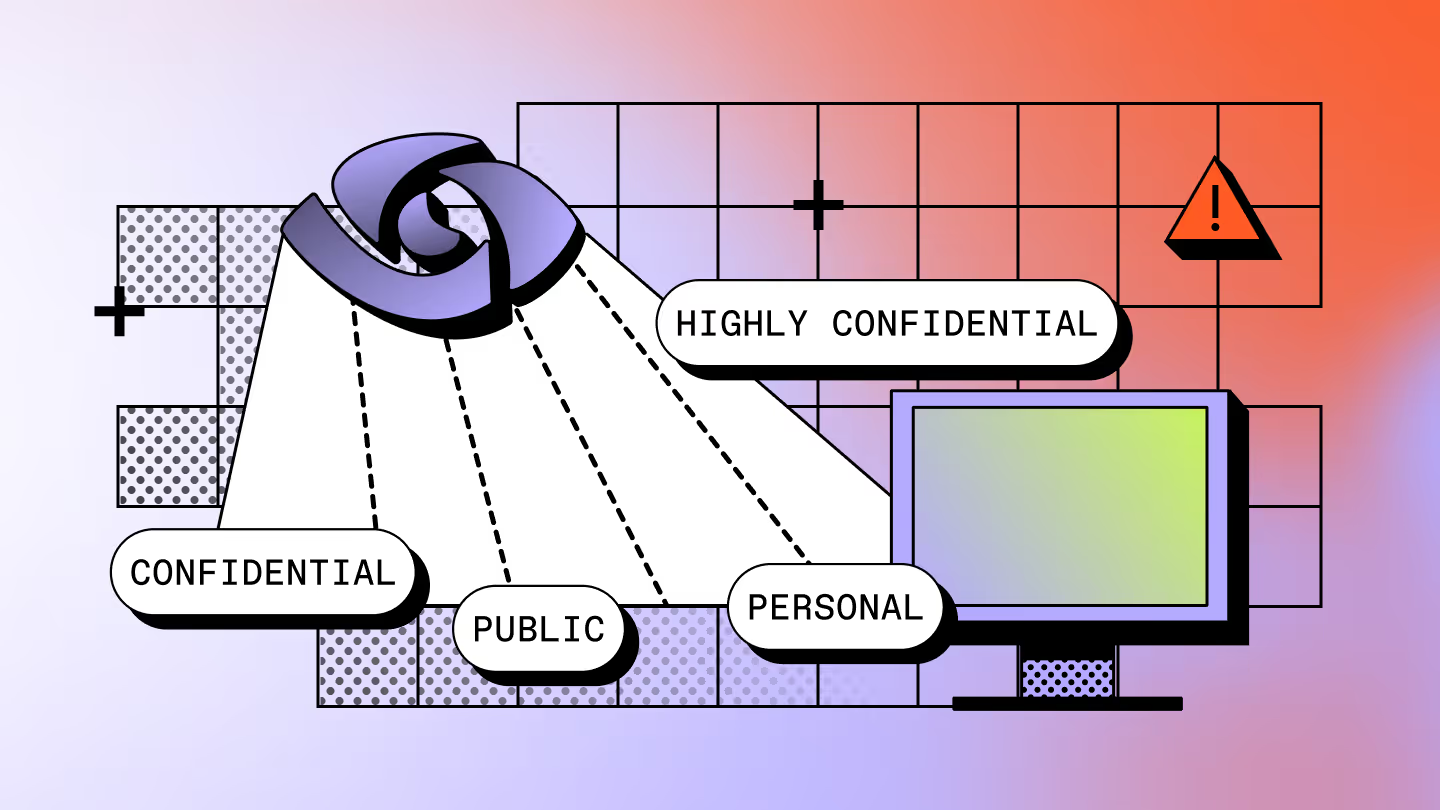
Welcome to the fifth installment of the Microsoft Purview tools series, where we dive deep into the world of sensitive information types (SITs). What exactly qualifies as sensitive information, and how do you protect it?
In our connected business world, we share and receive various data, like personal, financial, and business-related information.
These bits of info are crucial, and keeping them safe is a must. If they fall into the wrong hands, it can be a real mess – for individuals and organizations.
As a Data Security Consultant at Rubicon, I encountered a client who wanted to detect sensitive information like international bank account numbers, social security numbers, license plates, and mobile numbers when at least five were used in one location. This shows how vital it is to spot sensitive information types effectively.
But what exactly qualifies as sensitive information, and how do you protect it? In this article, we'll explore why SITs are so important, and I'll share some tips for identifying them. Let's keep your data compliant and secure without getting too techy!
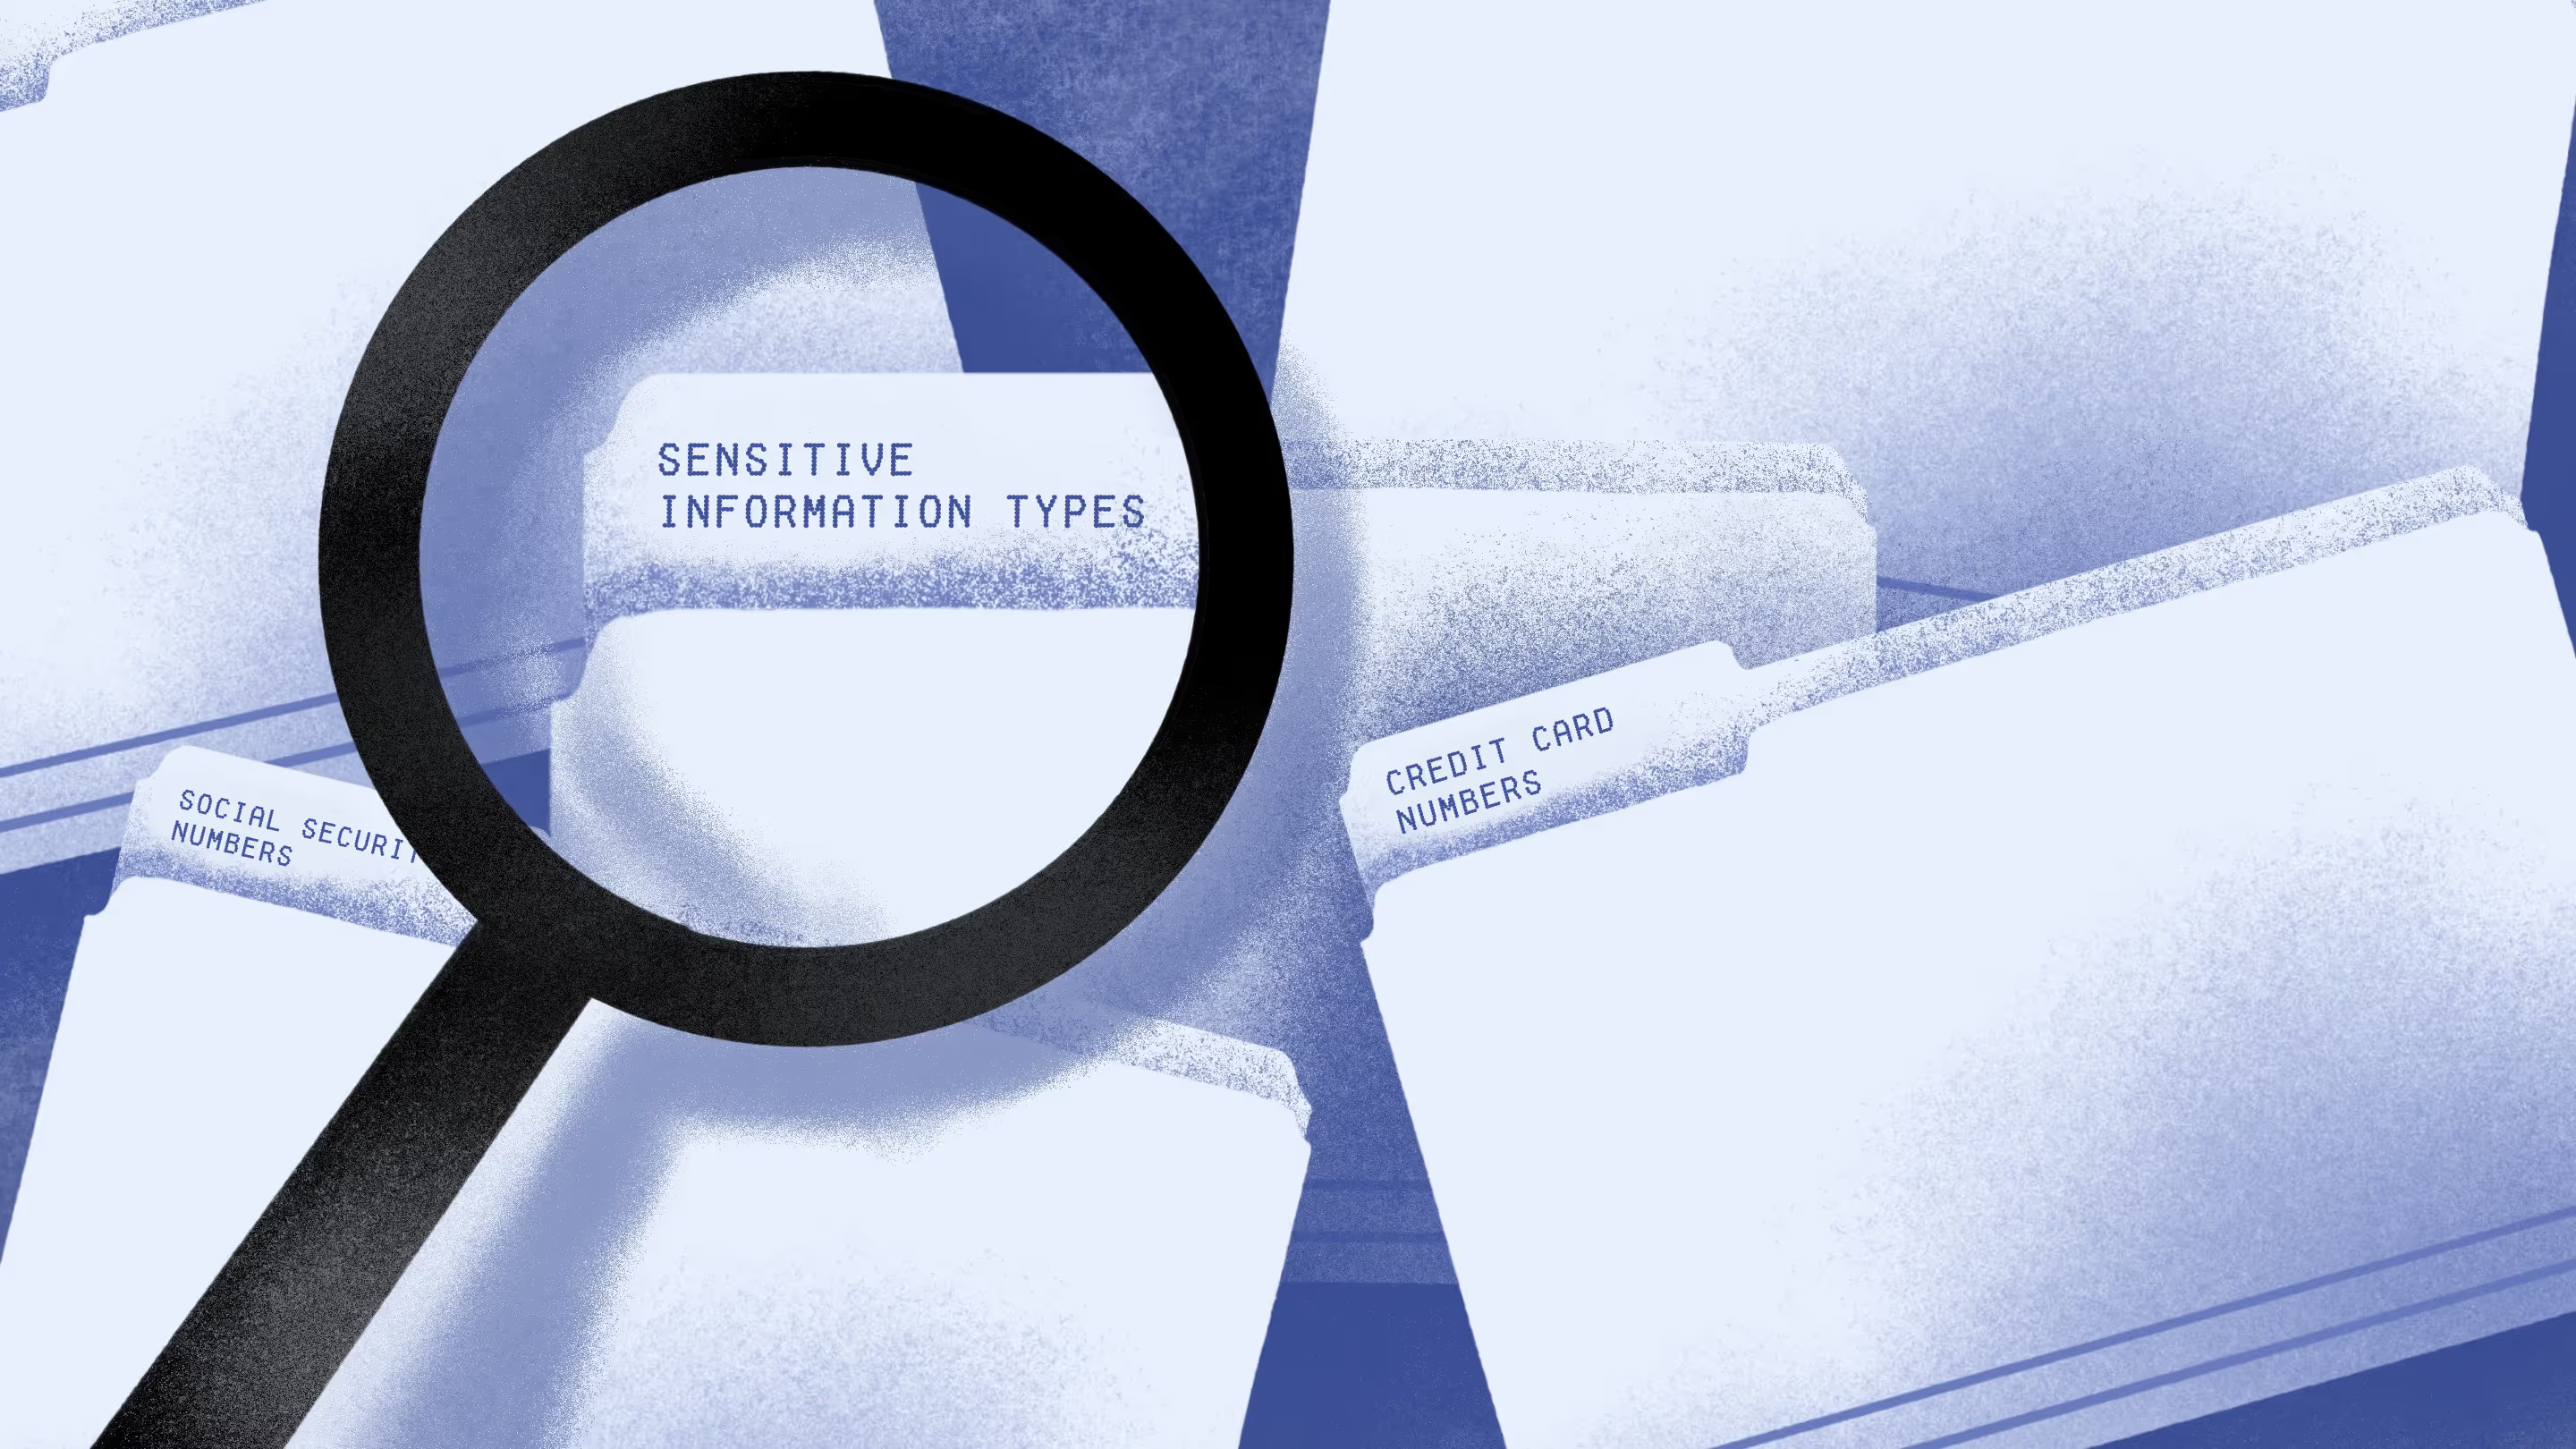
What are sensitive information types?
SITs help find and sort important, sensitive information in your company. You know, things like social security numbers, credit card numbers, or bank details. But there might be other important information, too, like intellectual property or precious customer data.
They're crucial in protecting sensitive information when using Microsoft Purview. In fact, SITs are used in various Microsoft Purview services and features, including:
- Microsoft Purview Data Loss Prevention policies
- Sensitivity labels
- Retention labels
- Insider risk management
- Communication compliance
- Auto-labelling policies
- Microsoft Priva
Why it's so important to define sensitive information types
Working with Microsoft 365 has a perk: it's easy to access your work and work-related personal information. But this convenience also poses a risk. Sensitive data can be exposed to the wrong people.
That's why you should identify your SITs, which provide a blueprint for effectively protecting sensitive data. Tools like Microsoft Purview Information Protection and Data Loss Prevention can help.
And guess where most of our sensitive data lives? In Microsoft Teams.
Where your Microsoft Teams information is stored
This diagram shows how data flows in your organization, particularly when it comes to Microsoft Teams.
The tricky part is that information storage is a little scattered, and you can see this in the table below:
Good to know
- Messages are not stored in SharePoint or OneDrive — only the files shared in messages are.
- Private and shared channels each create separate SharePoint sites.
- Meeting recordings shifted from being stored in Stream (Classic) to OneDrive/SharePoint.
- Tasks, when managed in the "Tasks by Planner and To Do" app, are deeply tied to Planner and Exchange.
This fragmentation makes it difficult for organizations to monitor and safeguard sensitive information. Which brings us to the question: how can you pinpoint your sensitive information types? Let's explore that next.
How to identify your sensitive information types
At first glance, it might seem straightforward for organizations to pinpoint their sensitive information types, but it isn't always the reality.
That’s exactly why I'm here to lend a hand! Here are a few pointers that can simplify the process:
Talk to stakeholders
Your organization has employees who practically breathe your business processes and associated SITs. Have a chat with them and put together a solid list.
Tap into Microsoft
Microsoft's Purview Administration Center offers a list of over 300 out-of-the-box SITs. It can serve as a wellspring of inspiration for jumpstarting your own definitions.
Stay compliant
Does your organization need to comply with specific laws or regulations, such as GDPR or the Health Insurance Portability and Accountability Act? These regulations often stipulate mandatory SITs or offer valuable recommendations.
Think data security
Last but not least, picture what would happen if specific data were to leak or fall prey to a security breach. Consider how this could affect your organization's reputation and finances. These reflections are here to provide you with valuable insights into your SITs.
How to find sensitive data in your Microsoft 365 tenant
Microsoft Purview supports your organization with solutions to find SITs within your Microsoft 365 tenant. Allow me to walk you through two of those solutions:
- Data Explorer
- Content Search
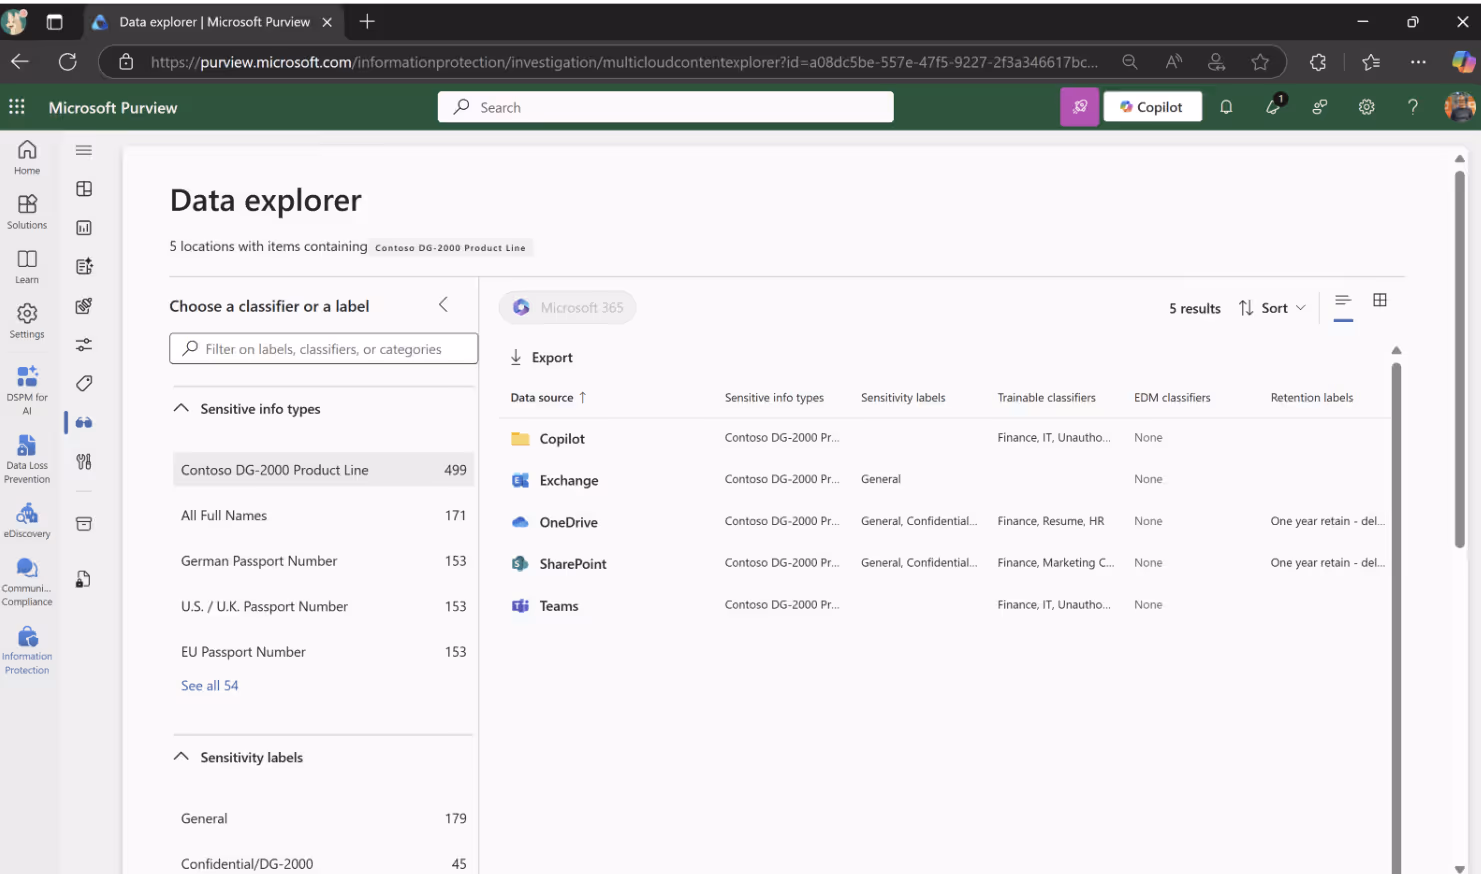
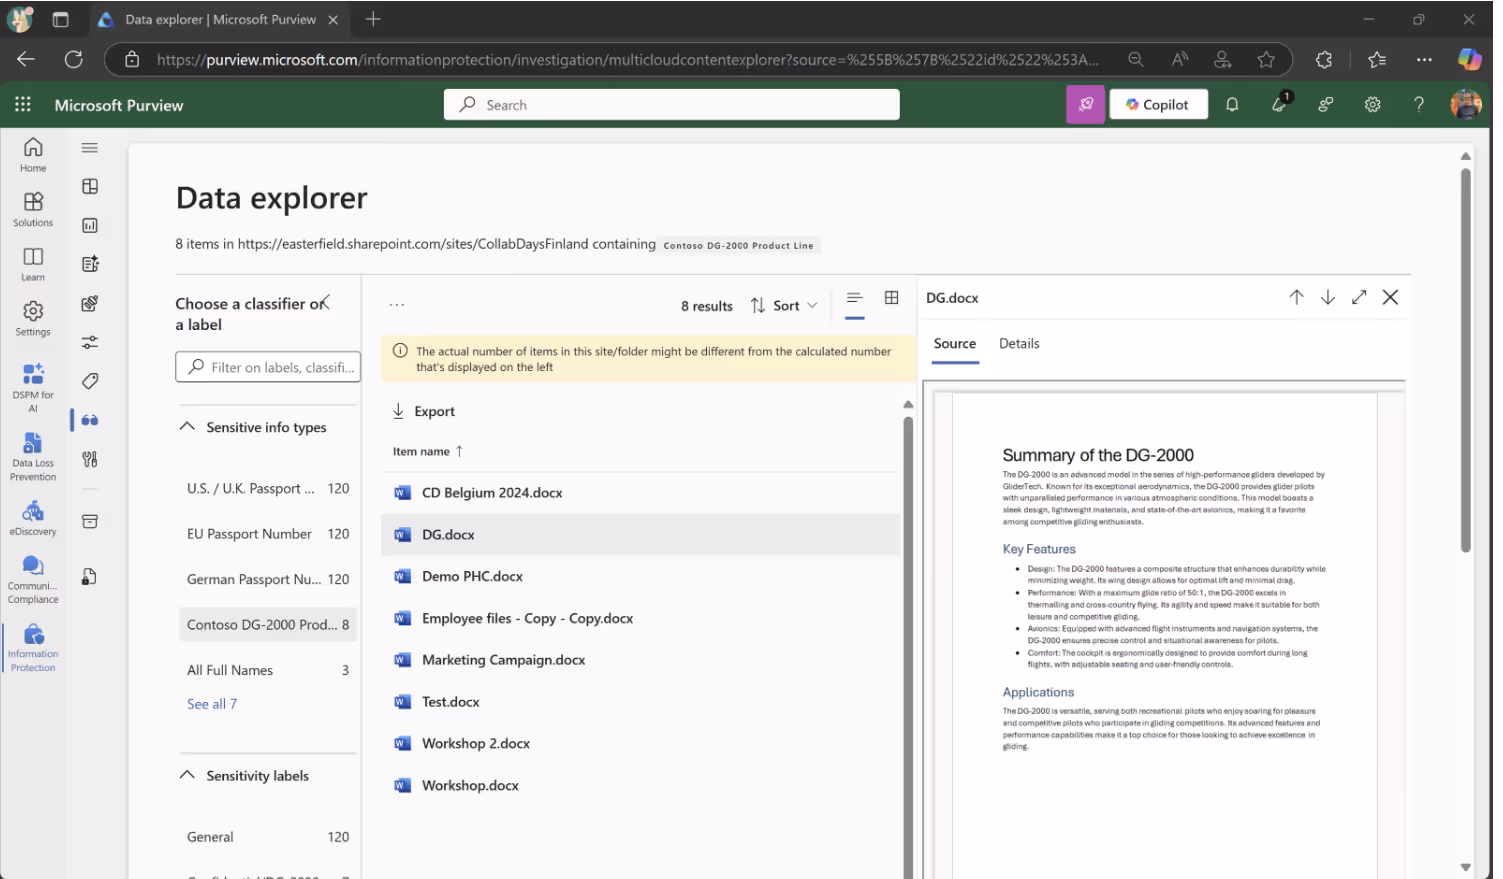
Data Explorer
Data Explorer lets you quickly dive into the info stored in Microsoft 365 related to one or more SITs, whether related to the default SIT from Microsoft or the ones you've created yourself. You can find Data Explorer in the Microsoft Purview Administrator Center under the Data classification menu.
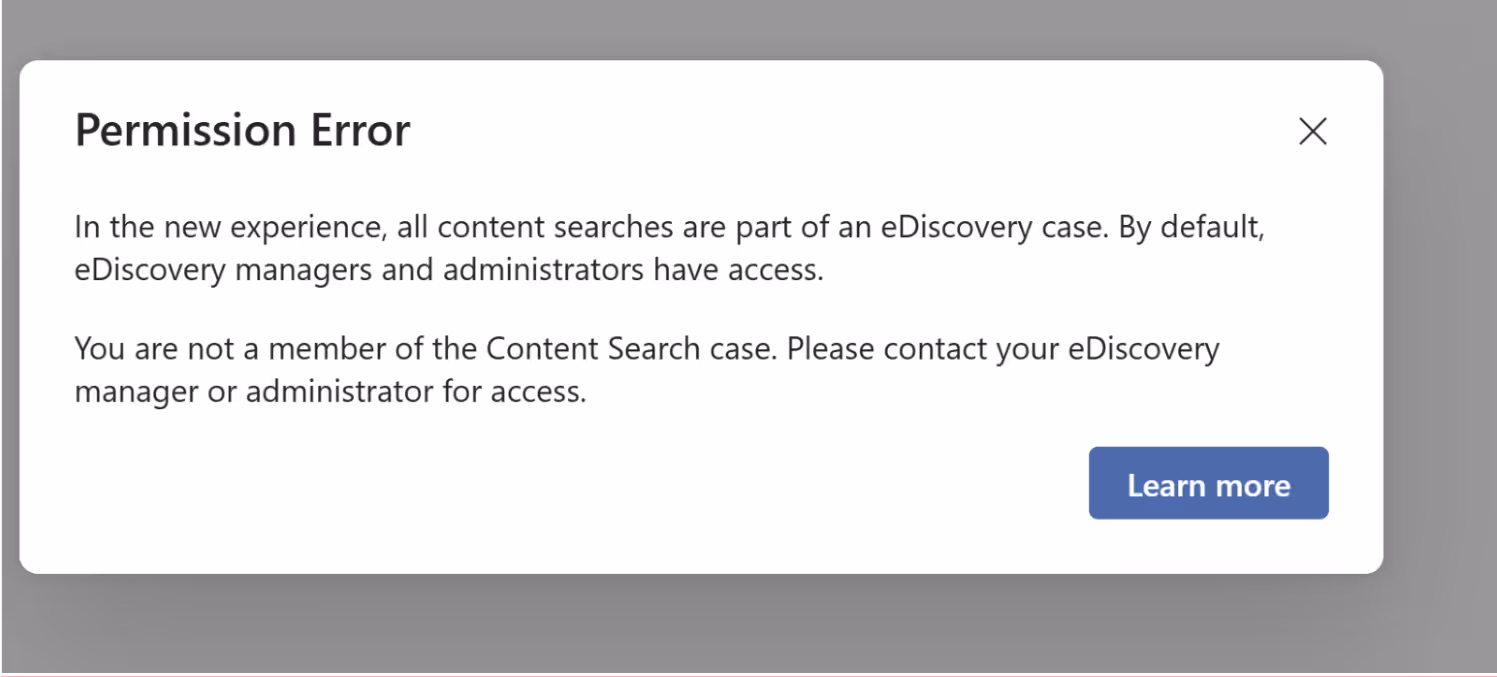
Content Search
Content Search has been renamed to Classic and the features are moving to Content Search underneath cases in eDiscovery.

Click on Create a search:
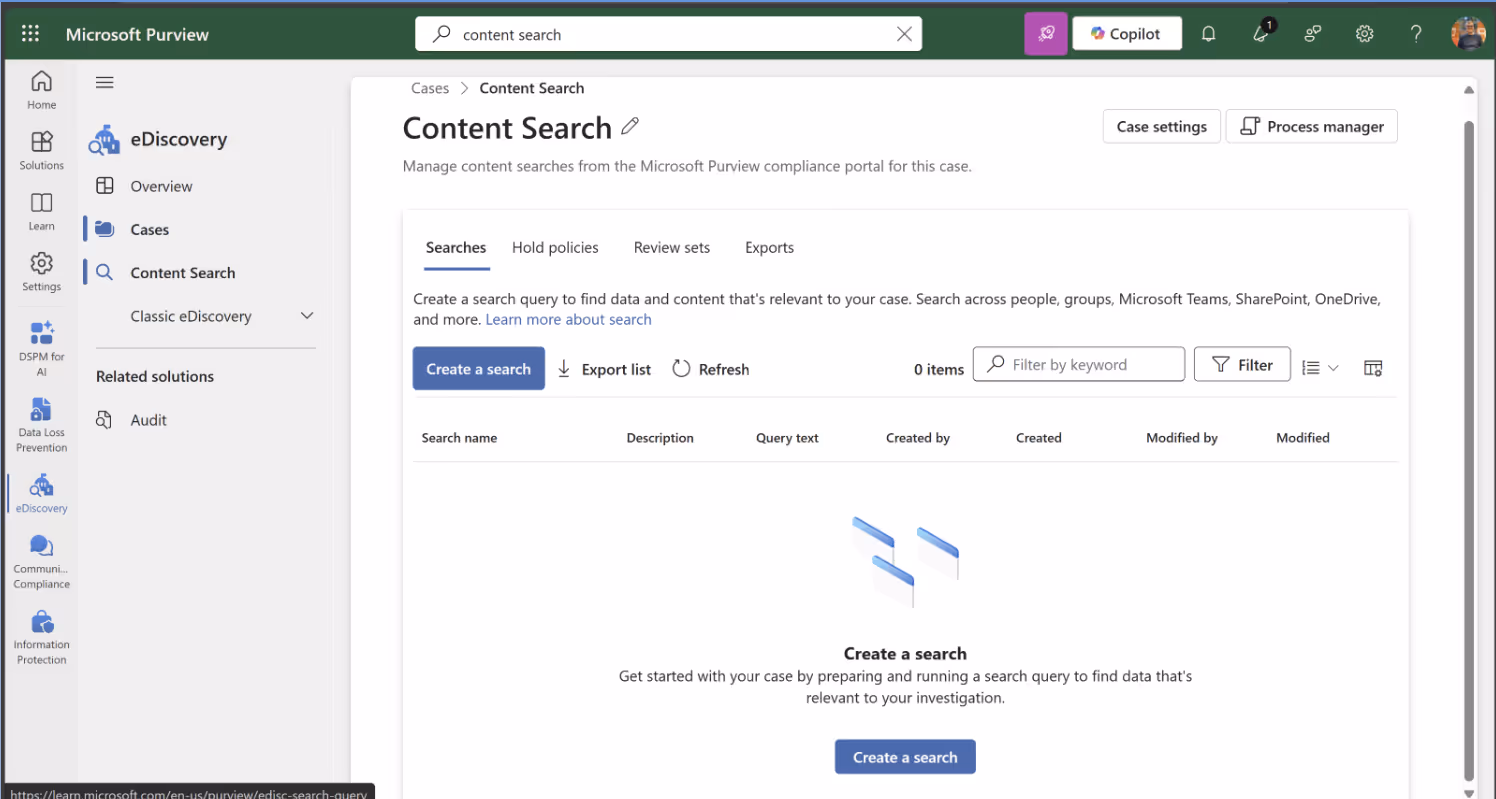
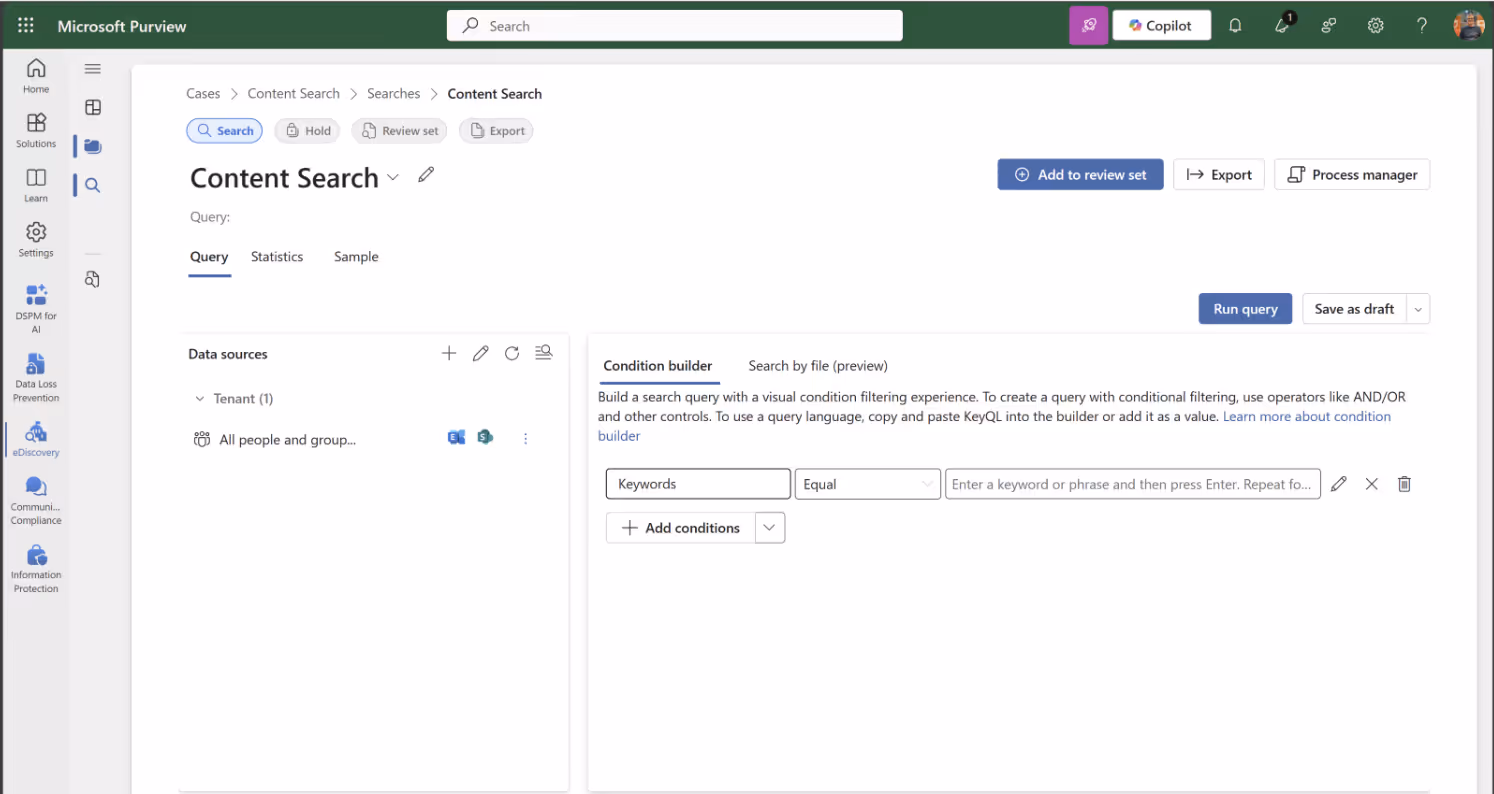
Then, configure your search query:
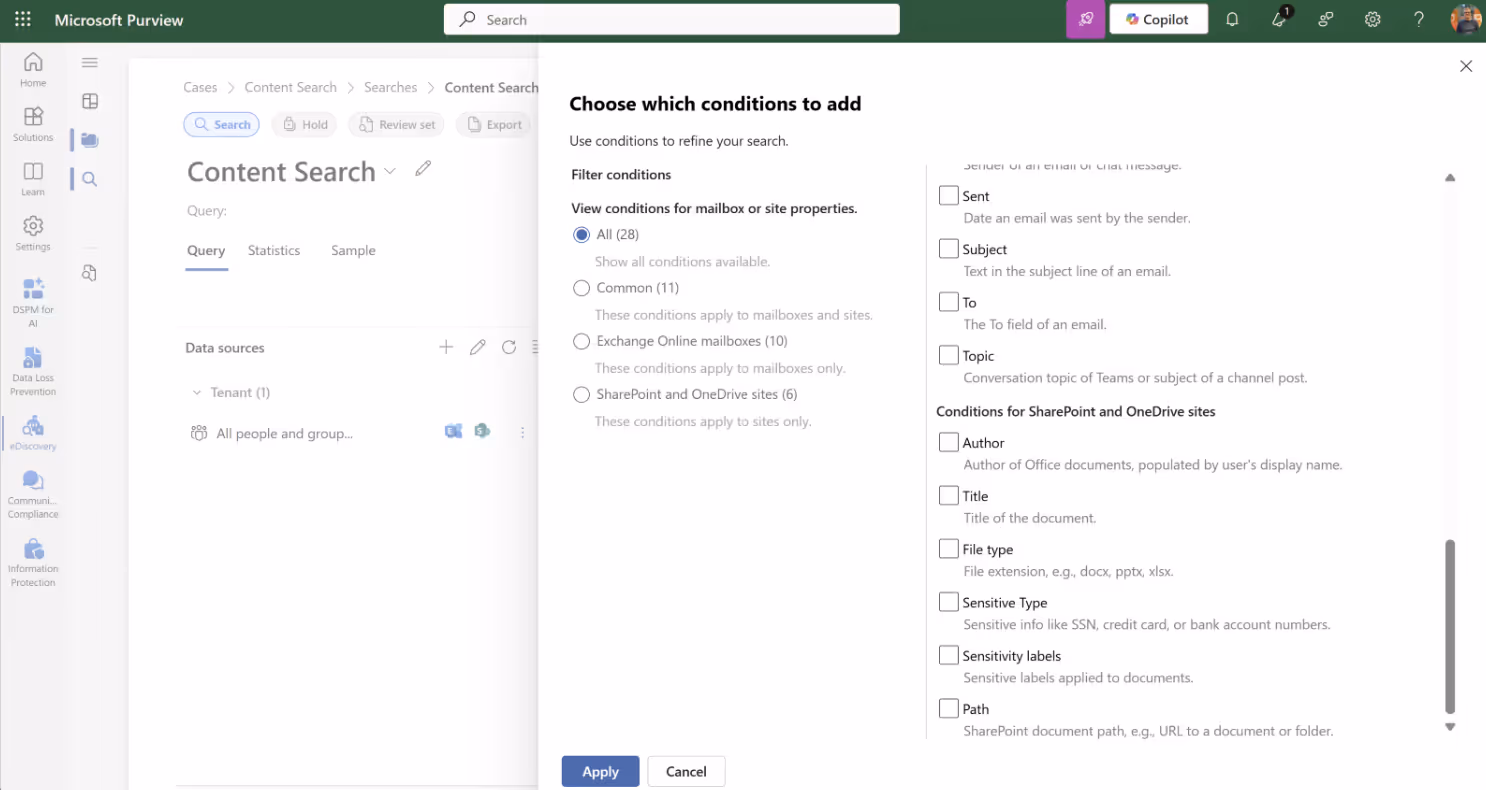
Select conditions for your query:
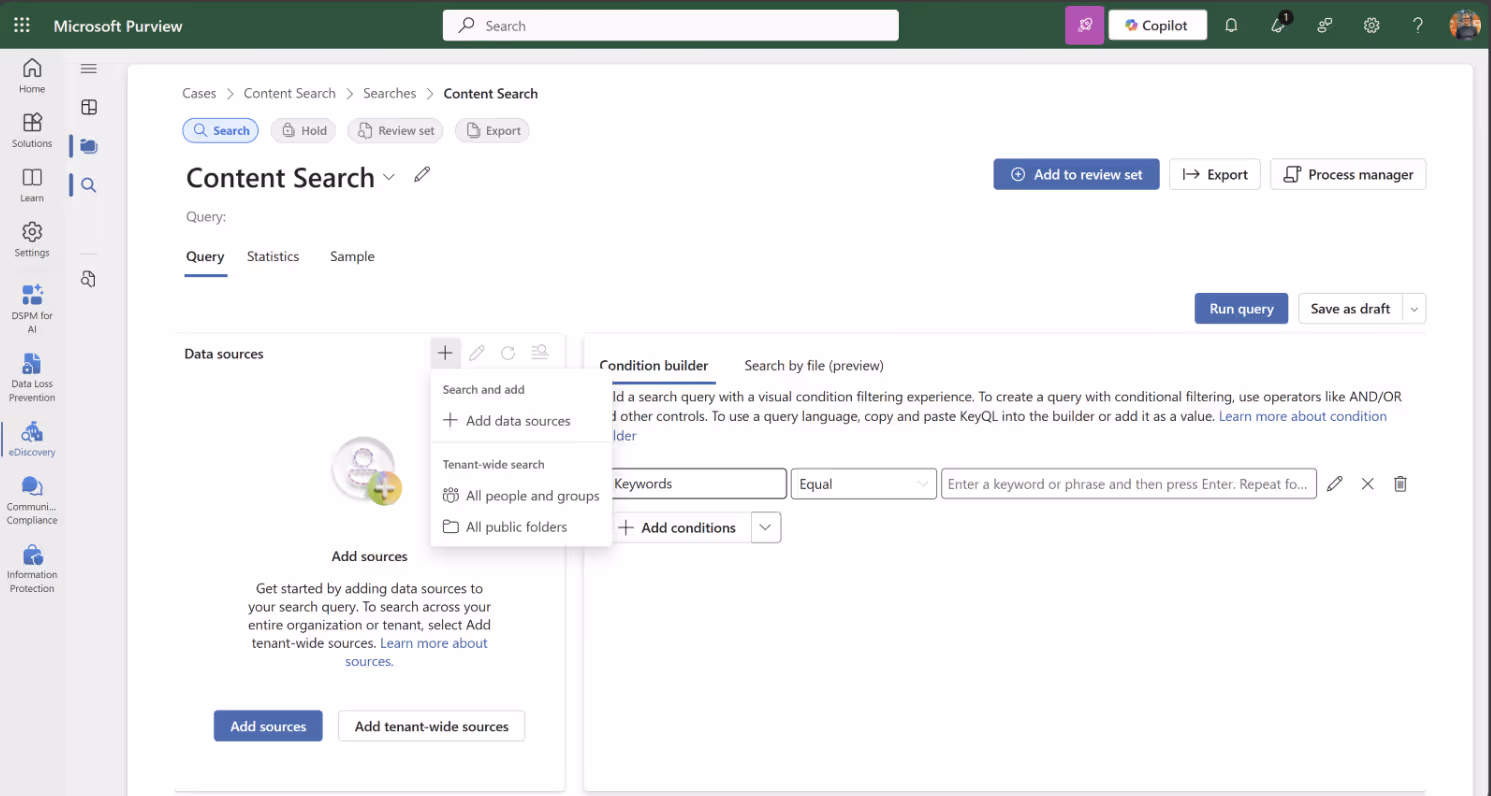
Then, select the source for your query:
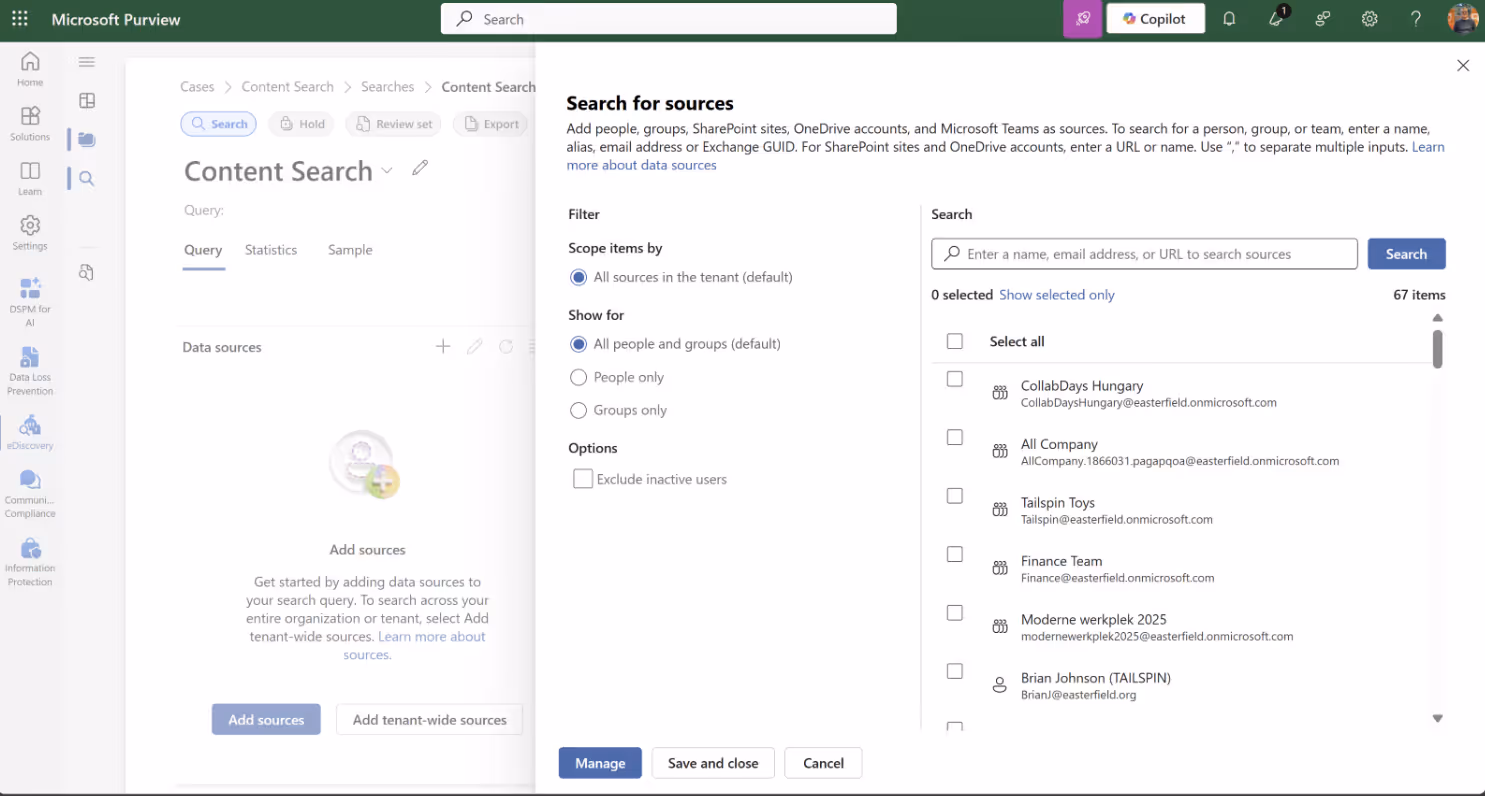
Define the specific locations for the query to search:
Create your own sensitive information type in Microsoft Purview
As mentioned before, Microsoft offers a plethora of SITs, but sometimes you may need to make your own. With Microsoft Purview, you can create a custom SIT. You have two options: create a new SIT based on a fingerprint, a copy of an existing SIT or a brand new one.
In this article, I'll create a new SIT for Project MRVN.
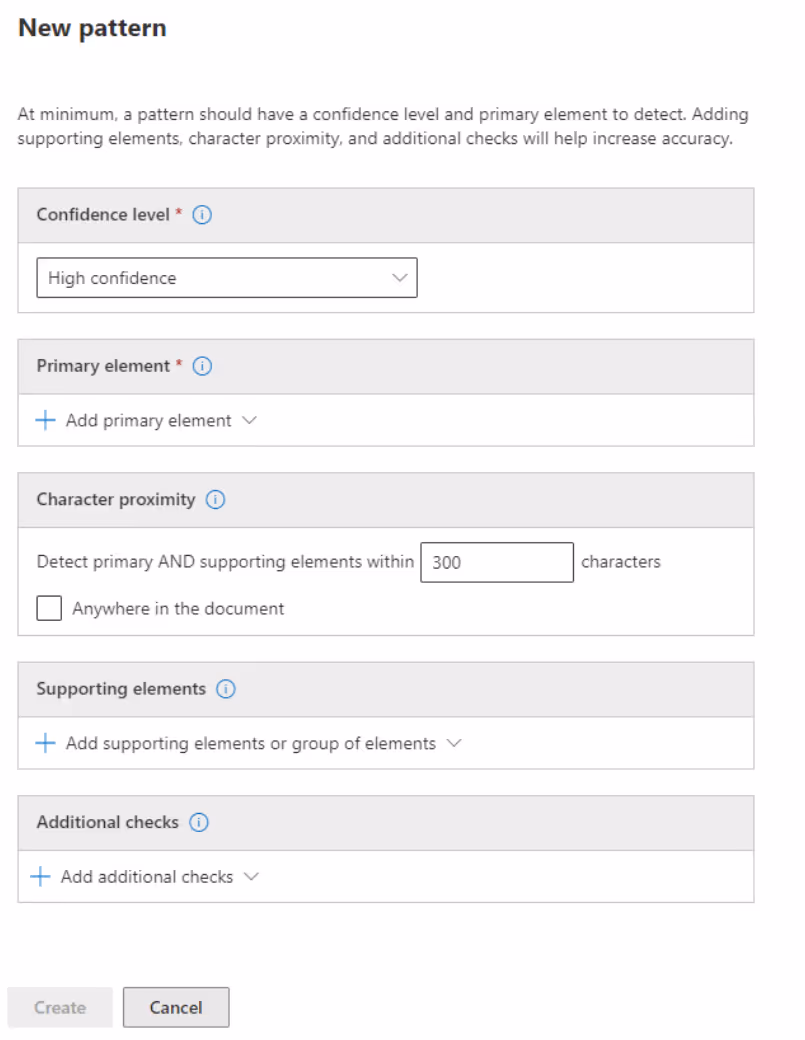
Every SIT revolves around patterns, which consist of these elements:
Understanding confidence levels is vital for the effectiveness of your custom Sensitive Information Types. Check out this Microsoft video.
Thanks to the primary element options you have, you can create complex SITs, especially when using regular expressions. Just to give you an example, one of my colleagues used this to create a custom SIT to find Dutch postcodes using the following:
(?:^|[\s,;\:\(\)\[\]"'])([1-9]\d{3} [A-Z]{2}|[1-9]\d{3}[A-Z]{2})(?:$|[\s,\;\:\(\)\[\]"']|\.\s|\.$)
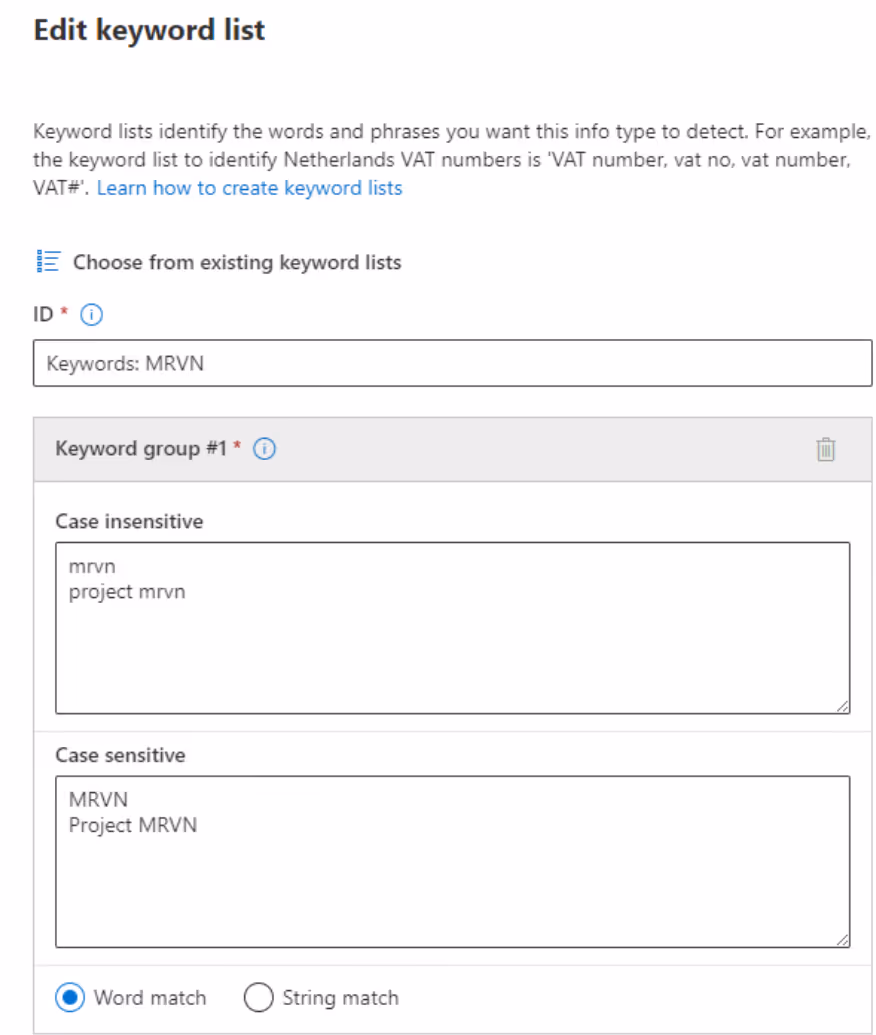
For the Project MRVN example, I'll keep it simple and make use of keywords:
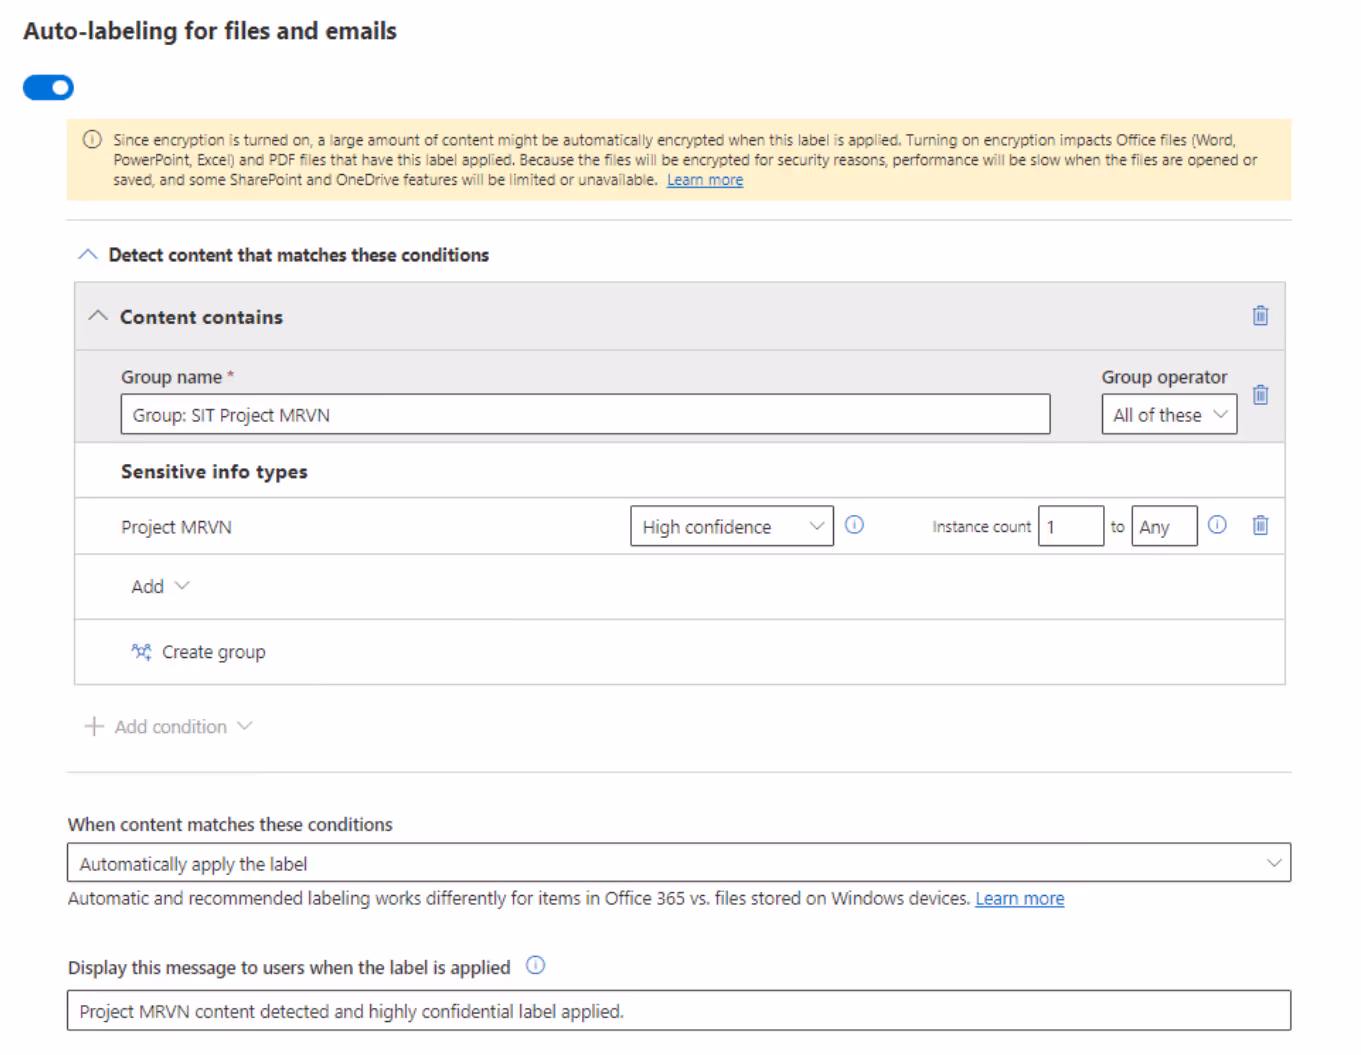
After submitting my new custom SIT, I use it within an auto-label policy for my Project MRVN sensitivity label.
I create a new Word document and use one of the keywords.
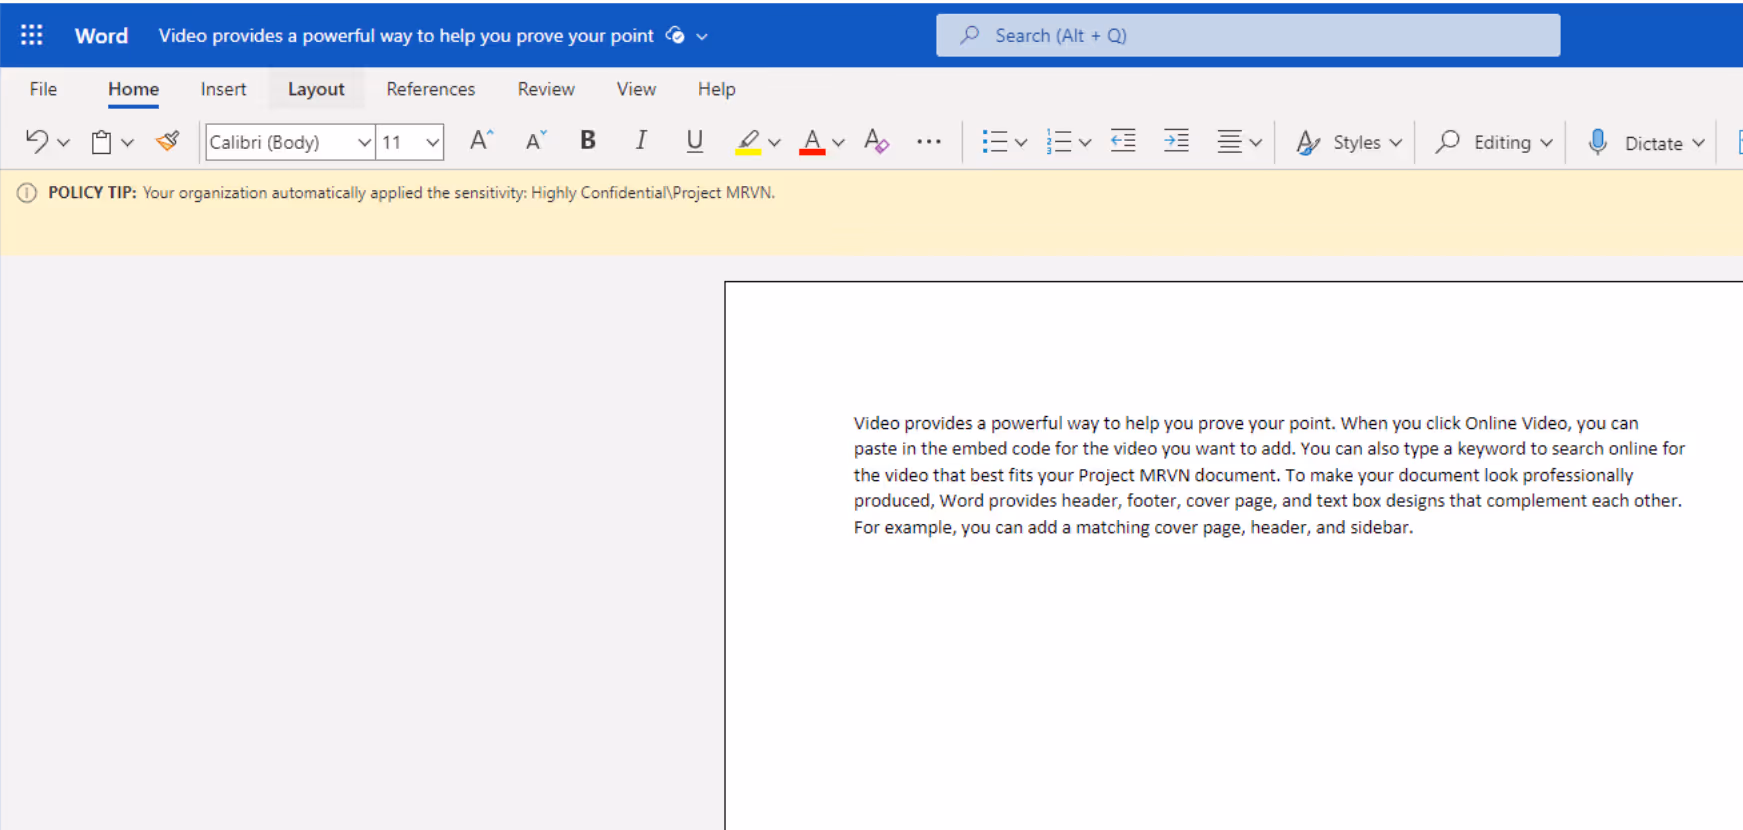
And there you have it! Thanks to the custom SIT, the sensitive information related to the project is now automatically protected.
Key insights and future developments
To circle back, the first steps to kickstart or enhance your journey with Microsoft Purview are:
- Define your sensitive information types
- Know the current limitations before implementing SITs
And one more tip: When it comes to managing sensitive information and SITs within the Microsoft Purview portal, it's important to consider roles and permissions. This is paramount for preventing unauthorized access to your sensitive data. Instead of relying solely on conventional administrator roles like Compliance Data Administrator or Compliance Administrator, I advise using role groups. This approach allows your organization to refine the permissions for specific features rather than applying them across multiple services.
Microsoft is actively working on introducing new features to assist in translating your sensitive information into SITs. These include Exact Data Match, Document Fingerprinting, Trainable Classifiers, and even Microsoft Syntex, which has a content compliance feature. The potential for AI advancements in this domain is incredibly promising, and the future looks bright!
If you’re looking to delve into Microsoft Purview solutions and tips for using them effectively, check out the other blogs in the series:
- How Microsoft Purview protects your sensitive data in Teams
- How Purview prevents accidental or unauthorized sharing of sensitive data in Teams
- Understand Microsoft Purview Data Lifecycle Management in Teams
- What is Microsoft Purview Compliance Manager?