.svg)

.avif)
Microsoft 365 governance made simple
Fix what matters, faster, without complex rules or tool switching!
Free trial%20(1).avif)
Master Hacks: Migrate like a pro
Check out our video series to help you turn migration projects into masterpieces!
Table of contents
Microsoft MVP and Data Security Consultant, Jasper Oosterveld, walks through Microsoft Purview Data Lifecycle Management and shares his tips for implementation success.
In previous articles, I discussed the importance of protecting your sensitive information with Microsoft Purview Information Protection and Data Loss Prevention.
But you also need to make sure your organization is following all those regulatory requirements.
In this article, I'll explain what Microsoft Purview Data Lifecycle Management is about. You'll learn how it can help you with archiving and getting rid of data when you need to. Plus, I'll share some handy tips to make sure you implement it effectively.
Let’s go!
What is Microsoft Purview Data Lifecycle Management?
Let’s take a step back for a moment.
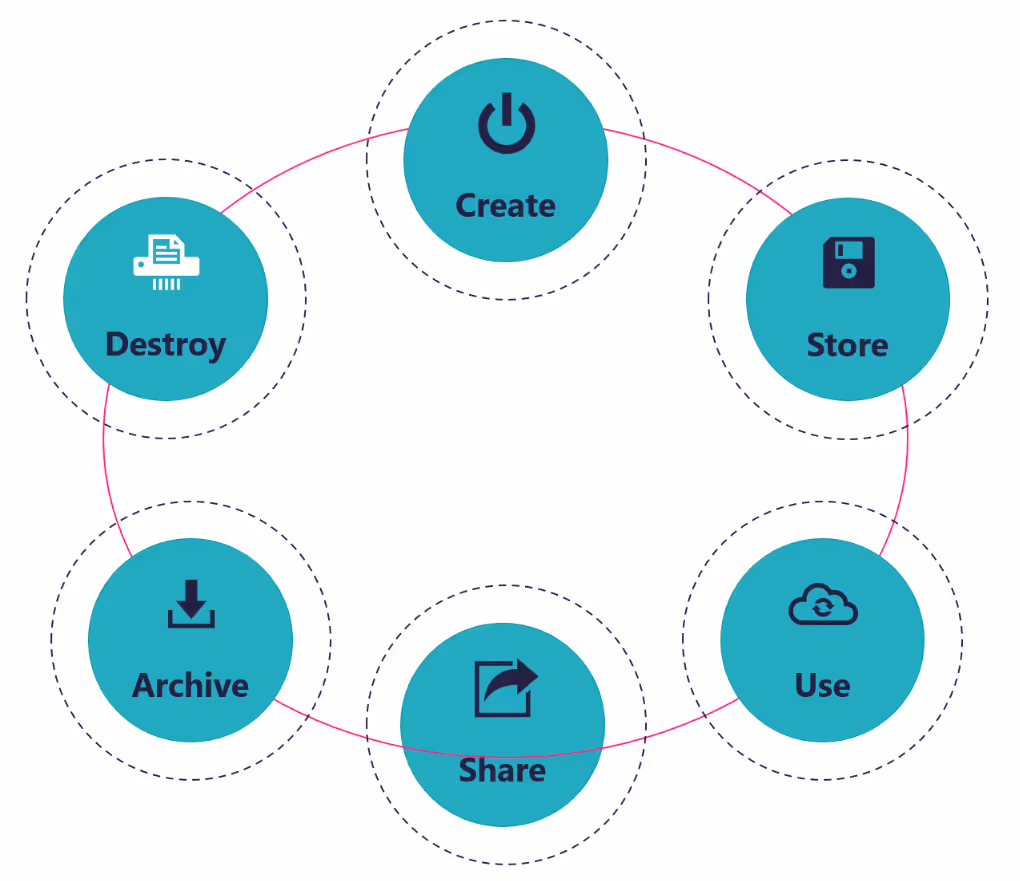
Data lifecycle management (DLM) is about handling data from the moment it’s created or acquired until it’s no longer needed. It involves storing, organizing, processing, and eventually deleting or archiving data to ensure its integrity and usefulness over time.
Microsoft Purview is a family of solutions that helps organizations with managing their data. One of its features is Data Lifecycle Management, which helps you keep your important data and eliminate unnecessary clutter. This not only improves security but also reduces compliance risks.
This diagram shows how data flows in your organization. Microsoft Purview Data Lifecycle Management helps with the final two steps: archiving and deleting.
Purview offers different tools to help you decide what to keep and delete. Let's check out the options:
- Retention policies: Assign an adaptive or static policy to one or more Microsoft 365 services. For example, Teams chats and channel messages.
- Retention labels: Create labels, comparable to sensitivity labels, with corresponding retention settings. For example, automatically delete items after 7 years.
- Label policies: Publish your retention labels to one or more Microsoft 365 services. This includes the option to auto-apply, comparable to sensitivity labels, the retention labels.
- Records management: Declare items as records to enable additional restrictions for your records.
Retention policies
Retention policies are applied on a container level. For example, teams in Microsoft Teams or SharePoint sites.
In a Microsoft 365 environment, imagine you have teams with content that need to be deleted within a specific timeframe. By creating and defining a retention policy, you automatically assign this policy to all corresponding sites. But how can you identify the sites related to teams? How can you prevent applying a retention policy to unrelated teams?
One way is to create an adaptive scope specifically for the SharePoint sites associated with the teams that require the policy. This helps identify the appropriate sites and prevents the retention policy from being mistakenly applied to unrelated teams.
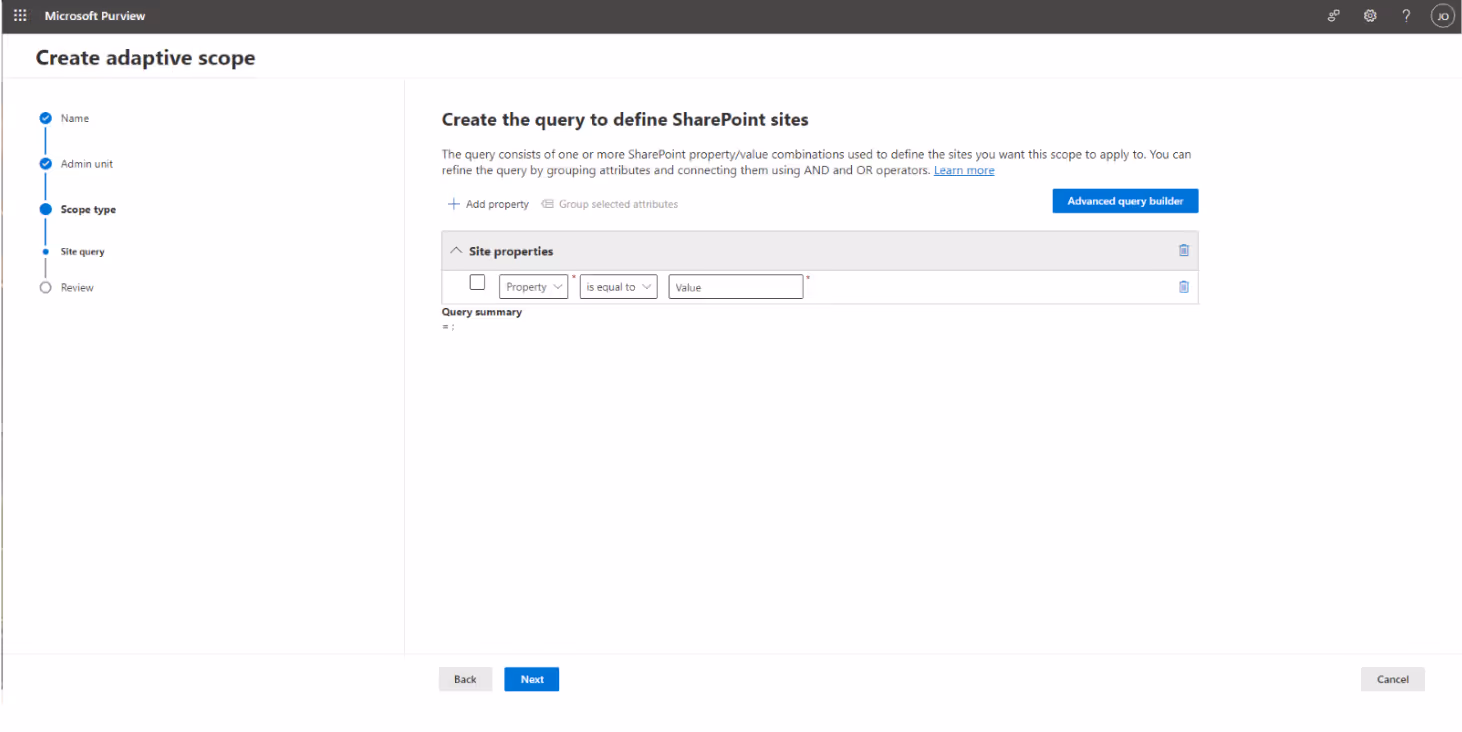
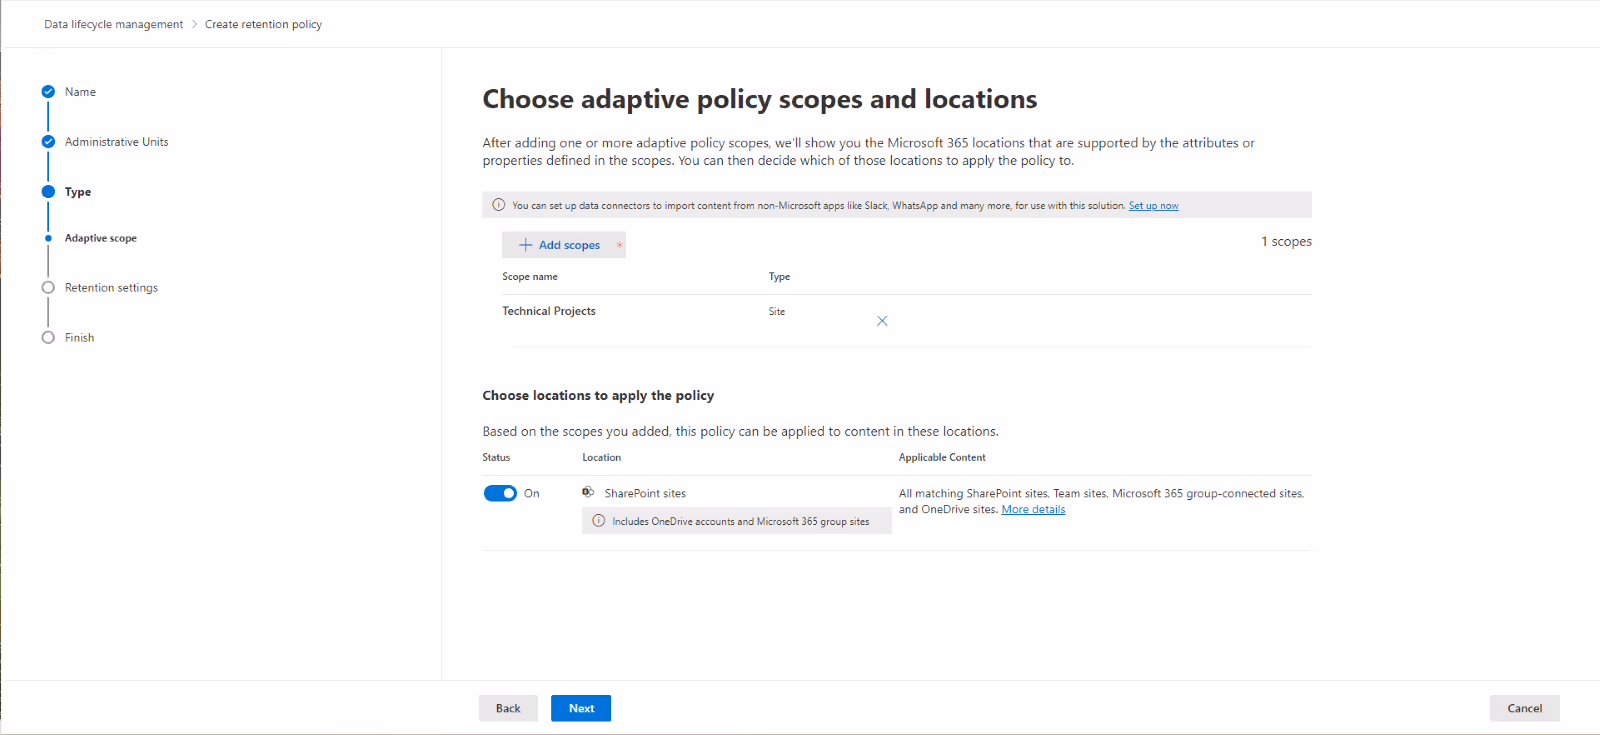
Using site properties automatically assigns the retention policy to the correct sites. You apply the adaptive scope during the configuration of the retention policy.
There is currently no adaptive scope for Teams channel messages available. Therefore, you have two options:
- keep all messages, or
- manually add the teams to the retention policy
I recommend the second option, where you manually add the teams to the policy.
TIP: Once messages are deleted by a retention policy, they cannot be recovered.
Retention labels and label policies
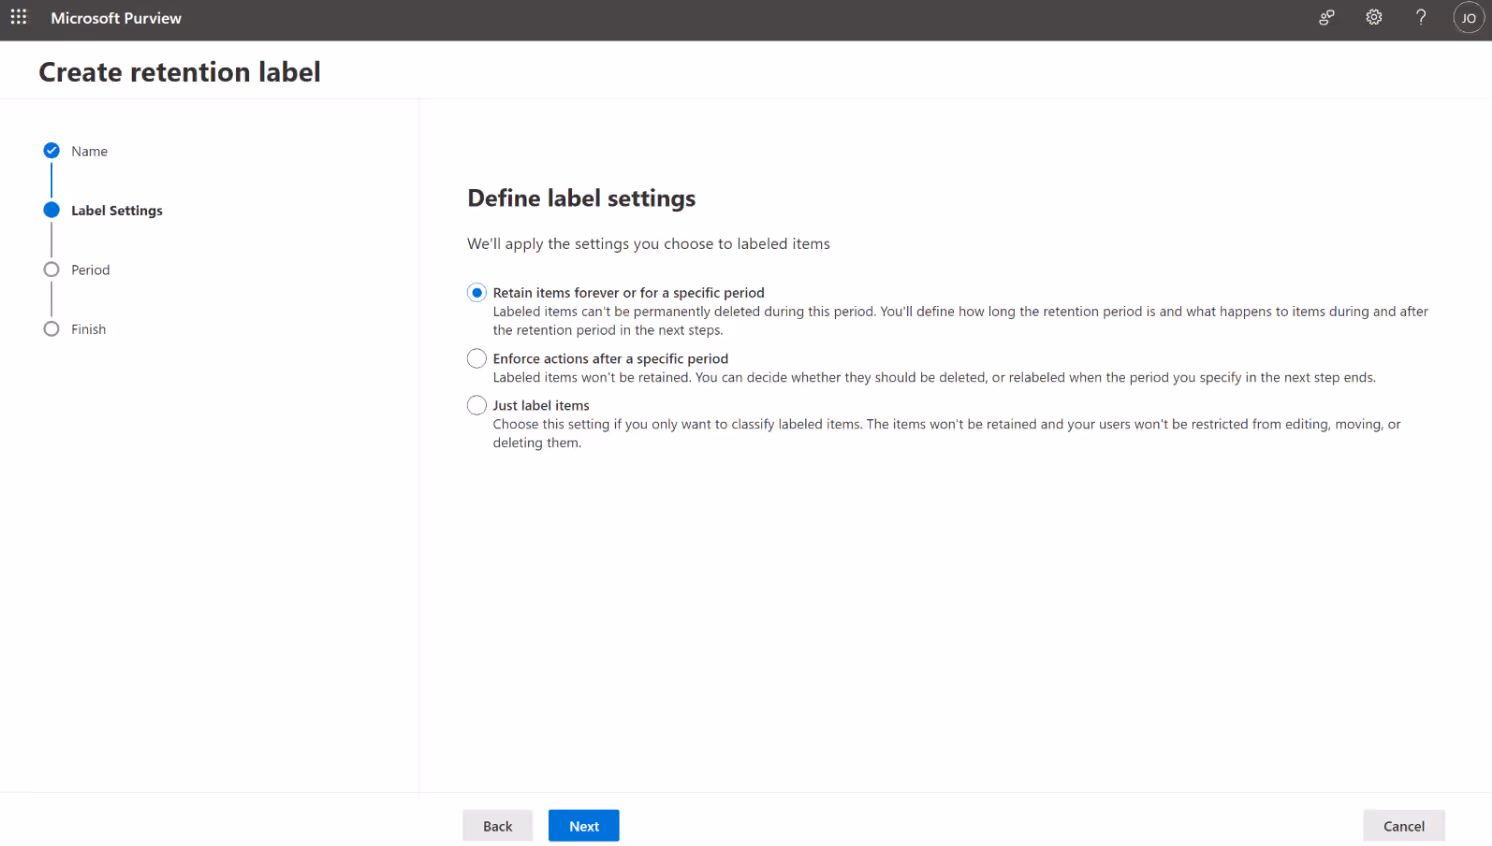
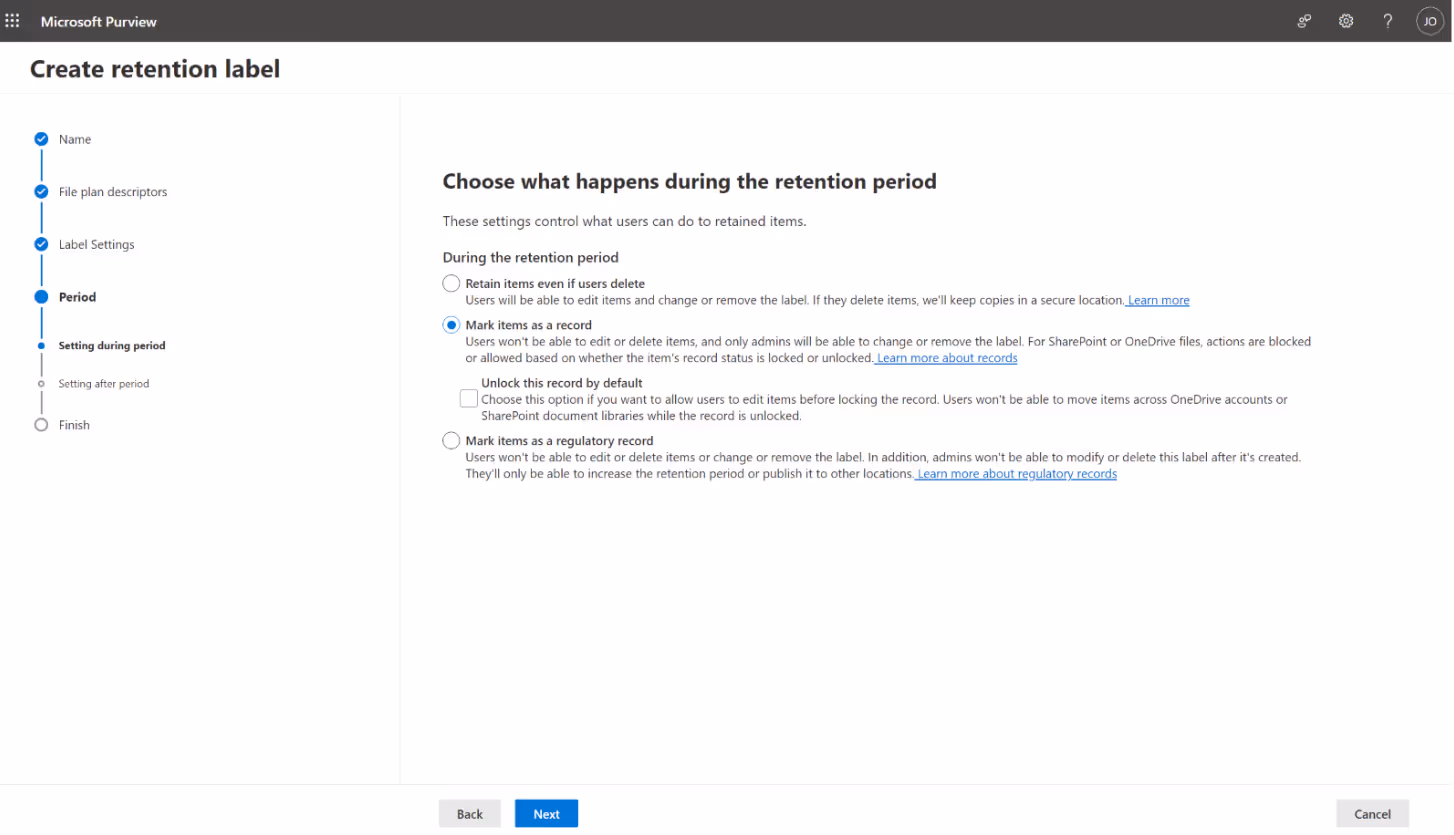
A retention label is used on an item level, like Office documents or PDFs stored in Microsoft Teams teams. When creating a retention label, you’ll be prompted to choose from three options:
- Retain items forever or for a specific period
- Enforce actions after a specific period
- Just label items
You can start the retention period when a label is assigned and after an event, like the completion of a project.
For employees, the process is like sensitivity labels. Once you publish your retention labels, employees manually assign the label to relevant content. However, this only works if employees are familiar with the document retention guidelines, which is often not the case.
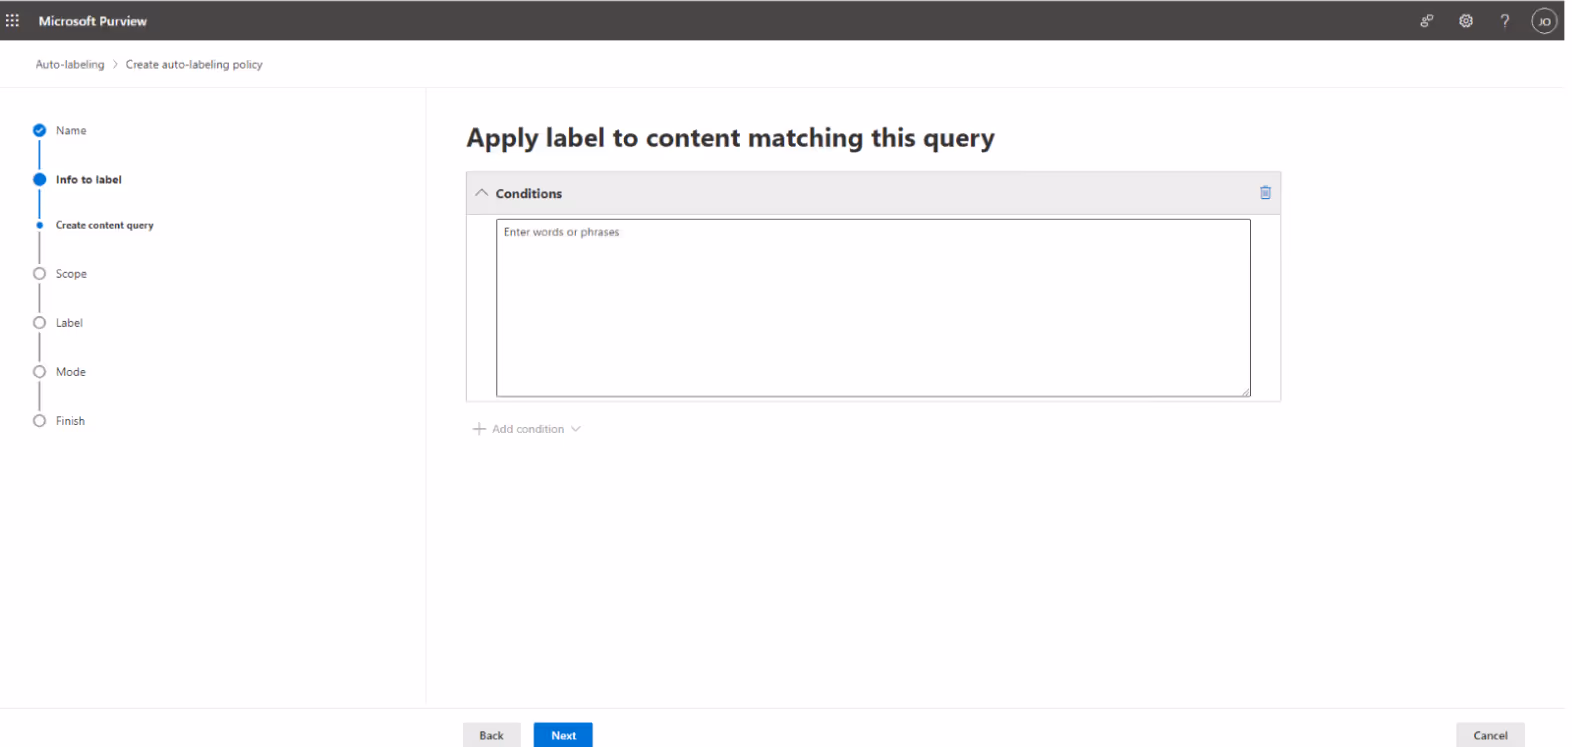
Auto-labeling comes in handy here. Let's say you want to automatically apply a retention label to sensitive project content related to the GDPR policy in the EU. I start with the retention label.
When the label is created, I connect the GDPR policy.
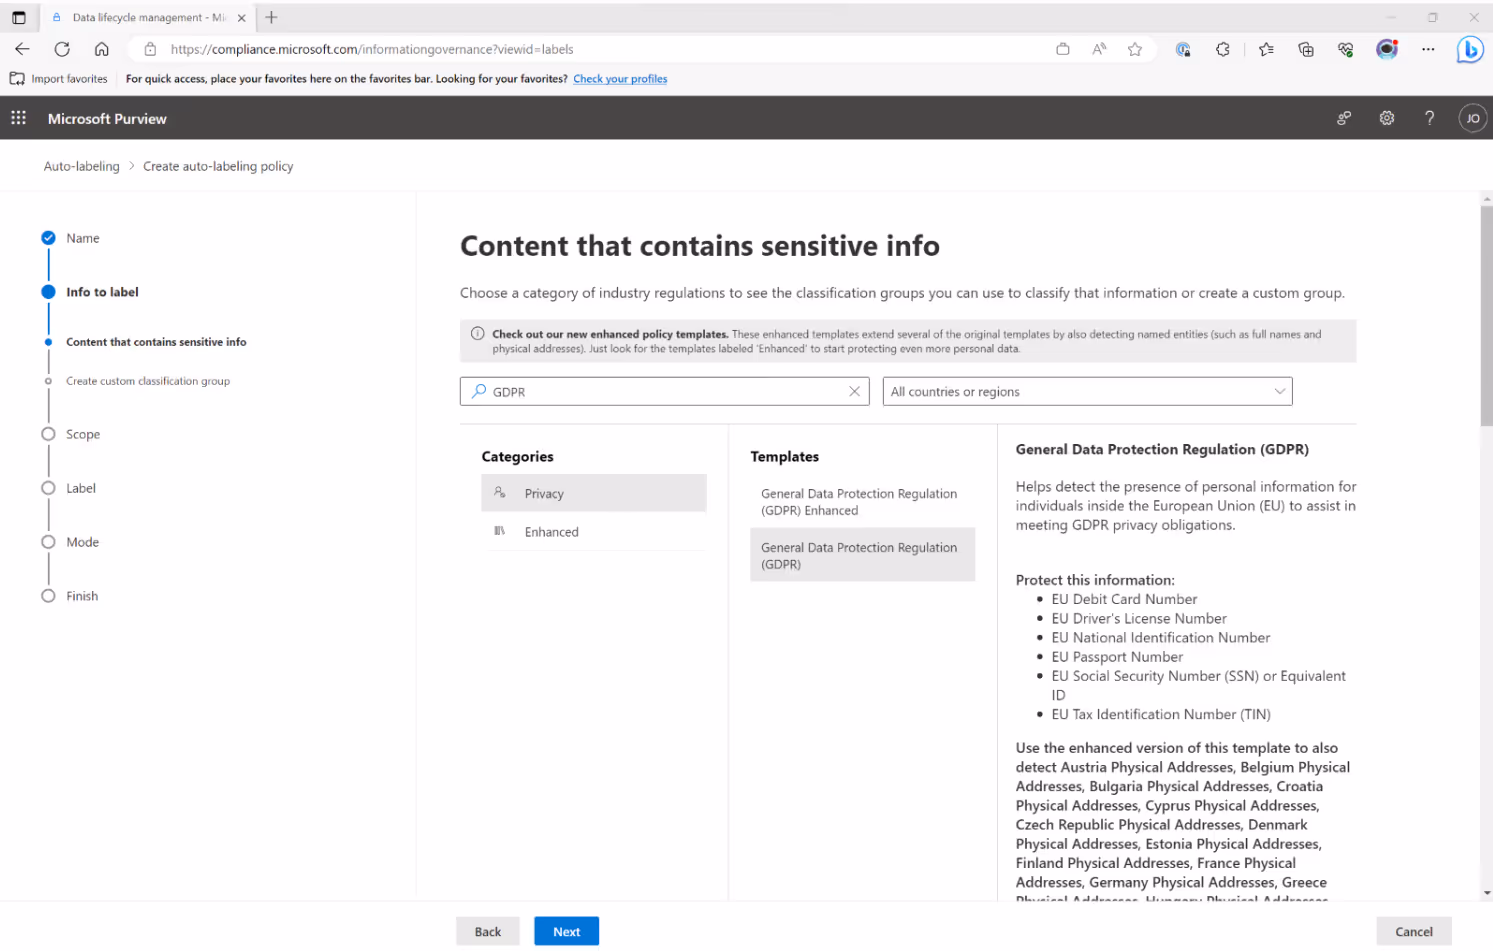
TIP: The options for configuring your auto-labeling policy vary depending on the configuration of the retention label you want to publish.
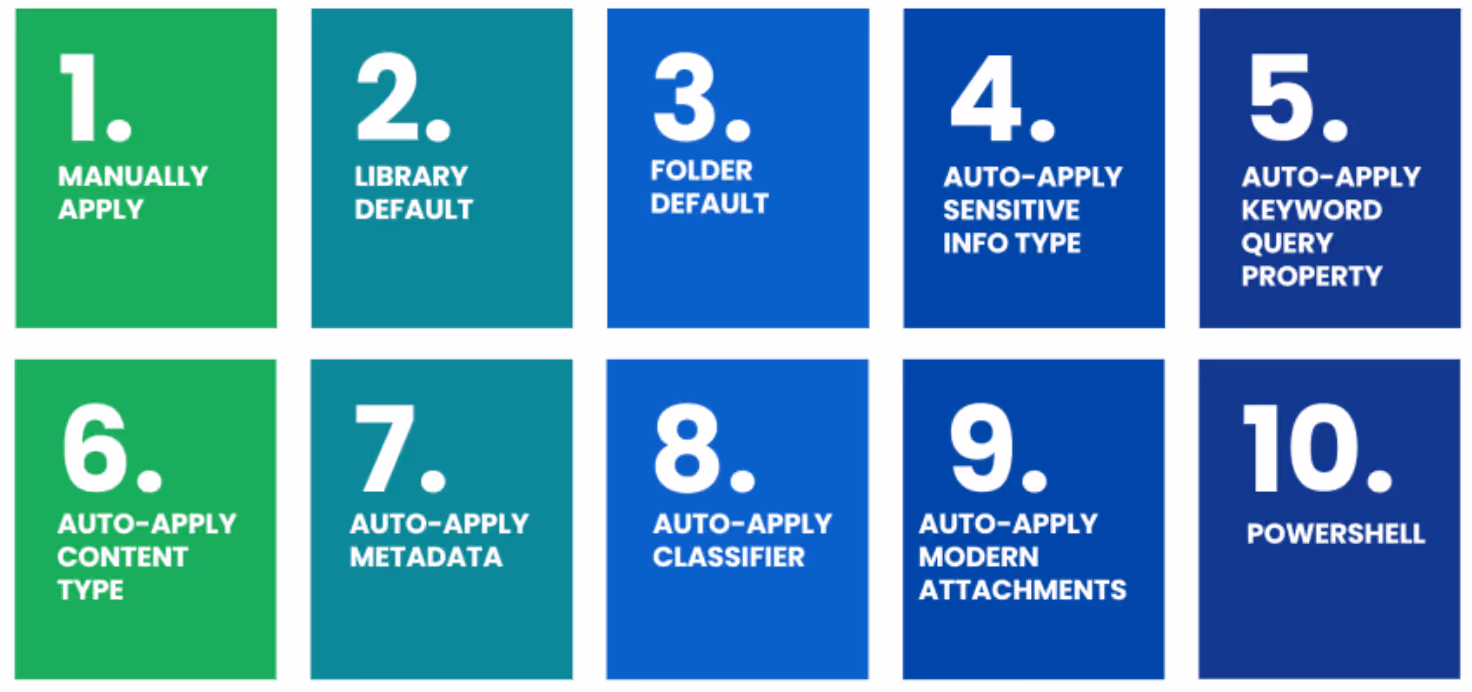
While Microsoft Purview Information Protection and Data Loss Prevention are pretty straightforward, Microsoft Data Lifecycle Management tends to get more intricate. There are many ways to apply a retention label, and Microsoft MVP Joanne C. Klein has expertly outlined 10 distinct methods for doing so.
Records management
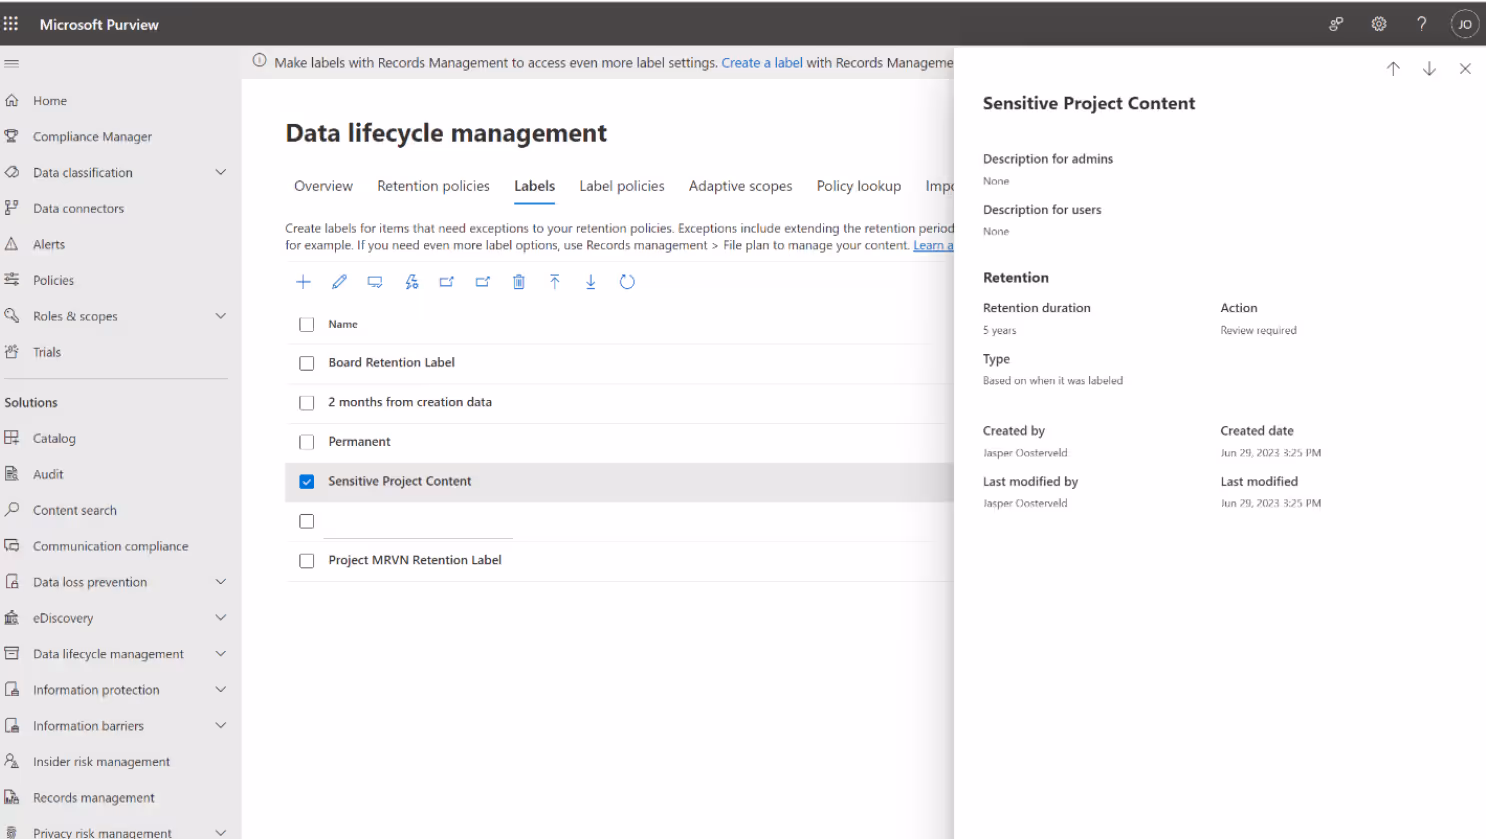
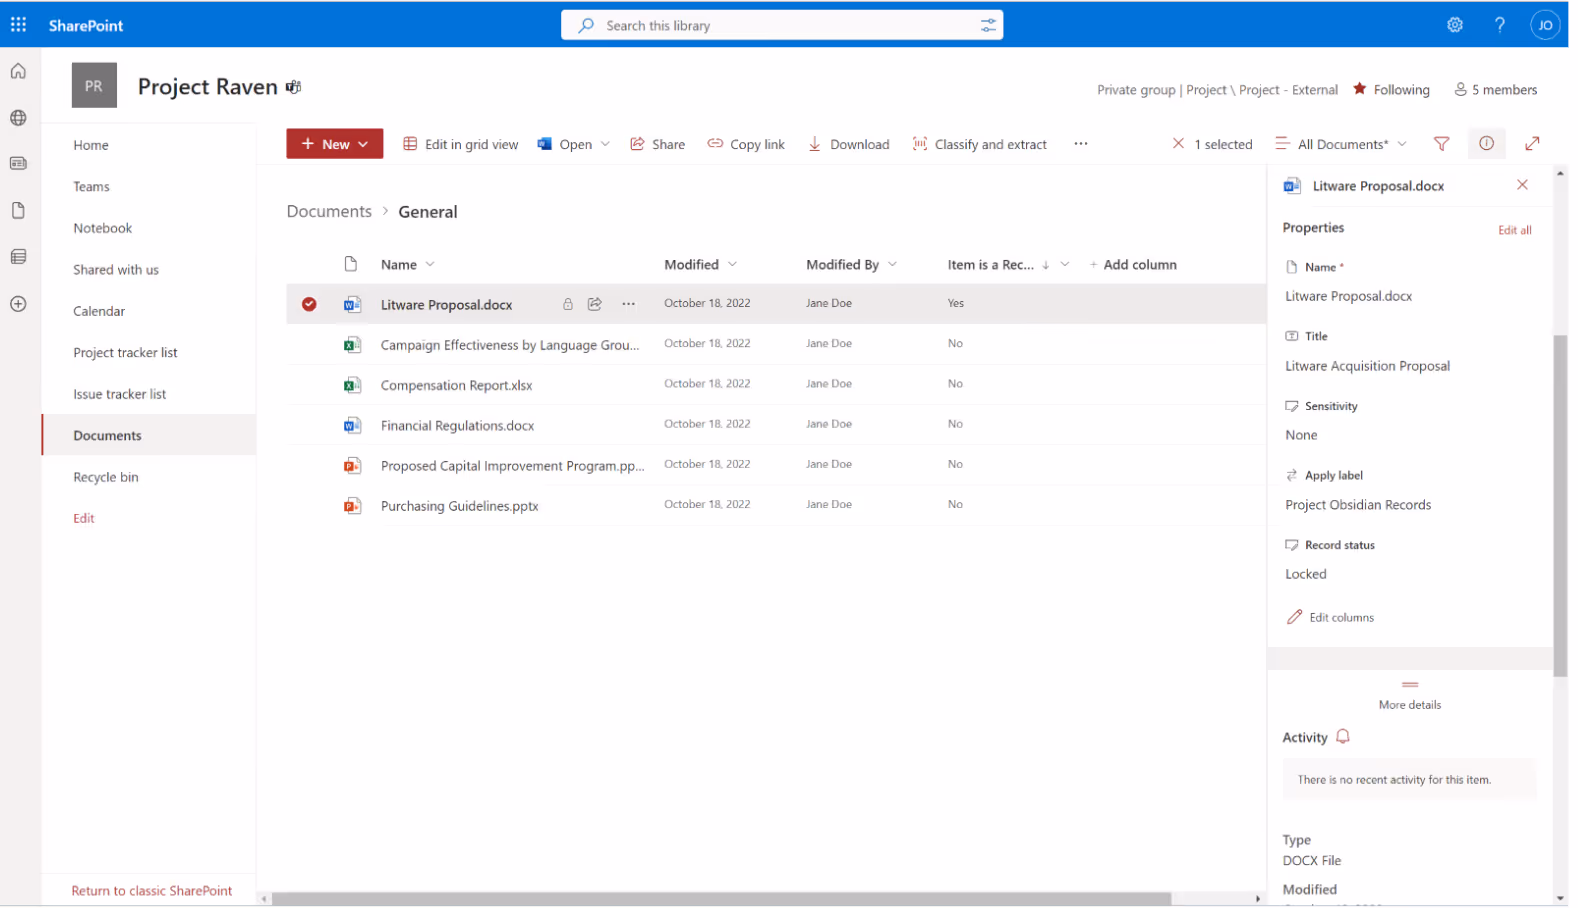
Microsoft Purview Records Management combines retention policies, labels, and extra features. One interesting feature is the ability to mark items as records in Microsoft Teams, which adds stricter data restrictions. To use this feature, go to the Record Management menu in the Purview Administration Center and create a retention label. Then, select the record option.
After assigning the label, a lock icon becomes visible, and the detail pane shows the record status. In our scenario, the record status is currently displayed as locked.
Common scenarios
Here are a few common scenarios where Microsoft Purview Data Lifecycle Management can come in handy:
- Keep your Teams communications tidy and clutter-free. With Purview DLM, you can set up a retention policy to delete any Teams communications older than 7 days.
- Let’s say you have a SharePoint document library with a retention policy in place. Before the documents are permanently deleted due to the expiration of the retention policy, Purview DLM allows you to review the contents of the library. This way, you can ensure that no important documents are accidentally deleted and take any necessary actions to preserve them.
- If you have certain types of content that need to be retained for a specific period, you can implement a retention policy. For example, you can set up a 5-year retention policy for automatically labeled content. This means that any content with the specified label will be kept for five years and then automatically deleted when the retention period ends.
Ensure your organization has the proper licensing for Microsoft Purview DLM
To tap into the full power of Microsoft Purview DLM, there's one thing you shouldn't overlook: ensuring that your business users have the appropriate licenses. Now I won’t sugarcoat it—the licensing structure can be a little tricky to navigate. But here's an important tip: Auto-applying labels is exclusively available for E5, A5, and G5 licenses. If you're looking for more detailed information, check out the official Microsoft documentation on the topic.
Microsoft Purview administration center
Purview DLM offers unified data lifecycle management from the Microsoft 365 Purview admin center. It's where you can create, manage, and monitor your Purview DLM solution.
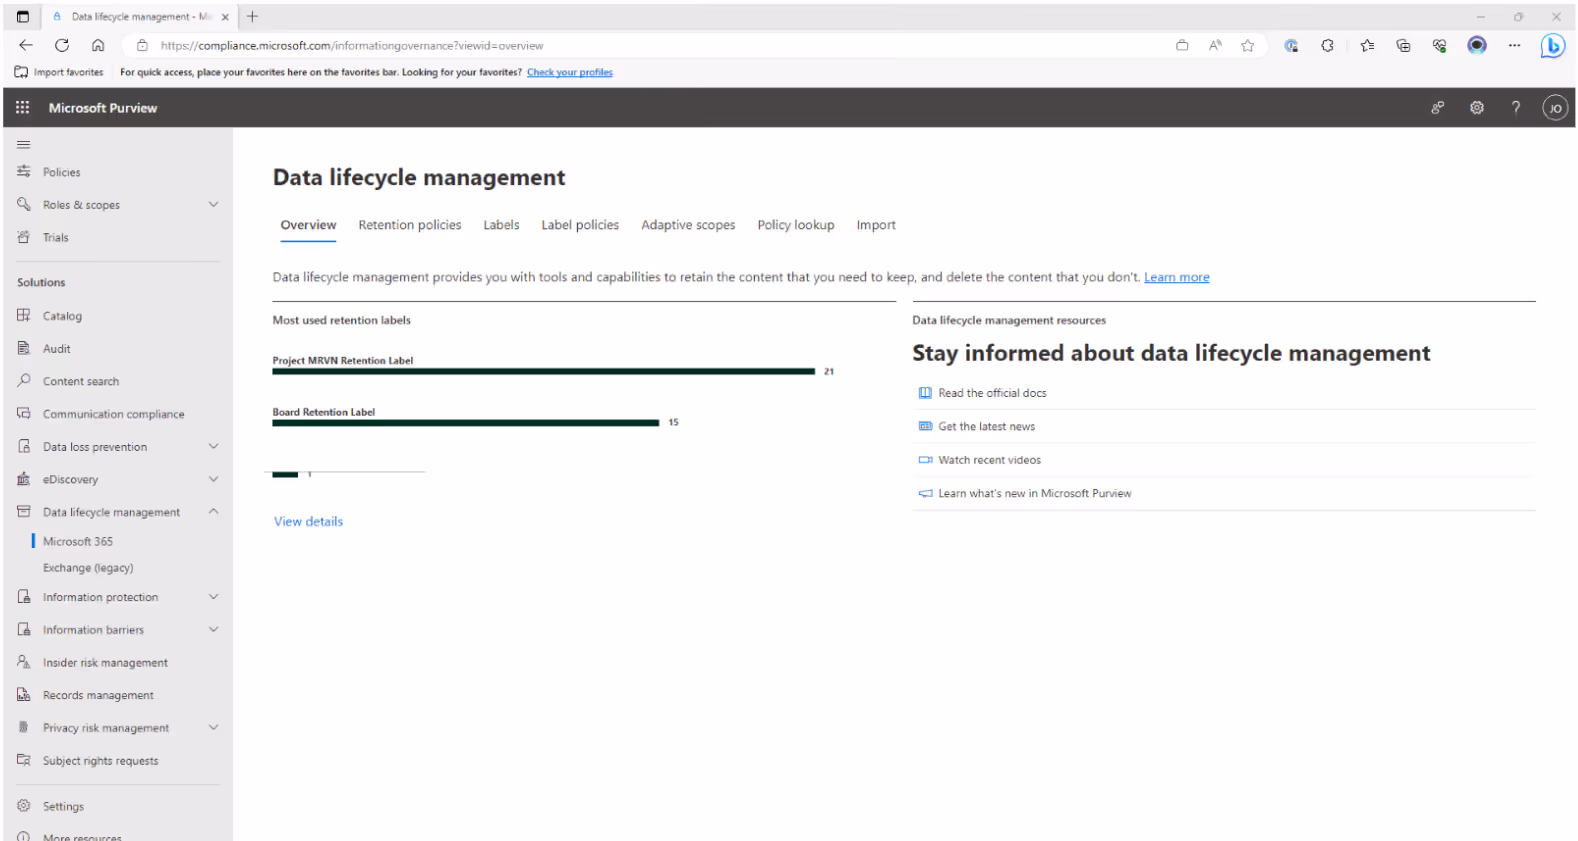
Before you dive into setting things up, take a moment to consider how long you need to keep different types of information based on your organization’s requirements. This can vary depending on the nature of your organization, like if you're a local government or in the legal field. Just make sure you define the retention period in line with the laws and regulations of your country and organization type.
How Microsoft Purview Data Lifecycle Management and Microsoft Purview Information Protection can work together
In the last article, I talked about how Microsoft Purview Information Protection and Data Loss Prevention complement each other.
You might be wondering if Microsoft Purview Data Lifecycle Management has any connections to them.
Well, let's dive into a scenario.
Contoso is working on a project called Project MVRN. They've created a sensitivity label called Project MVRN, which automatically gets assigned to related content. All content with this label needs to be kept for 5 years. To assign the retention label automatically, I use a PowerShell Cmdlet to find the label's ID.
Connect-IPPSSession
Get-label | Format-Table - Property Name, ImmutableId, Disabled
I can use the following option within the auto-label configuration to assign the ID.
How end users experience Microsoft Purview DLM
Users might have questions like why it's important, how it affects their work, where to find more information, and what's expected of them. Purview DLM helps organizations manage data better, ensuring it's safe and useful. For users, it means finding data easily, controlling access, and understanding where data comes from.
Let's see how the tool works for two things:
Assigning a retention label
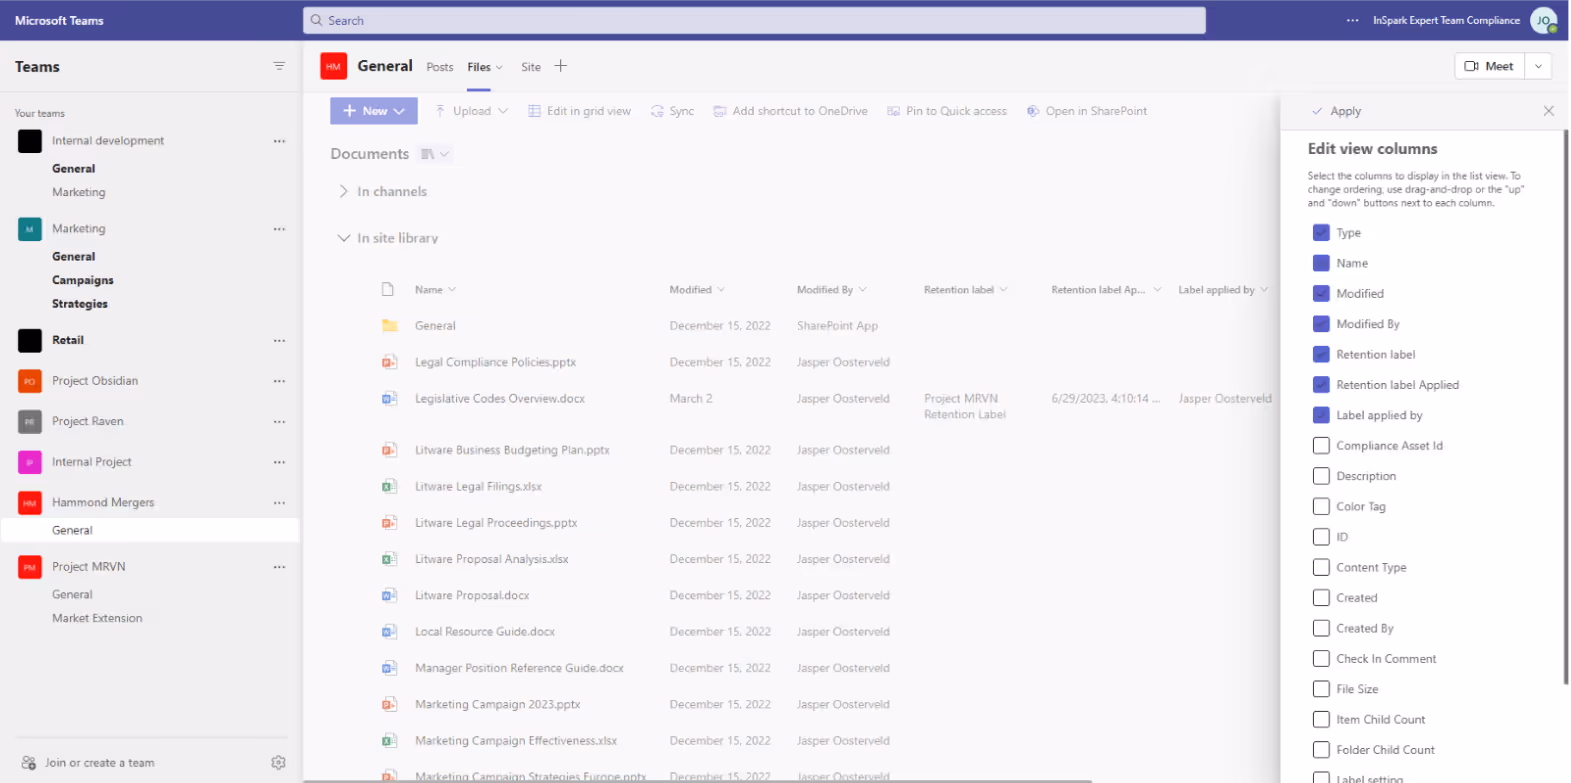
Earlier, I talked about how your employees can assign retention labels manually—they just select a file and choose the retention label from the detail panel.
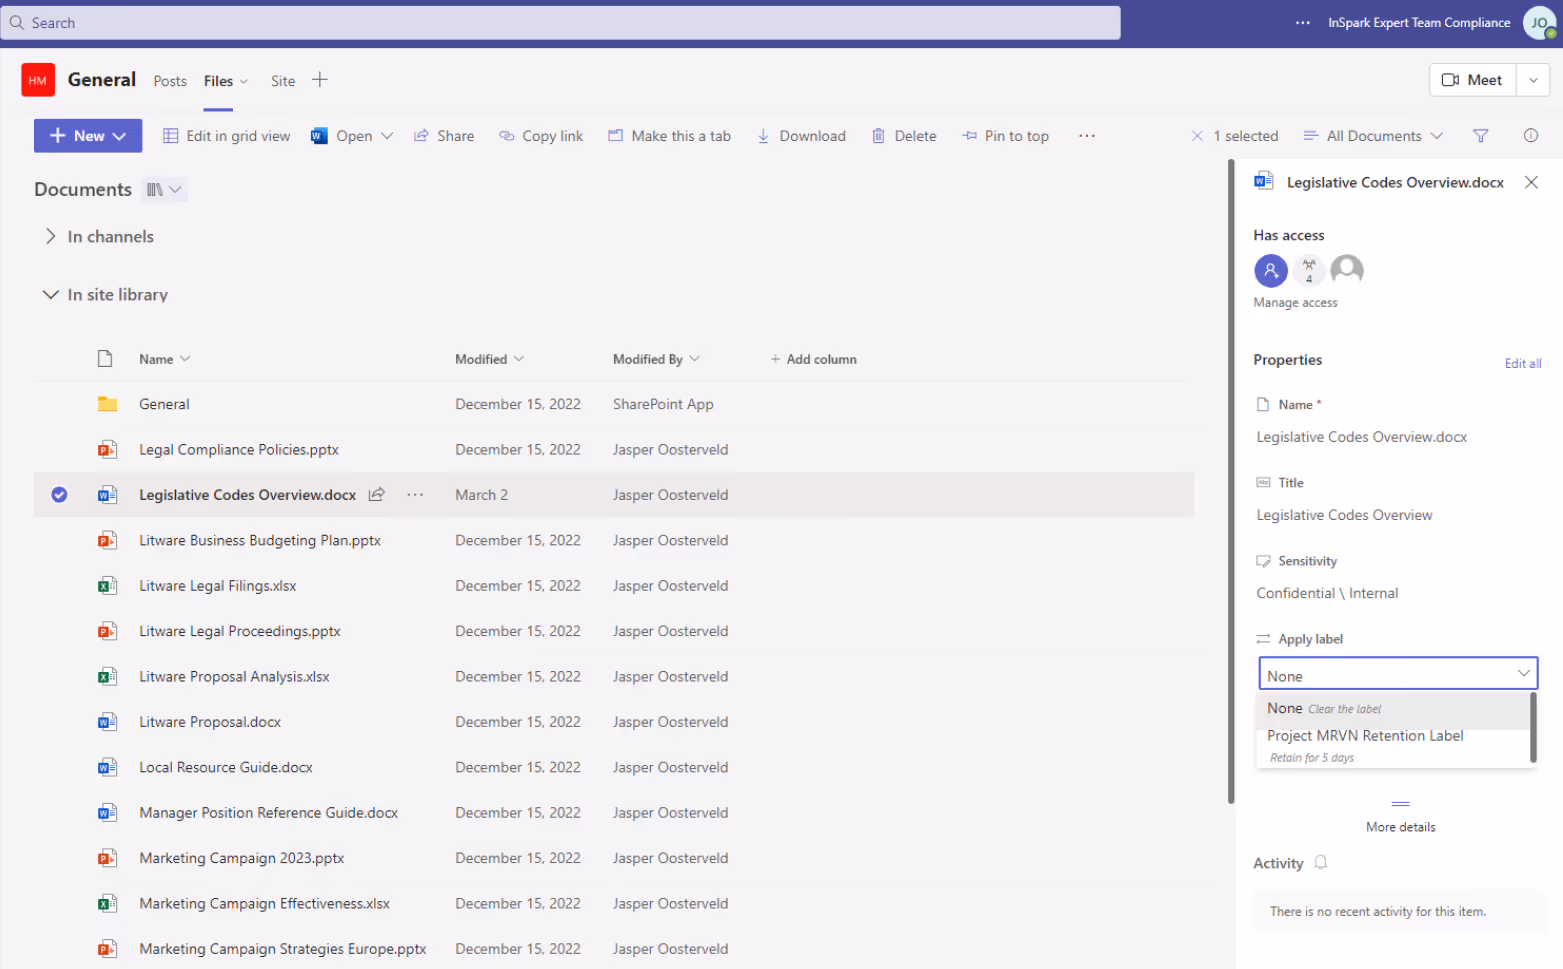
To increase the adoption of your DLM implementation, I suggest adding three retention columns to the view of your SharePoint document library.
Approving the deletion of content
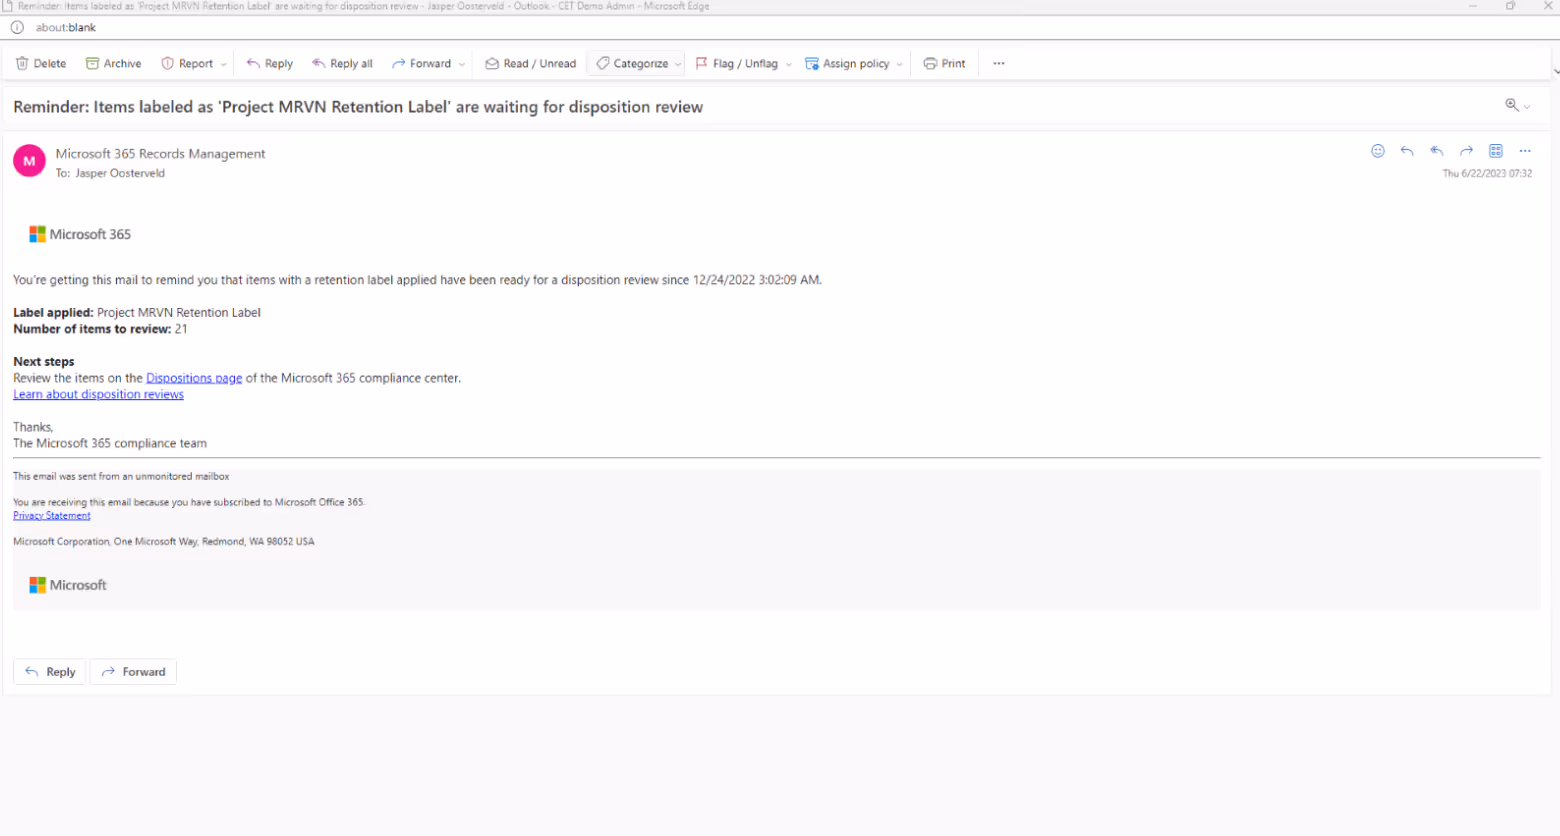
Before you remove content with the help of a retention label and policy, I recommend implementing a disposition review. The reviewer receives an e-mail requesting to review items up for deletion.
After clicking the review link, you can see the pending dispositions.
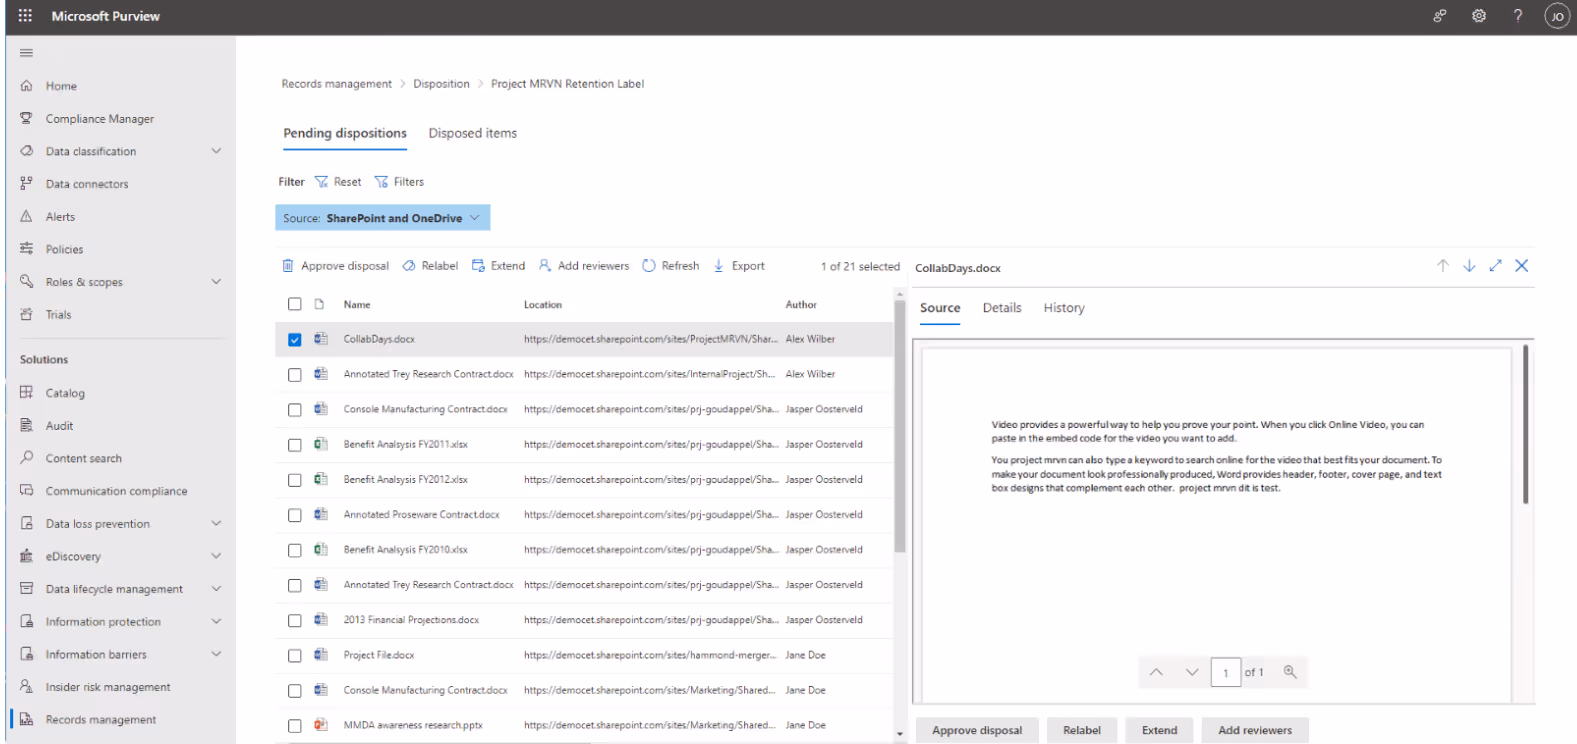
The reviewer can see the content and decide on the next steps:
- Approve disposal and permanently delete the content from your Microsoft 365 environment.
- Attach a different retention label.
- Extend the review timeframe.
- Include additional reviewers to determine to improve and finalize the disposal process.
TIP: Employees need permissions to perform the review.
Tips and advice
I want to emphasize this: don't jump into a companywide implementation right away. Dealing with DLM can be tricky, with many factors and dependencies to consider. It's important to take your time and really understand how the DLM process works in your organization. Once you've got a good grasp on it, then you can start exploring the tools provided by Microsoft Purview.
But my suggestion is to start small, like with a pilot project or a limited scope. Test things out, see how it goes, review the results, and make any necessary tweaks. From there, you can gradually build and expand upon your successes. Remember, it's a process, so take it step by step.
Also, one of the biggest challenges you may face is the timeframe for retention labels to become available. It can take up to 7 days, which can be quite a wait.
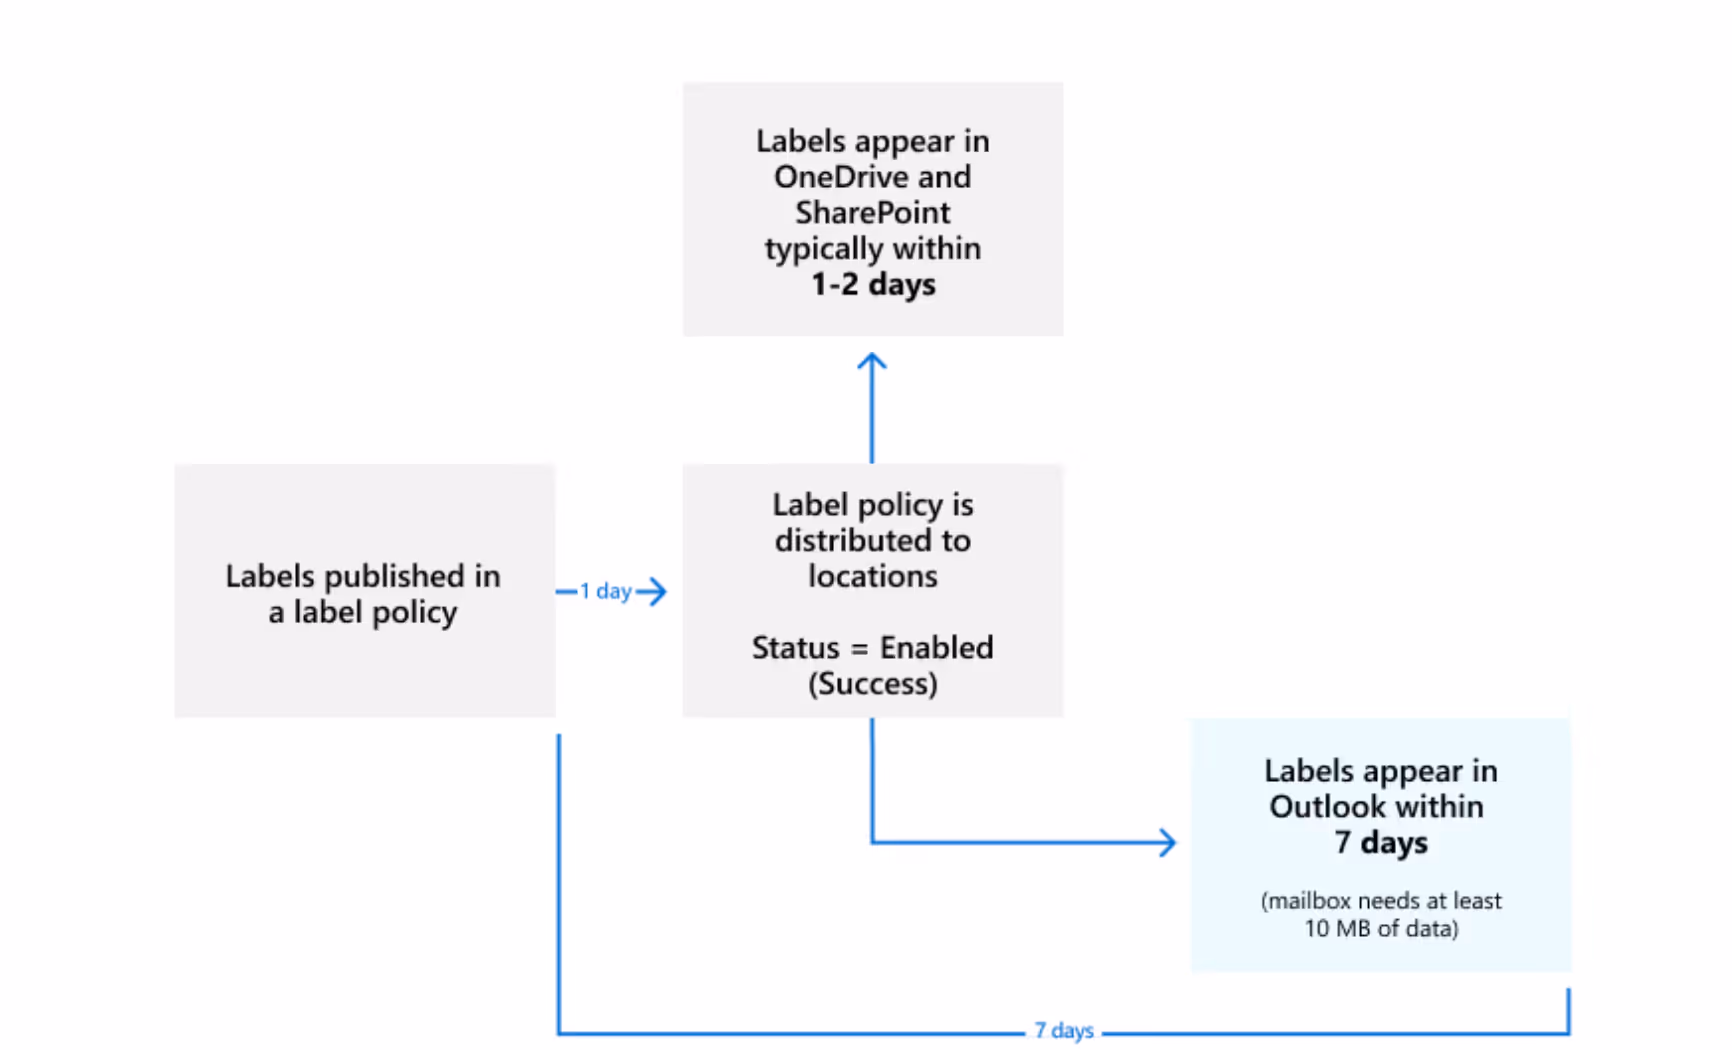
The same timeframe applies to retention policies.
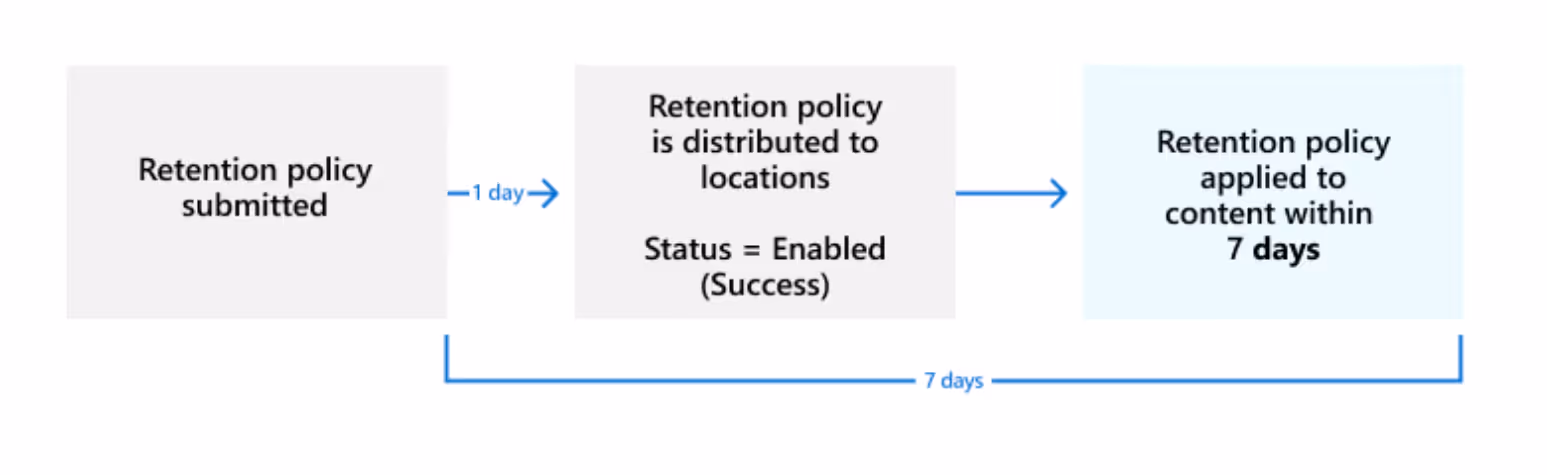
This delay will impact your testing and implementation process, so consider it when scheduling project tasks.
To sum it up, when starting your Microsoft Purview DLM journey, the first step is defining the lifecycle of your sensitive data. Pay special attention to the archive and delete phases. Once you've got that sorted out and everyone internally is on the same page, it's time to dive into the technology provided by Microsoft Purview. That's the main takeaway from this article - make the most of what Microsoft Purview has to offer to manage your data lifecycle effectively.
If you're wondering how to put in place regulatory compliance, the Microsoft Compliance Center can help you secure your organization all in a centralized hub.
Creating and following a governance strategy and ensuring security compliance requires time and specific skills.
ShareGate’s Teams management features make it easy to keep things organized in Microsoft Teams, and give you better visibility across the entire lifecycle—from creation to archival. Automatically detect problem areas like inactive and orphaned groups, and collaborate with owners you trust to keep Teams tidy and secure...right from the get-go!


.png)