Is a SharePoint migration on your roadmap? We explain two ways to tackle data mapping—ensuring users have everything they need to succeed in their new SharePoint Online environment.
Two of the most important goals with any data migration are to ensure (1.) no data loss, and (2.) a seamless user experience, one in which there’s no interruption in your users’ ability to log in and access the files they need in their day-to-day work.
When migrating to SharePoint online, you can use the default user mapping file. However, this can lead to problems if you have more than one user with the same name because Microsoft’s SharePoint Migration Tool (SPMT) might not map the right user at the source and the destination.
We recommend you create your own mapping file for data to ensure everything is mapped correctly. In this article, we’ll show you a couple of different ways to create your own user mapping file to map your users, permissions, and metadata for your SharePoint migration.
Jump to…
Method #1: How to create a user-mapping file for data content migration using the Microsoft SharePoint Migration Tool
With this method, you’ll create a user mapping file in Microsoft Excel. Then you’ll save it as a .csv file and upload it to SharePoint Online with the SPMT. Note that you could use any text editor or spreadsheet application to create the .csv file. We just think Excel is the easiest.
Creating your user-mapping file for data in .csv file format
Here are the steps to create a user-mapping file for data using Excel:
- Start Excel.
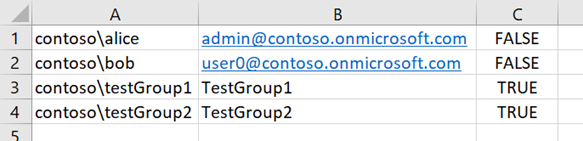
- Enter the values for your user mapping file (all three fields are required):
- Column A: From the source location, enter the login name of the user. Note that for SharePoint Server 2010 migrations, only the log-in name is supported. For SharePoint Server 2013 and later, you can use either the log-in name or the SID.
- Column B: On the target site, enter the user principal name (UPN).
- Column C: If the user principal name on the target site is an Active Directory (AD) group, enter TRUE. If it’s not an AD group, enter FALSE.
- If you add a header row to provide column labels, you’ll need to delete it before you save the file.
- Once you’ve entered all your data, save it as a .csv file and close.
Upload to SPMT
Now it’s time to upload your user-mapping file to SharePoint Online using the SPMT:
- Start the SPMT and sign in with your Microsoft 365 credentials.
- Select Start your first Migration.
- Select your migration type:
- SharePoint server (content is already in SP2010, 2013, or 2016): Site migration list, document library migration, workflow migration
- File Share
- .json or .csv file for bulk migration of multiple sources
- Enter your source information, then select Next.
- Enter your destination information, then select Next.
- Microsoft Teams
- SharePoint
- OneDrive
- Review your migration details, then select Next.
- Click on the Choose your settings page and expand to View all settings.
- Under Users in the User-mapping box, select Choose file, and navigate to where you saved your user-mapping file.
- Select Save.
Looking for a hassle-free way to migrate from SharePoint 2013 to SharePoint Online? ShareGate can help you survive the shift.
Limitations of the SharePoint Migration Tool
SPMT has limitations that SharePoint administrators should consider when choosing a tool for migrating their users, permissions, and metadata to SharePoint online.
SharePoint groups migration
The SPMT can only migrate your default SharePoint groups. This means that if your organization uses Active Directory groups, you can’t use the SPMT to map them to SharePoint groups in the target site. You also can’t use the SPMT to map a SharePoint Server group to a SharePoint group either.
File and folder permissions
There are also some things you’ll need to consider when using the SPMT that can affect the permission settings on your files after they have been migrated to SharePoint Online.
The first thing to know is that in order to maintain the existing permissions in your on-premises SharePoint server, you must have a user in SharePoint online for every user in your mapping file. Synchronizing your Active Directory accounts to Azure Active Directory (Azure AD) is the easiest way to do this.
When you use the SPMT with your user mapping file, Read, Write, and Full control permissions will be migrated to SharePoint Online as follows:
- If a file has Read permission for user1, then the file will be set to Read for user1.
- If a file has Write permission for user1, then the file will be set to Contribute for user1.
- For Full control permission, the file will be migrated as Full control.
It’s important to note that while the unique permissions on a file in your SharePoint server will be migrated to SharePoint Online, inherited permissions, custom permissions, and special permissions, such as Deny won’t be preserved in the migration.
Permissions control can also be affected by a number of other factors, including:
- The source of your data (a file share, a list/document library, a SharePoint site, or a SharePoint Site (A) with Subsite B, both migrated with the SPMT).
- Whether you’re migrating to a root folder or a subfolder.
- What the target library permission is before the migration (unique or inherited) and whether you’ve selected the option to preserve them.
When considering a migration project, it’s crucial to understand the SharePoint Migration Tool limitations that might impact your process. These limitations play a pivotal role in shaping your decision-making. To delve deeper, take a look at our comprehensive guide on how to assess these limitations effectively.
Method #2: Using ShareGate for SharePoint migration user mapping
While the SPMT is good for simple file migrations from file shares, migrating document libraries with document sets, lookups, or metadata can challenge its capabilities.
Using ShareGate to migrate your users, their permissions, and metadata to SharePoint Online is an easy solution built to simplify complex migrations, with features that allow you to bulk manage metadata and migrate customized metadata.
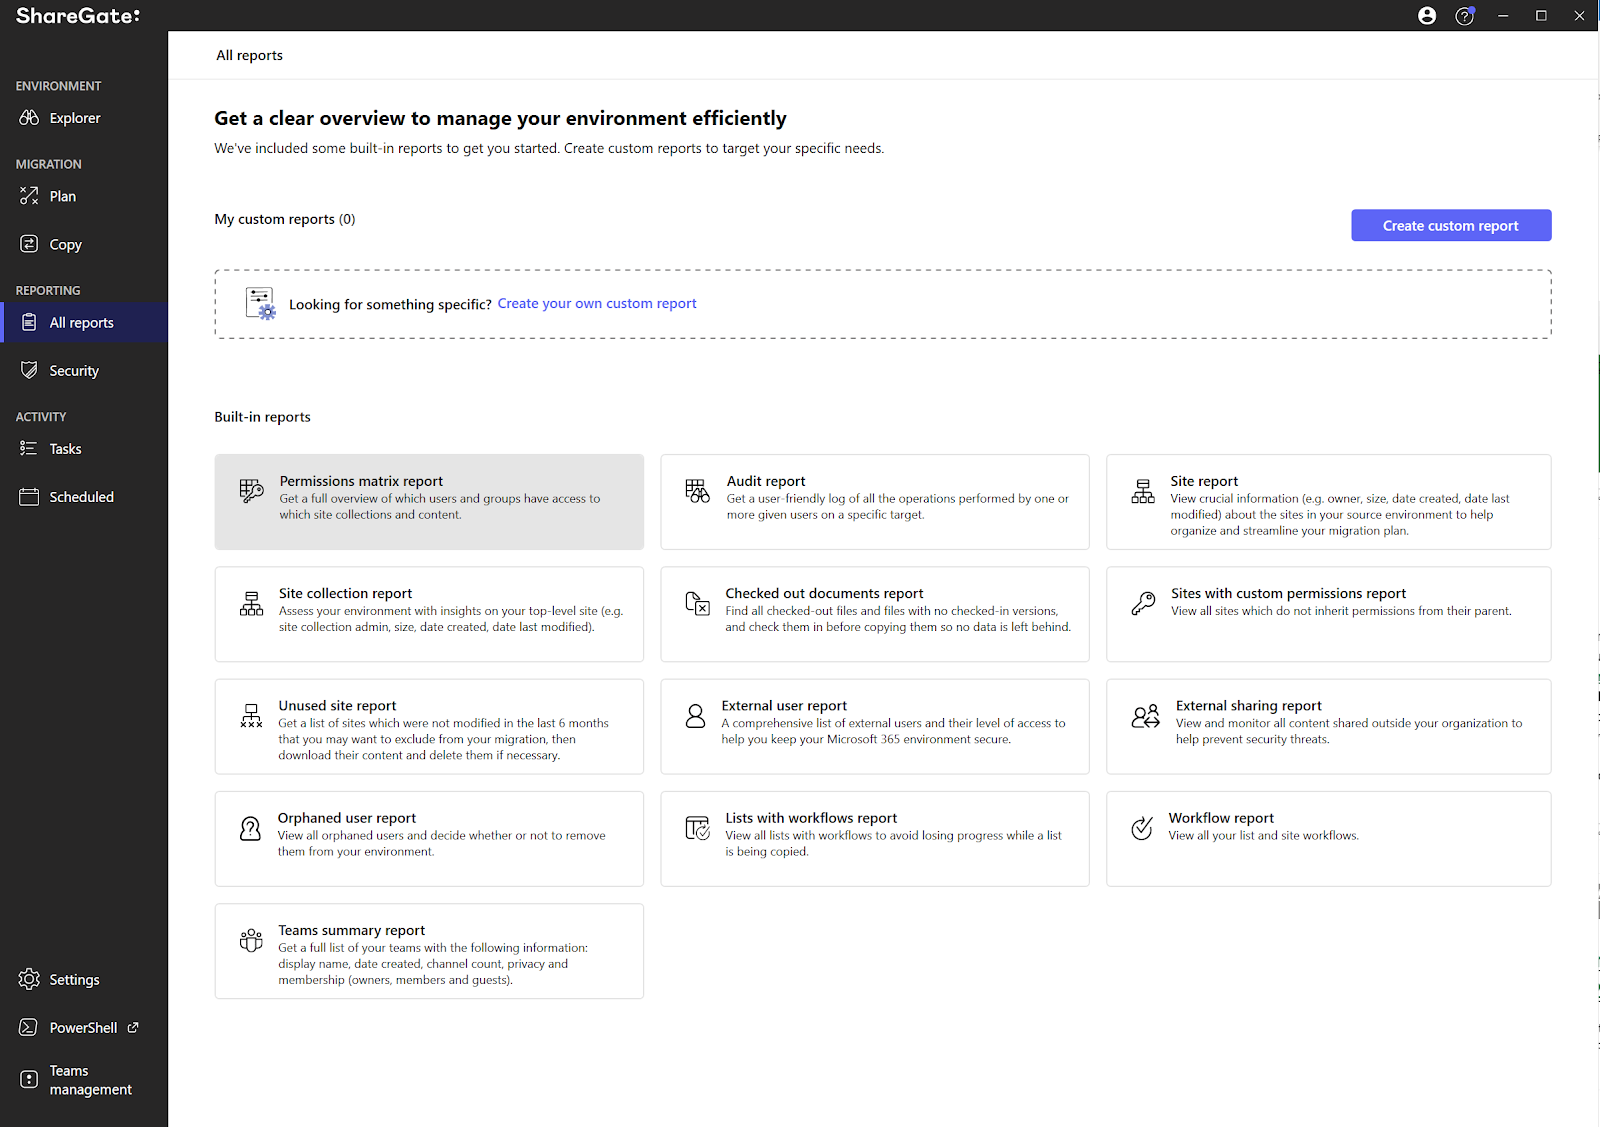
Before you start: Run an audit in SharePoint to help you quickly understand what’s going on in your Microsoft 365 environment.
Creating your user-mapping file
When you’re using ShareGate to create a user mapping, you’ll still use Excel to create your .csv file. However, in ShareGate, you only need two columns in your spreadsheet to map the SourceValue and the DestinationValue.
As shown below, these values can be a user’s email, username, display name, or full name. We recommend using email addresses because they are unique and include the domain.
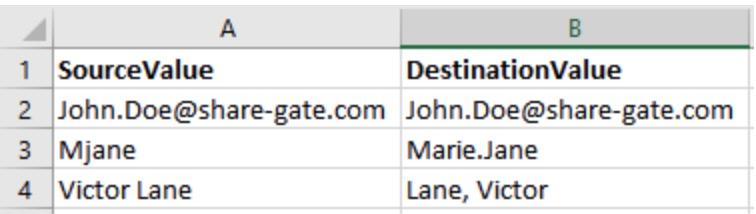
ShareGate’s SharePoint migration tool preserves user values through your SharePoint migration. The tool automatically maps all your users and groups with existing users and groups with the same account name in SharePoint Online without considering the domain. If no match is found, the mapping will be done using the display name.
ShareGate uses the People Picker in SharePoint to search for matching users at your source and destination. Here are a few examples of what that looks like:
- domain1john will map to domain2john because the account name is the same.
- domain1john will map to domain2john-doe if both users’ display name is John Doe.
In ShareGate, you don’t have to worry if you’re migration project involves migrating from a classics-based authentication system to a claim-based system. ShareGate ensures that your users and groups will map correctly regardless of how your tokens are formatted.
Mapping permissions
In ShareGate, mapping permissions is simple. It’s important to note that ShareGate automatically reassigns permission levels based on how you have mapped your content for the migration. It does not affect the migration of the permission levels themselves.
Unlike the SPMT, when you use ShareGate, any unique permissions you might have are automatically mapped as well so they should be the same as they were at the source. ShareGate also allows the mapping from one type of group to the other type.
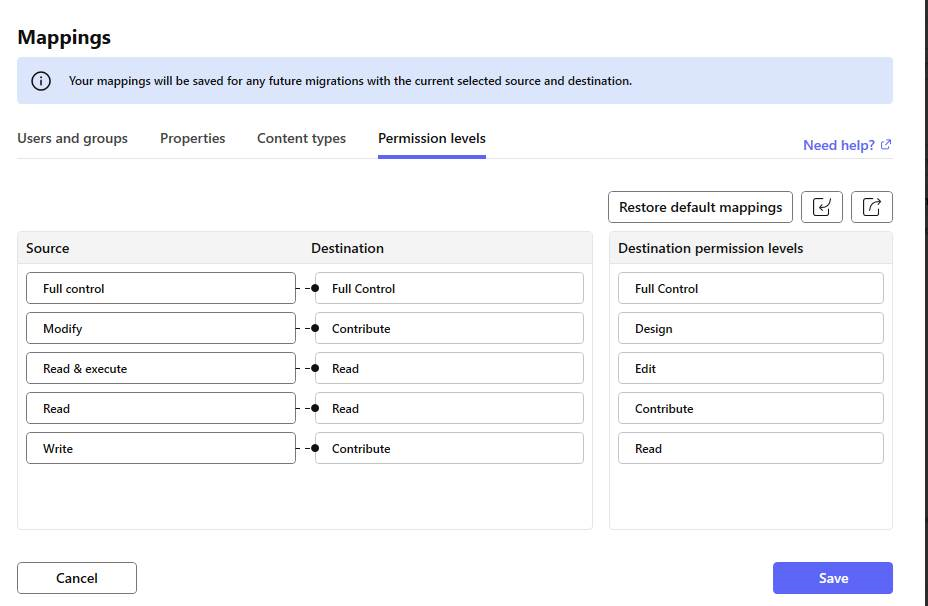
In ShareGate, permission levels with the same name will automatically be mapped together by default. During the migration of your site:
- Default permission levels will merge at the destination.
- Custom permission levels with the same name will merge at the destination.
- Custom permission levels with different names will always get copied as new.
Let’s walk through how you map permissions in ShareGate:
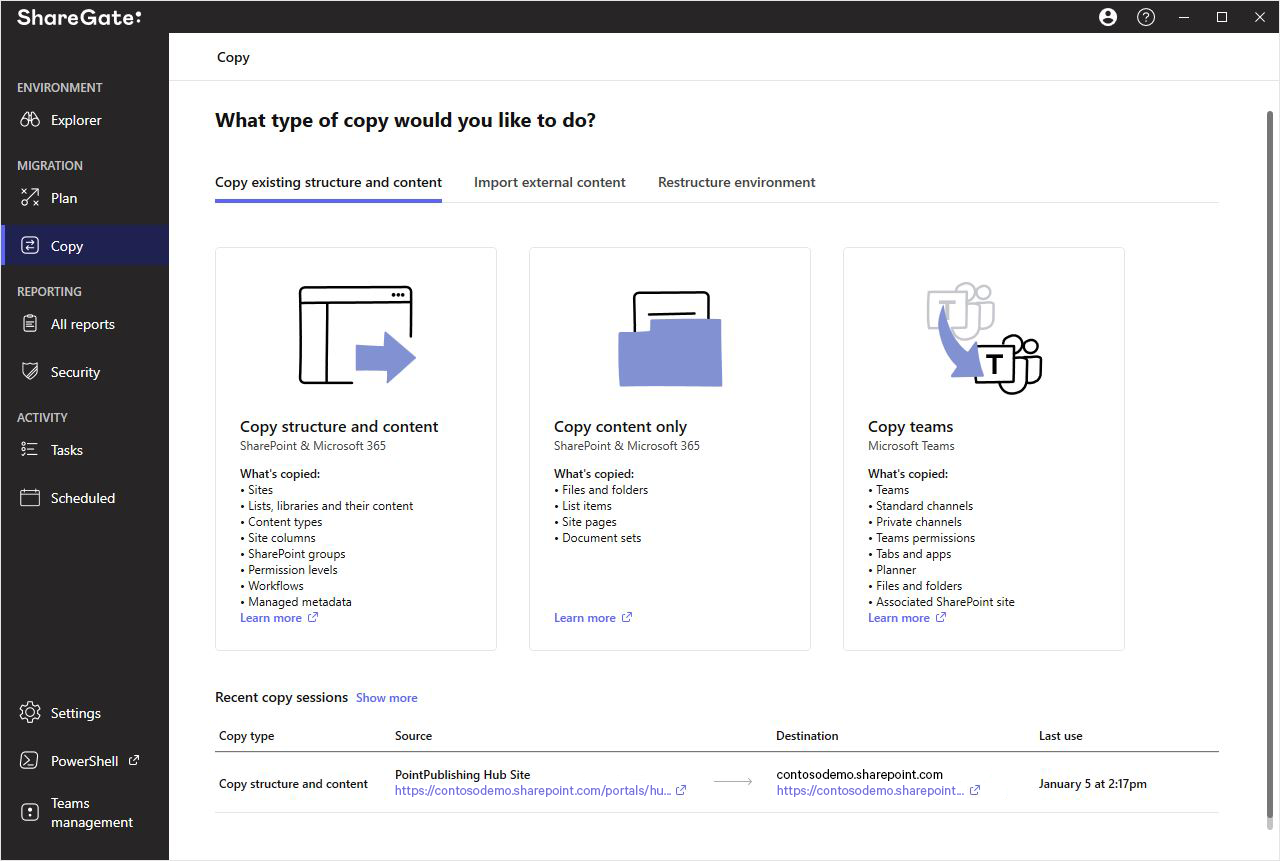
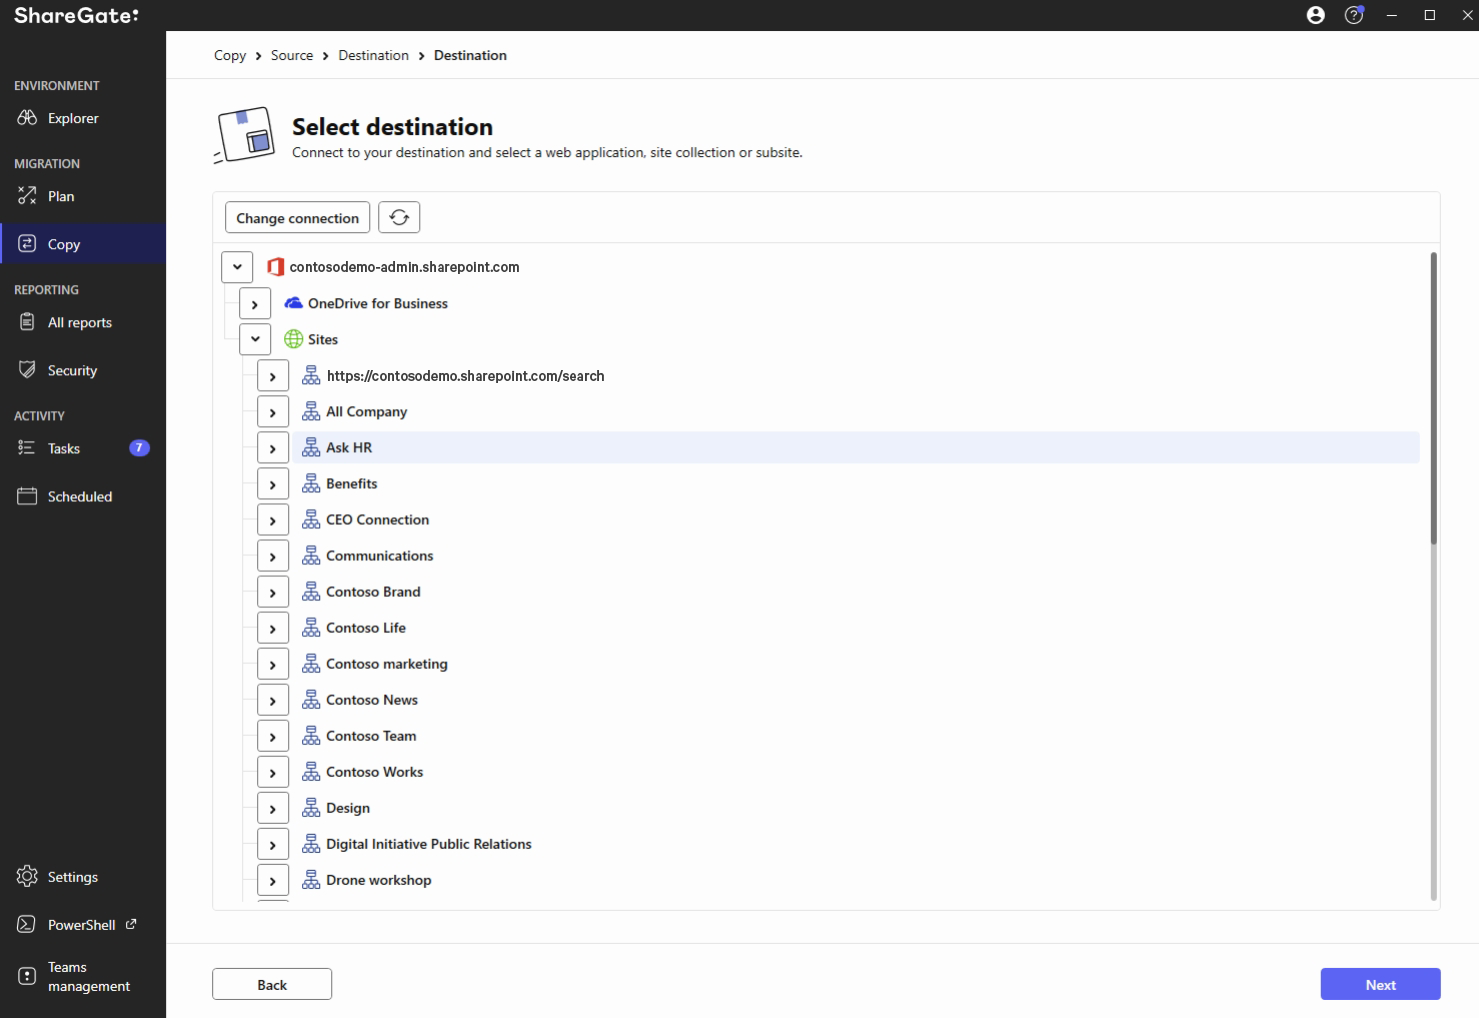
- Select Copy from the menu.
- Select the type of copy you want to perform, then connect to a source and a destination.
- Click Mappings on the top-right.
- In the Mappings screen, select the Permission levels tab.
- From the far-right column, select the Destination permission levels you want to map.
- Drag and drop the permission level into the appropriate spot in the Destination column.
- Click Save.
ShareGate automatically saves your mapping, too!
Another great feature is that ShareGate always saves the mappings for all source/destination combinations, so anytime you create a new operation with that source/destination, the mappings are automatically recreated without any effort on the user’s part. This feature also gives you the ability to save your mappings for future use or, if you’re using mappings from a previous session, you can export or import a mapping file. Here’s how:
- Open the Mappings screen in ShareGate.
- To export, select Export permission level mappings. Then save the file to your preferred location. This file will have a .sgrm extension.
- To import, select Import permission level mappings. Navigate to your saved file and open it. This file needs to have a .sgrm extension.
Mapping metadata
Properly configured, SharePoint metadata provides powerful search capabilities in SharePoint. For example, if your on-premises SharePoint relies on complex folder hierarchies with folder names to describe the purpose of different sets of files, during migration, you can map your folder names to SharePoint metadata columns so you’ll never again have to drill down through multiple folders to get to the files you need.
Here’s how to use ShareGate to copy your metadata at the destination so that it’s there when you start copying your structure and content:
- Select Copy from the menu.
- Select Copy structure and content.
- Add your source credentials.
- Click Connect.
- Select your source.
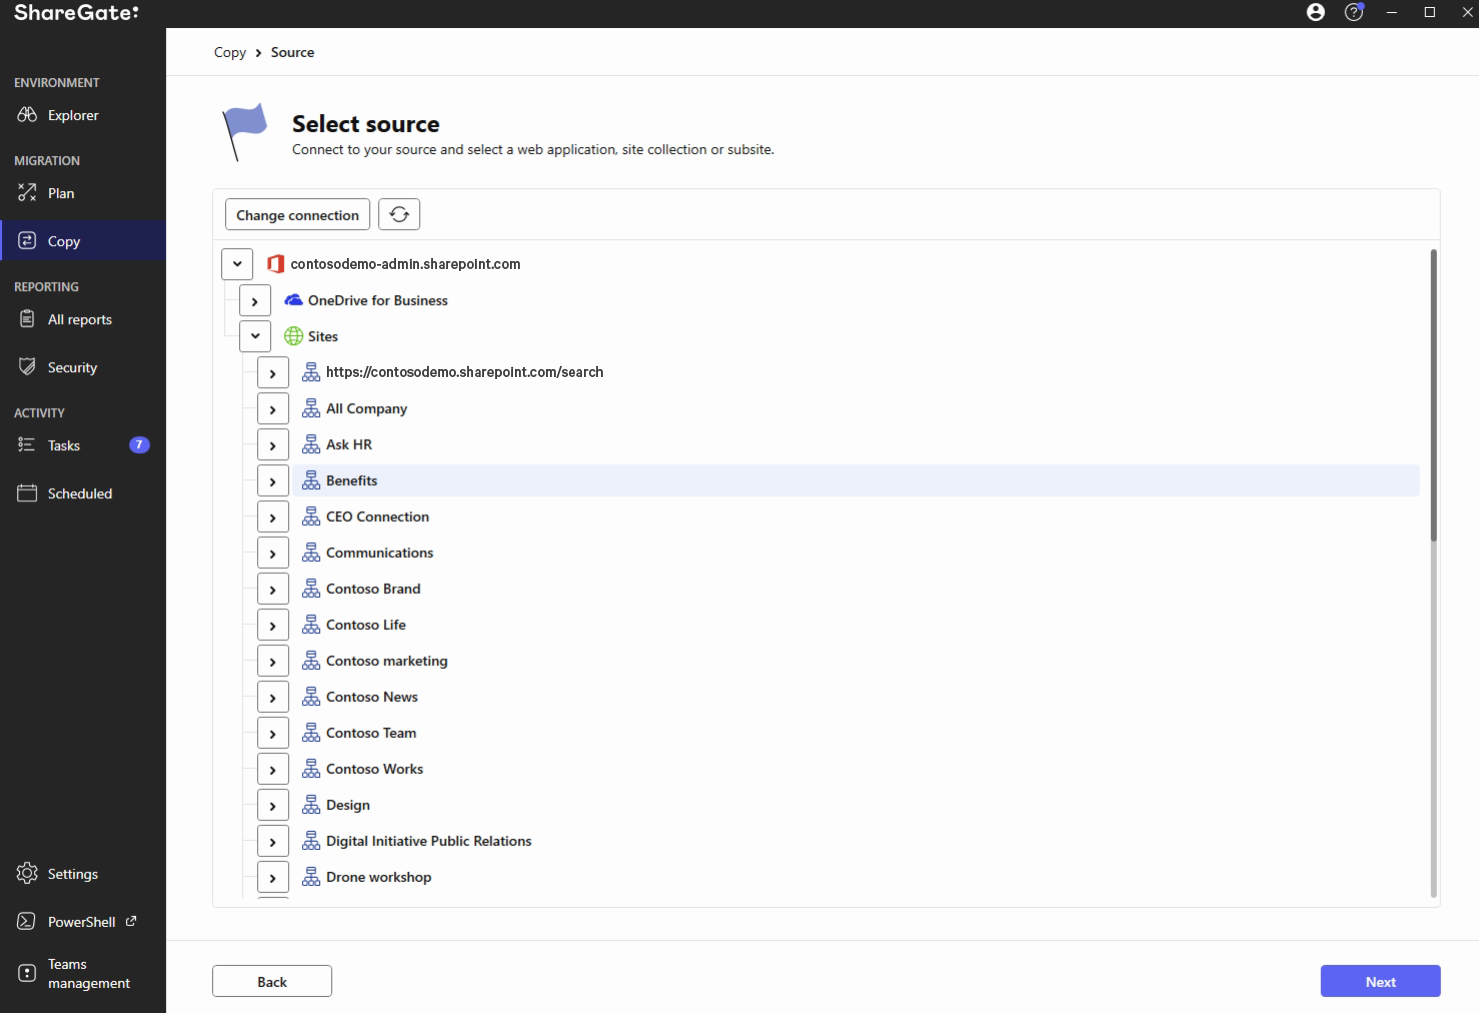
- Click Next.
- Add your destination credentials.
- Click Connect.
- Select your destination.
- Click Next.
- Select Managed Metadata from the list of Site objects.
- Select the managed metadata you want to copy from the source.
- Click Options and/or Mappings on the top-right if you want to apply specific parameters.
- Drag and drop it into the destination, or click Start copy on the bottom-right corner.
Once the action is completed, ShareGate will provide a Migration report that will show you any successes, warnings, or errors with your migration.
After your migration, you may decide you want to make some changes in your metadata, you can use ShareGate to easily export existing SharePoint metadata to a Microsoft Excel spreadsheet to make changes to all your documents’ metadata. ShareGate even suggests potential metadata that can be applied in bulk using basic Excel formulas.
ShareGate’s SharePoint migration tool is just the beginning
ShareGate not only makes it easier to map and migrate your users and their permissions to SharePoint Online, but it also simplifies ongoing permissions management.
ShareGate centralizes permissions management across multiple tenants and allows you to automate policy compliance, with the right-sized permissions settings to support your governance policies and keep your tenant secure.
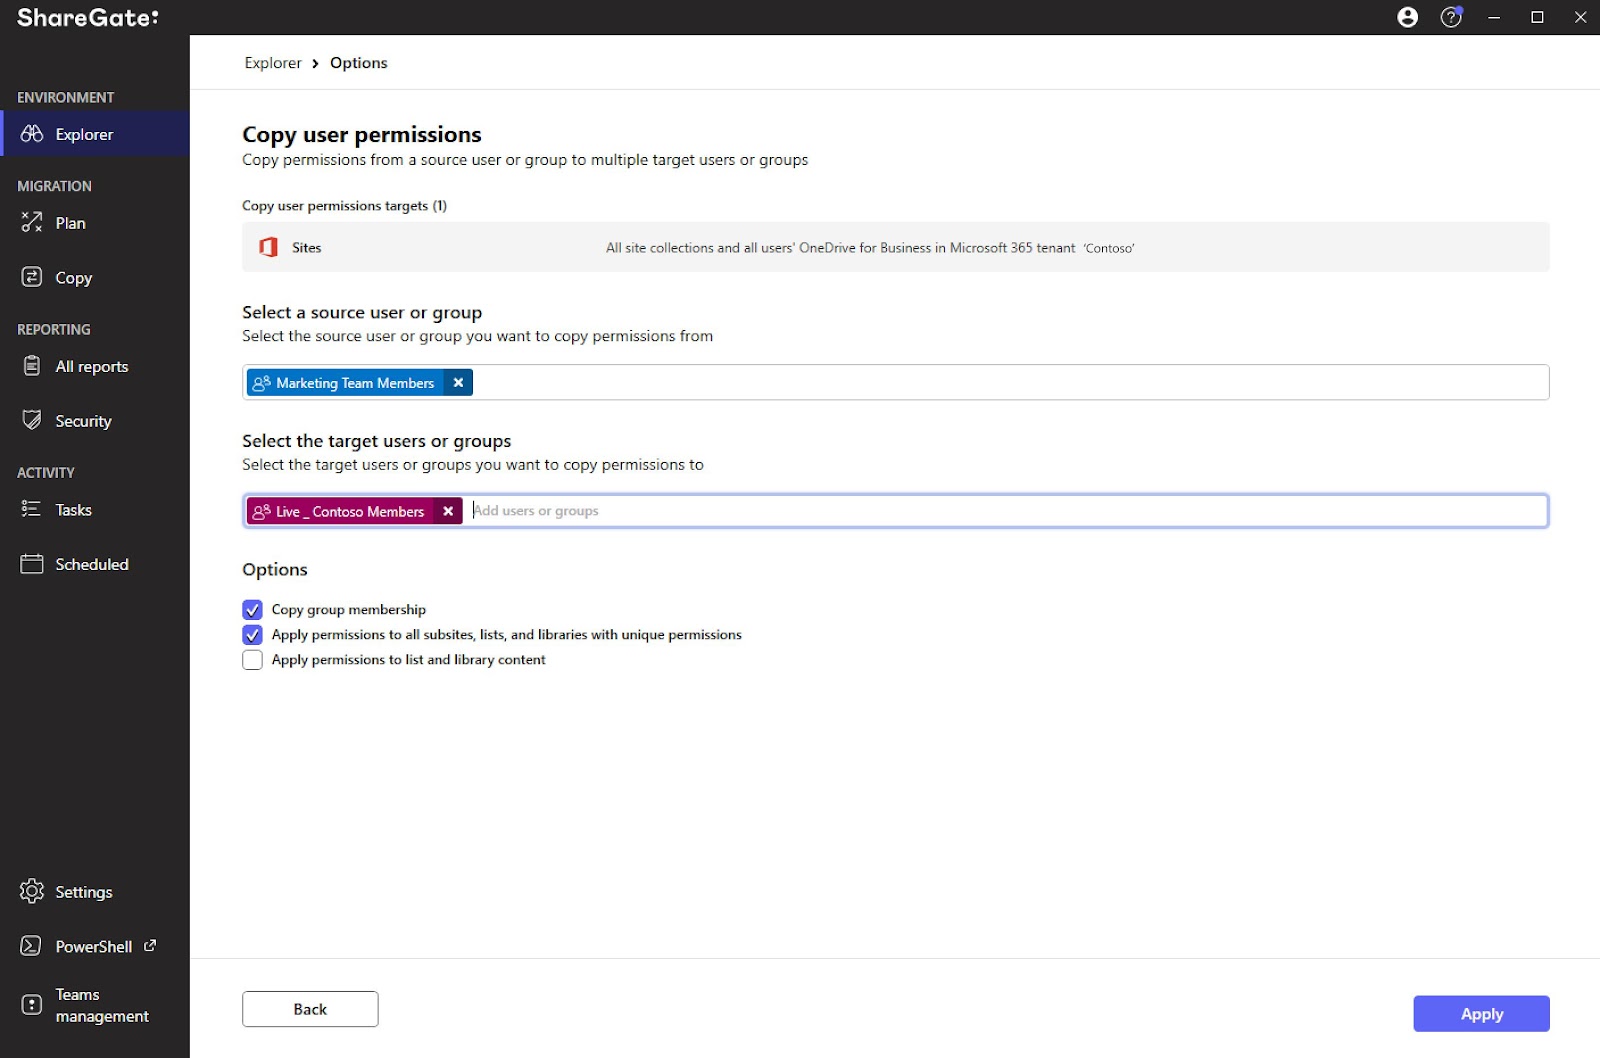
It also allows you to copy permissions from one user to another for onboarding, offboarding, or when an employee moves to another department or team within your organization.
These are just a couple of examples of ShareGate’s features. If you’re ready to see how easy SharePoint migration and administration can be, it’s time to look at ShareGate.