.svg)

.avif)
SharePoint security audit tool
Discover how we can help you manage SharePoint permissions, users, & activity at scale!
Book demo%20(1).avif)
Master Hacks: Migrate like a pro
Check out our video series to help you turn migration projects into masterpieces!
Table of contents
What are SharePoint site columns and how are they different than content types? Here's how to create a site column in SharePoint 2013:
When was the last time you borrowed a book from your local library? Whether you go every week or haven’t been since you were a kid, it can sometimes be useful to think of SharePoint like your local public library. Given that many of the features we associate with SharePoint, such as metadata, this comparison is pretty appropriate.
A physical library, of course, breaks books down into a series of subcategories held in order and placed on shelves throughout the building. Normally, the library has a system in place that helps you search for books by, say, year of publication, author, language or genre, etc.
In SharePoint, all of your organization’s information is broken down into departments and then stored in sites (and subsites). You might say that SharePoint Lists and Libraries are a little like the shelves in a library. And, to carry this analogy through, SharePoint columns are a little like the classification system the library uses to place books in the right place (and help you find them!)
Now, while columns are useful, they can be a little limiting—they only let you apply specific pre-determined metadata/column types. In today’s post, we’re going to see how you can go beyond these limits using Site Columns.
Start to learn SharePoint series
- Let's begin with some SharePoint Basics
- SharePoint Columns and Column Types
- Advanced Column Types
- SharePoint 2016 User Interface & Navigation
- Understand, use and create SharePoint views
- Overview of Wiki, Publishing and Web Part Page Types in SharePoint
What are site columns in SharePoint?
In SharePoint, you normally add columns to a List or Library in order to include additional metadata to files in a it—date of publication, owner, or a short description. These can be added fairly simply (see this guide on how). Many of the most common column types are provided automatically by SharePoint. However, your organization is unique so you may well need some of your own ‘custom-made’ columns too.
If this is the case, consider using SharePoint Site Columns. Simply speaking, SharePoint Site Columns allow you to add to the list of standard SharePoint columns used in a site or its sub-sites. A SharePoint Site Column is a little like a template you can use over and again across your site. In action, this means that next time you’re applying a column in SharePoint, you can select your very own custom-made column from the column creation menu.
Pretty neat, right?
Pay attention with site columns
Site Columns are really useful. They let you reuse a column you’ve configured over and again, and save you lots of time. Without Site Columns, you’d have to recreate your own custom column within each individual List or Library. And that would not be fun.
Nonetheless, you need to be careful with Site Columns. You’ll need to think about columns and architecture each time a column is created and if they’re overused, they can create chaos within sub-sites. So, exercise Site Columns with caution.
How to create a SharePoint site column
The basic process for creating a Site Column is pretty straightforward. Let’s see how this is done using an iteration of SharePoint Online (don’t worry, the process will be pretty much the same whatever version of SharePoint you use).
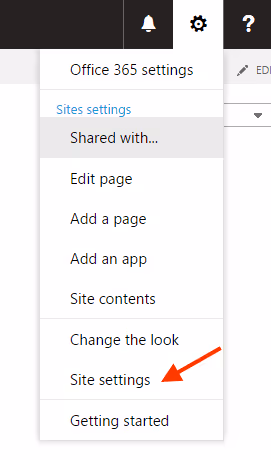
- Begin by selecting the ‘cog’ on the top right of your screen and choose the ‘Site settings’ option:
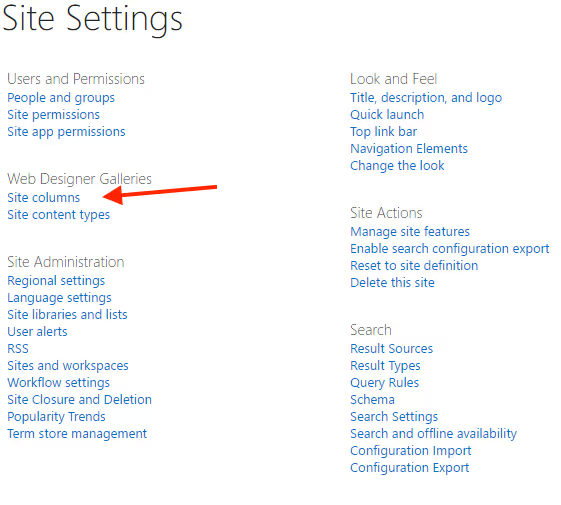
- From the Site Settings page, select Site Columns:
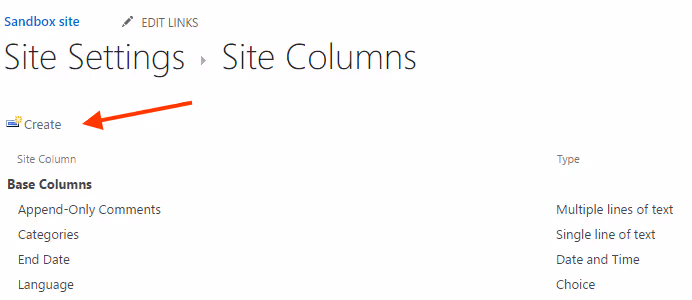
- You’ll see that there’s already a long page of column settings. These are the details of your existing columns—DO NOT change or remove any of these as this will impact on your existing Lists and Libraries and cause havoc.Create a new Site Column by selecting ‘Create’:
- Good job. Your next step is to create the actual column and the details themselves. We’ve put together an imaginary ‘customer complaints’ column:
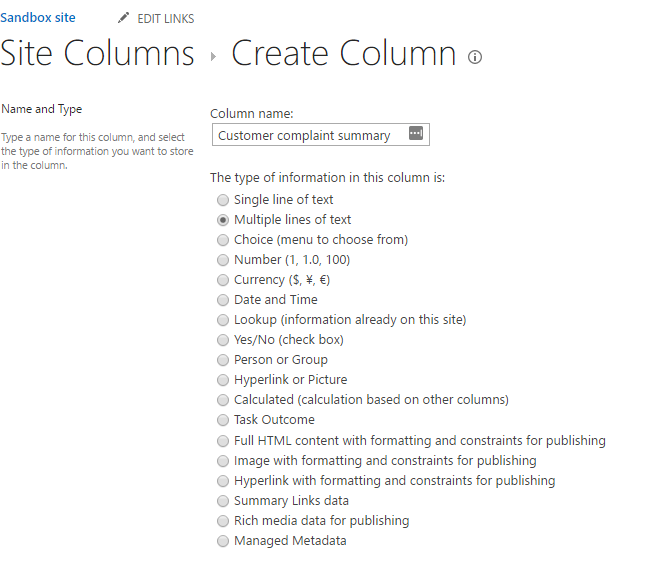
- Don’t forget to add additional useful information which will impact how the column can be used.
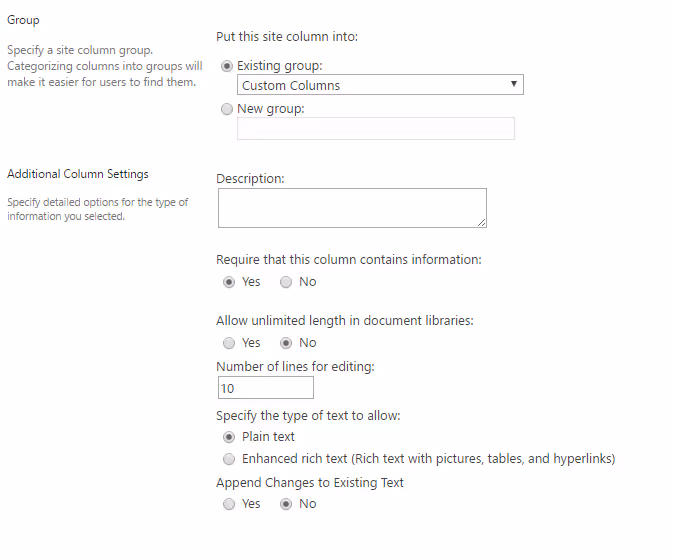
- Click ‘create’ and the new column is ready to use. Awesome!
So, how do I put that new column into action?
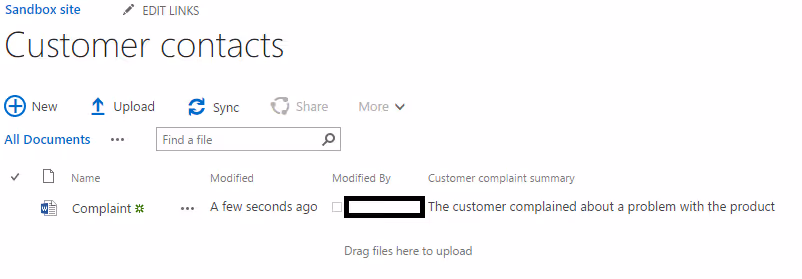
Now that you have that column, let’s see how to put it into use. We've created a very simple mock-up to illustrate the process.
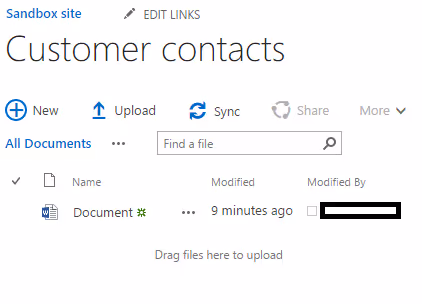
- Go to the List or Library you want to add the column to, as follows:
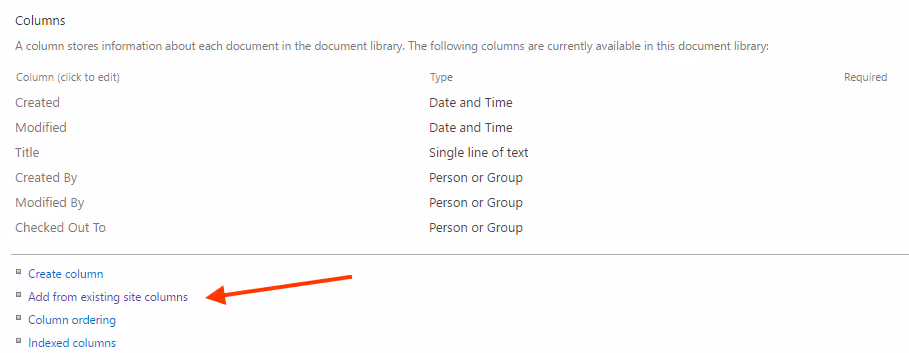
- From the ribbon menu, select Library Settings:

- Scroll down and select ‘add from existing site columns’
- Next, you simply add the site columns you’ve created
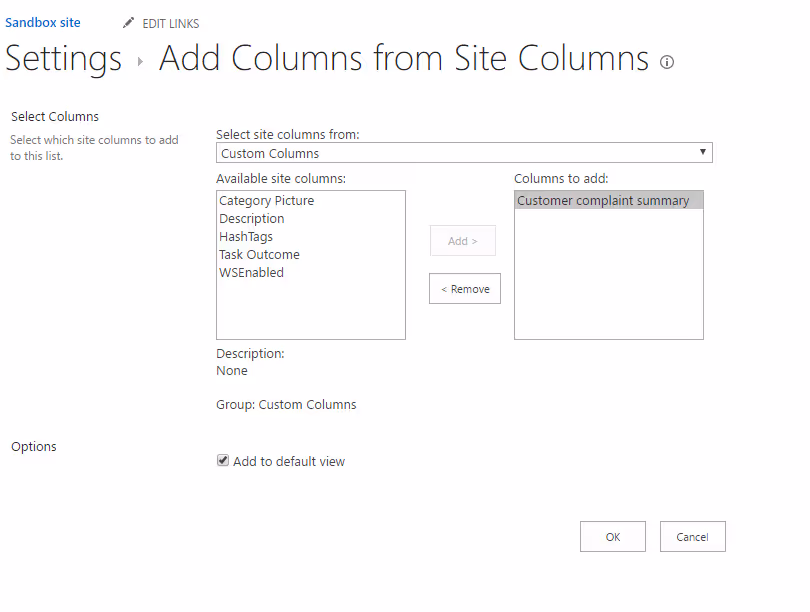
- And you’re done. You can now add information to that column
So, there you have it: the ins and outs of creating a site column. To learn more about the fundamentals of managing SharePoint, just refer to our blog where you’ll find our entire back catalog with tips and tricks for getting the most out of this colossal collaboration platform. Good luck, and let us know how your Site Columns go!
** This blog was updated in July 2016. Comments below posted prior to this date will refer to the original content. **