.svg)

.avif)
Microsoft 365 governance made simple
Fix what matters, faster, without complex rules or tool switching!
Free trial%20(1).avif)
Master Hacks: Migrate like a pro
Check out our video series to help you turn migration projects into masterpieces!
Table of contents
Wondering how to move SharePoint sites or subsites? Or maybe you’re trying to move an existing SharePoint subsite to the top level. In this guide, we’ll walk you through the processes, including subsite creation, tips on site templates and permissions, and share best practices to keep your site structure organized.
You need an intranet that continually adapts to the ways your organization is evolving—aligning the user experience with the new ways of work.
That means that—sooner or later—you’ll need to make the switch to SharePoint’s modern interface, restructuring your environment from top-down to flat. The idea is that by adopting a flat topology, it’s easier to move things around as your organization continues to evolve.
At ShareGate, we decided to embrace a flat site structure in order to leverage new Microsoft experiences—like Teams, Microsoft 365 Groups, and Planner—that can only be attached to top-level sites. In the process, we learned a lot of valuable lessons that were useful for improving ShareGate, our migration and Teams management tool.
Here, we explain how to move the contents of one SharePoint site to another site collection—and how to move subsites to the top level in SharePoint Online.
When it comes to converting your subsites to independent sites, you have two main options.
Option 1: Move SharePoint files and folders to a new site collection
The modern experience is faster, easier to use, and displays better in mobile browsers. And the new document library and list experience in SharePoint Online also makes it easier to complete tasks using the command bar—including copying and moving files between site collections.
First, you’ll need to create a new site:
- Make sure you’re signed in to the SharePoint admin center as a global or SharePoint admin, and that you have Microsoft 365 administrator permissions in your organization.
- In the left pane, under Admin centers, select SharePoint.
- In the left pane, under Active sites, select Create.
- Choose the type of new site you need:
- Team site (connected to a Microsoft 365 group)
- Communication site (for sharing information broadly); or
- Other options (to create a new team site without a Microsoft 365 group)
- Choose a name and owner for your site, then select Finish.
A few things to note:
- If you choose a Team site with a Microsoft 365 group, a group email and other resources will be created automatically.
- If you select Other options, you can create a standalone team site without a group.
- It might take a few minutes for the site to appear in the Active sites list.
TIP: Before you create subsites in SharePoint, consider whether they need to inherit navigation and permissions from the parent site or have unique settings. If you manage multiple subsites, you may want to automate permission assignments to save time and reduce errors.
Once your new subsite is created, go to the Site Contents page to access the document library where your files and folders are stored. From here, you can move content between subsites or libraries, and do the following:
1. Select the items you want to move.

2. Click Move to in the main menu at the top of the page. You may have to click the ellipses (…), and then click Move to.
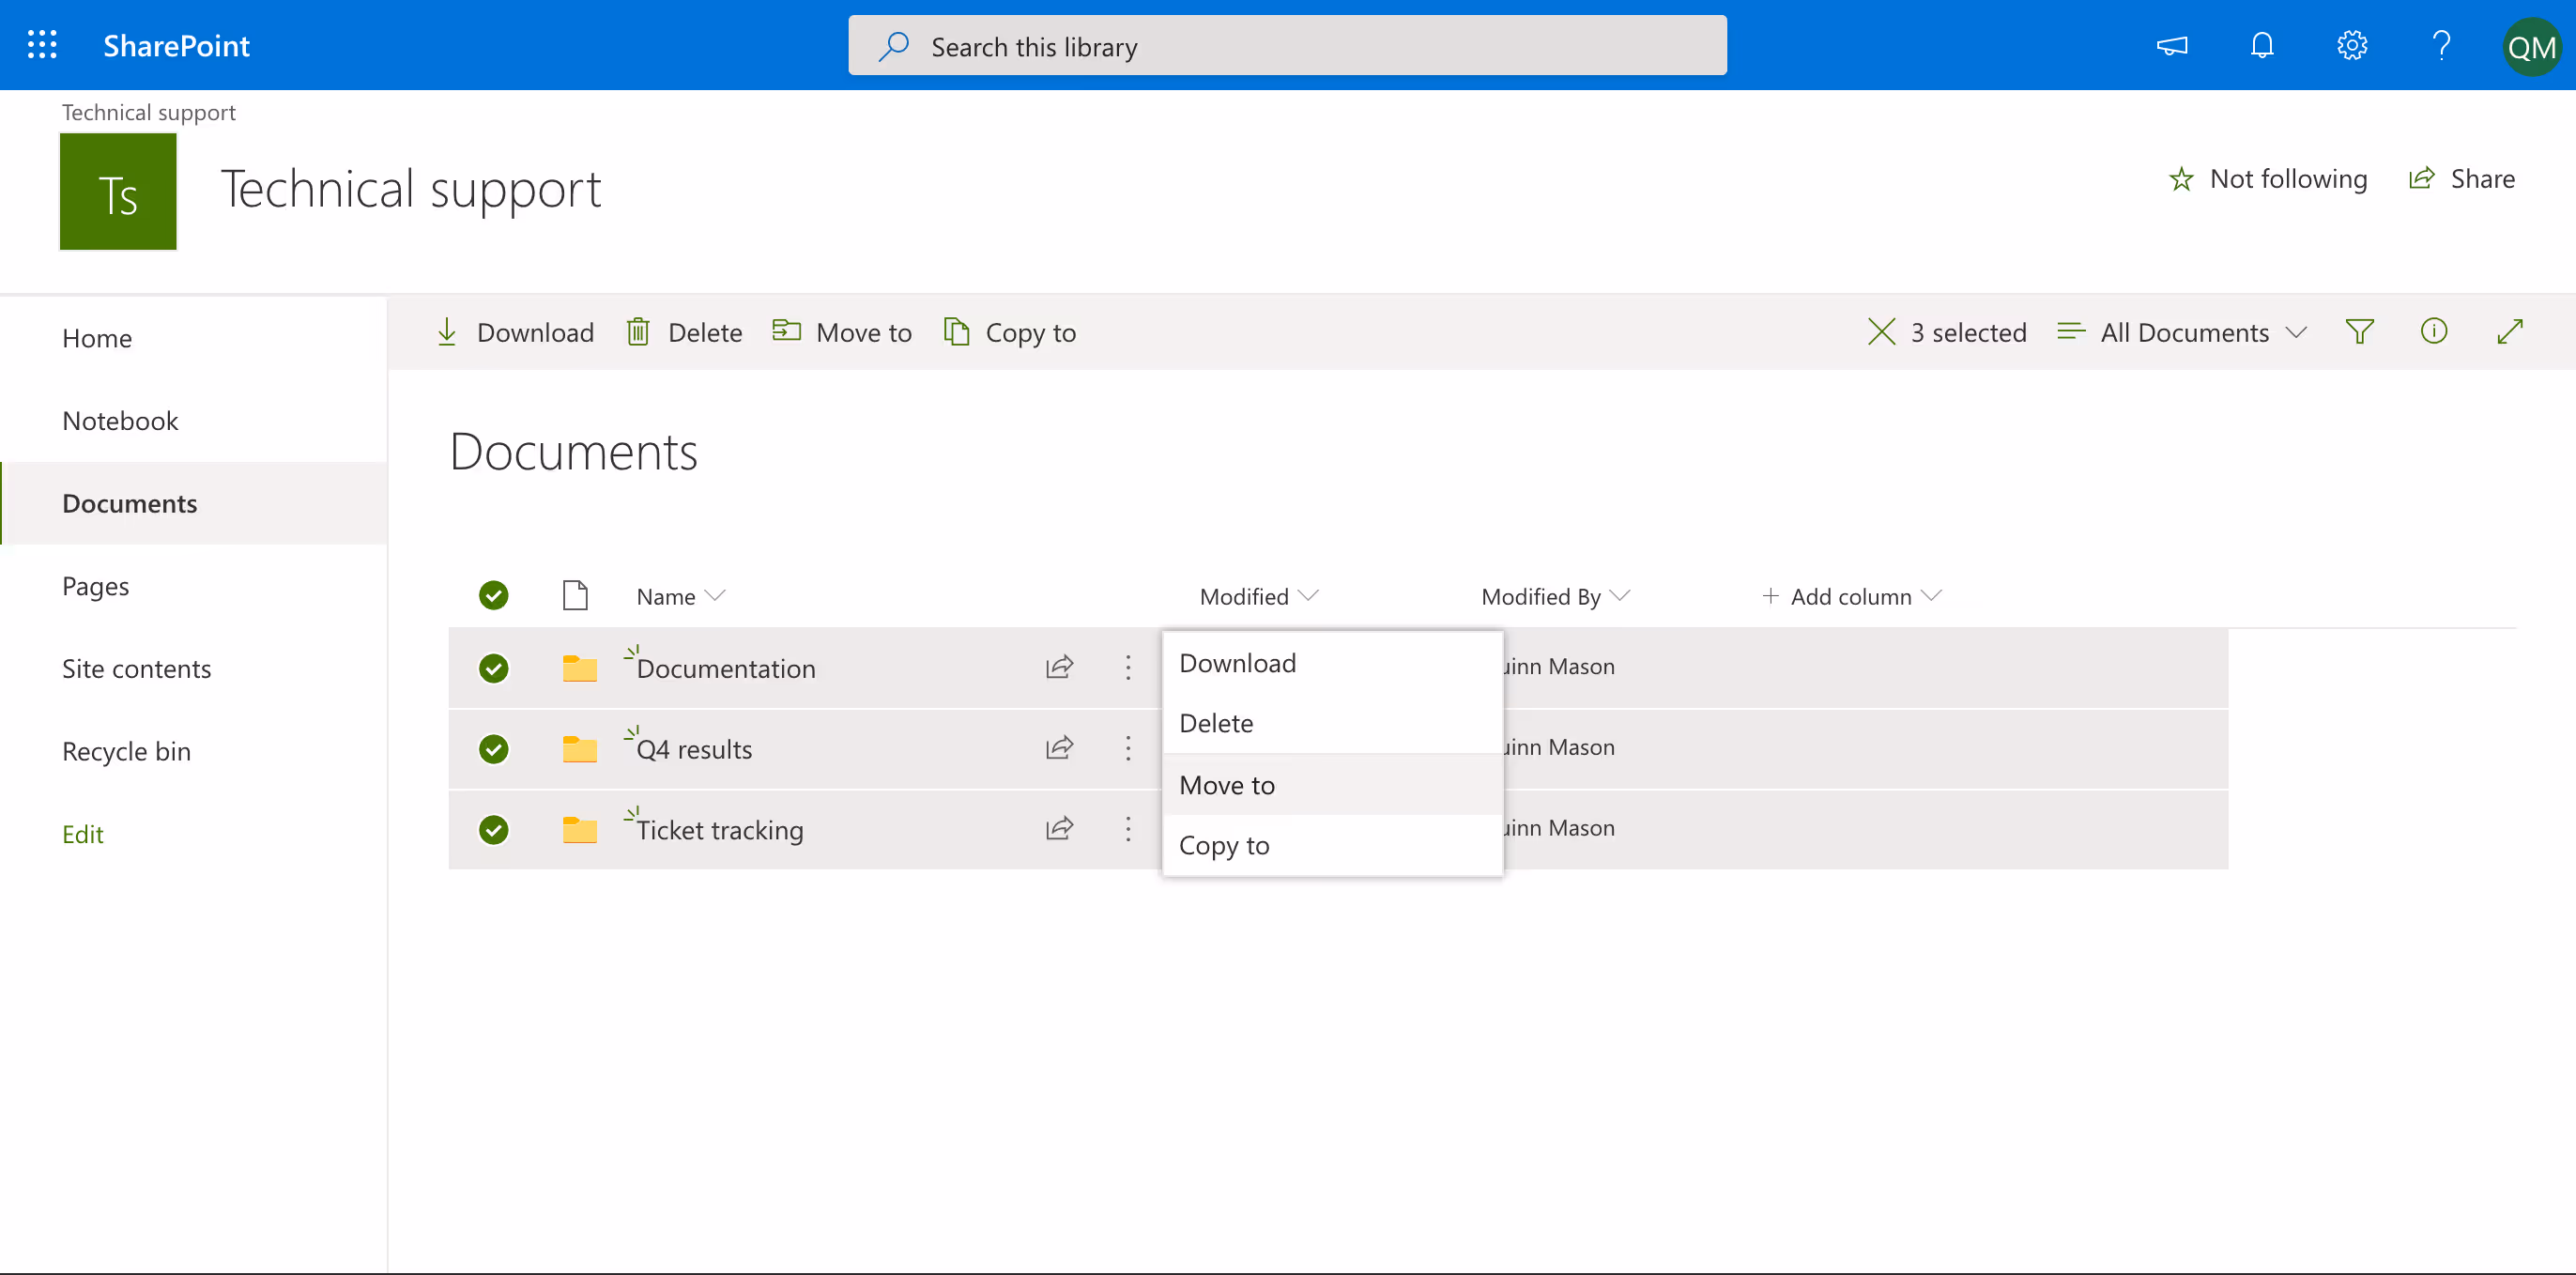
3. In the pane, click More places and navigate to the new site you just created. Then click Move here.

4. You also have the option to create a new folder within your new site’s document library to move the item to. In the pane, click New folder, assign it a name, click the check mark, and then click Move here.

Moving your subsite’s files and folders might seems like the most straightforward option—but it’s also the most time-consuming.
If your subsite has unique permissions, moving content to a new site won’t automatically carry over those permissions. That means you might need to manually reassign user access. SharePoint doesn’t automatically transfer permission settings when moving files—so it’s something to keep in mind.
In Site Contents, you can access document libraries and SharePoint lists. Each subsite is tied to a parent site, meaning site settings, navigation, and lists may be impacted when restructuring. If your subsite has unique metadata, lists, or permissions, you’ll want to use a migration tool to make sure all content moves over correctly. Otherwise, you’ll need to manually rebuild your subsite’s structure in the new location—essentially, rebuilding your existing infrastructure from scratch.
It’s also worth noting that moving your content this way won’t transfer custom metadata. And if your library uses versioning, you’ll only get the latest version—none of your previous versions will be moved over.
If you’re looking for more ways to survive the shift when migrating from SharePoint 2013 to SharePoint Online, our explainer covers everything you need to know.
Option 2: Use a third-party tool to restructure your existing environment
We get it. You like everything set up a particular way.
And if you’ve already invested time and energy customizing your intranet’s infrastructure, you probably don’t want to build a new site from scratch.
Instead of trying to rebuild what you already have, why not use a third-party tool to restructure the environment you’ve invested so much time in?
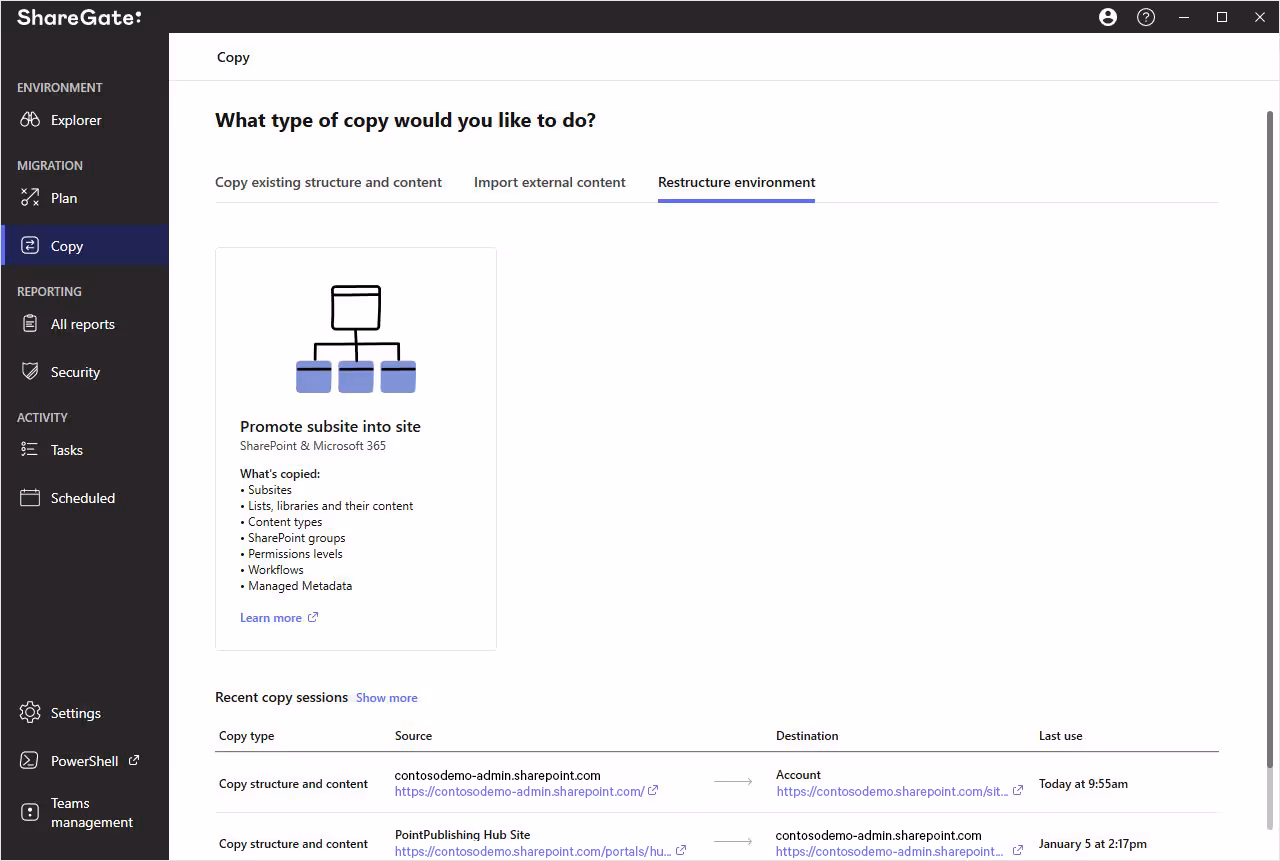
ShareGate has a full-fledged Promote feature. That way, your existing content stays intact.
Here’s how:
1. Select from your existing subsites. Head over to the Copy tab, select Restructure environment and click on Promote subsite into site to access the Promote feature.
On the next screen, ShareGate shows you all of your sites and subsites in one place—including all the information you need to get started.

2. Preview the new site structure before making a change. See the future before it happens. With a visual preview of your copy, you can preview any changes, and adapt if you need to.
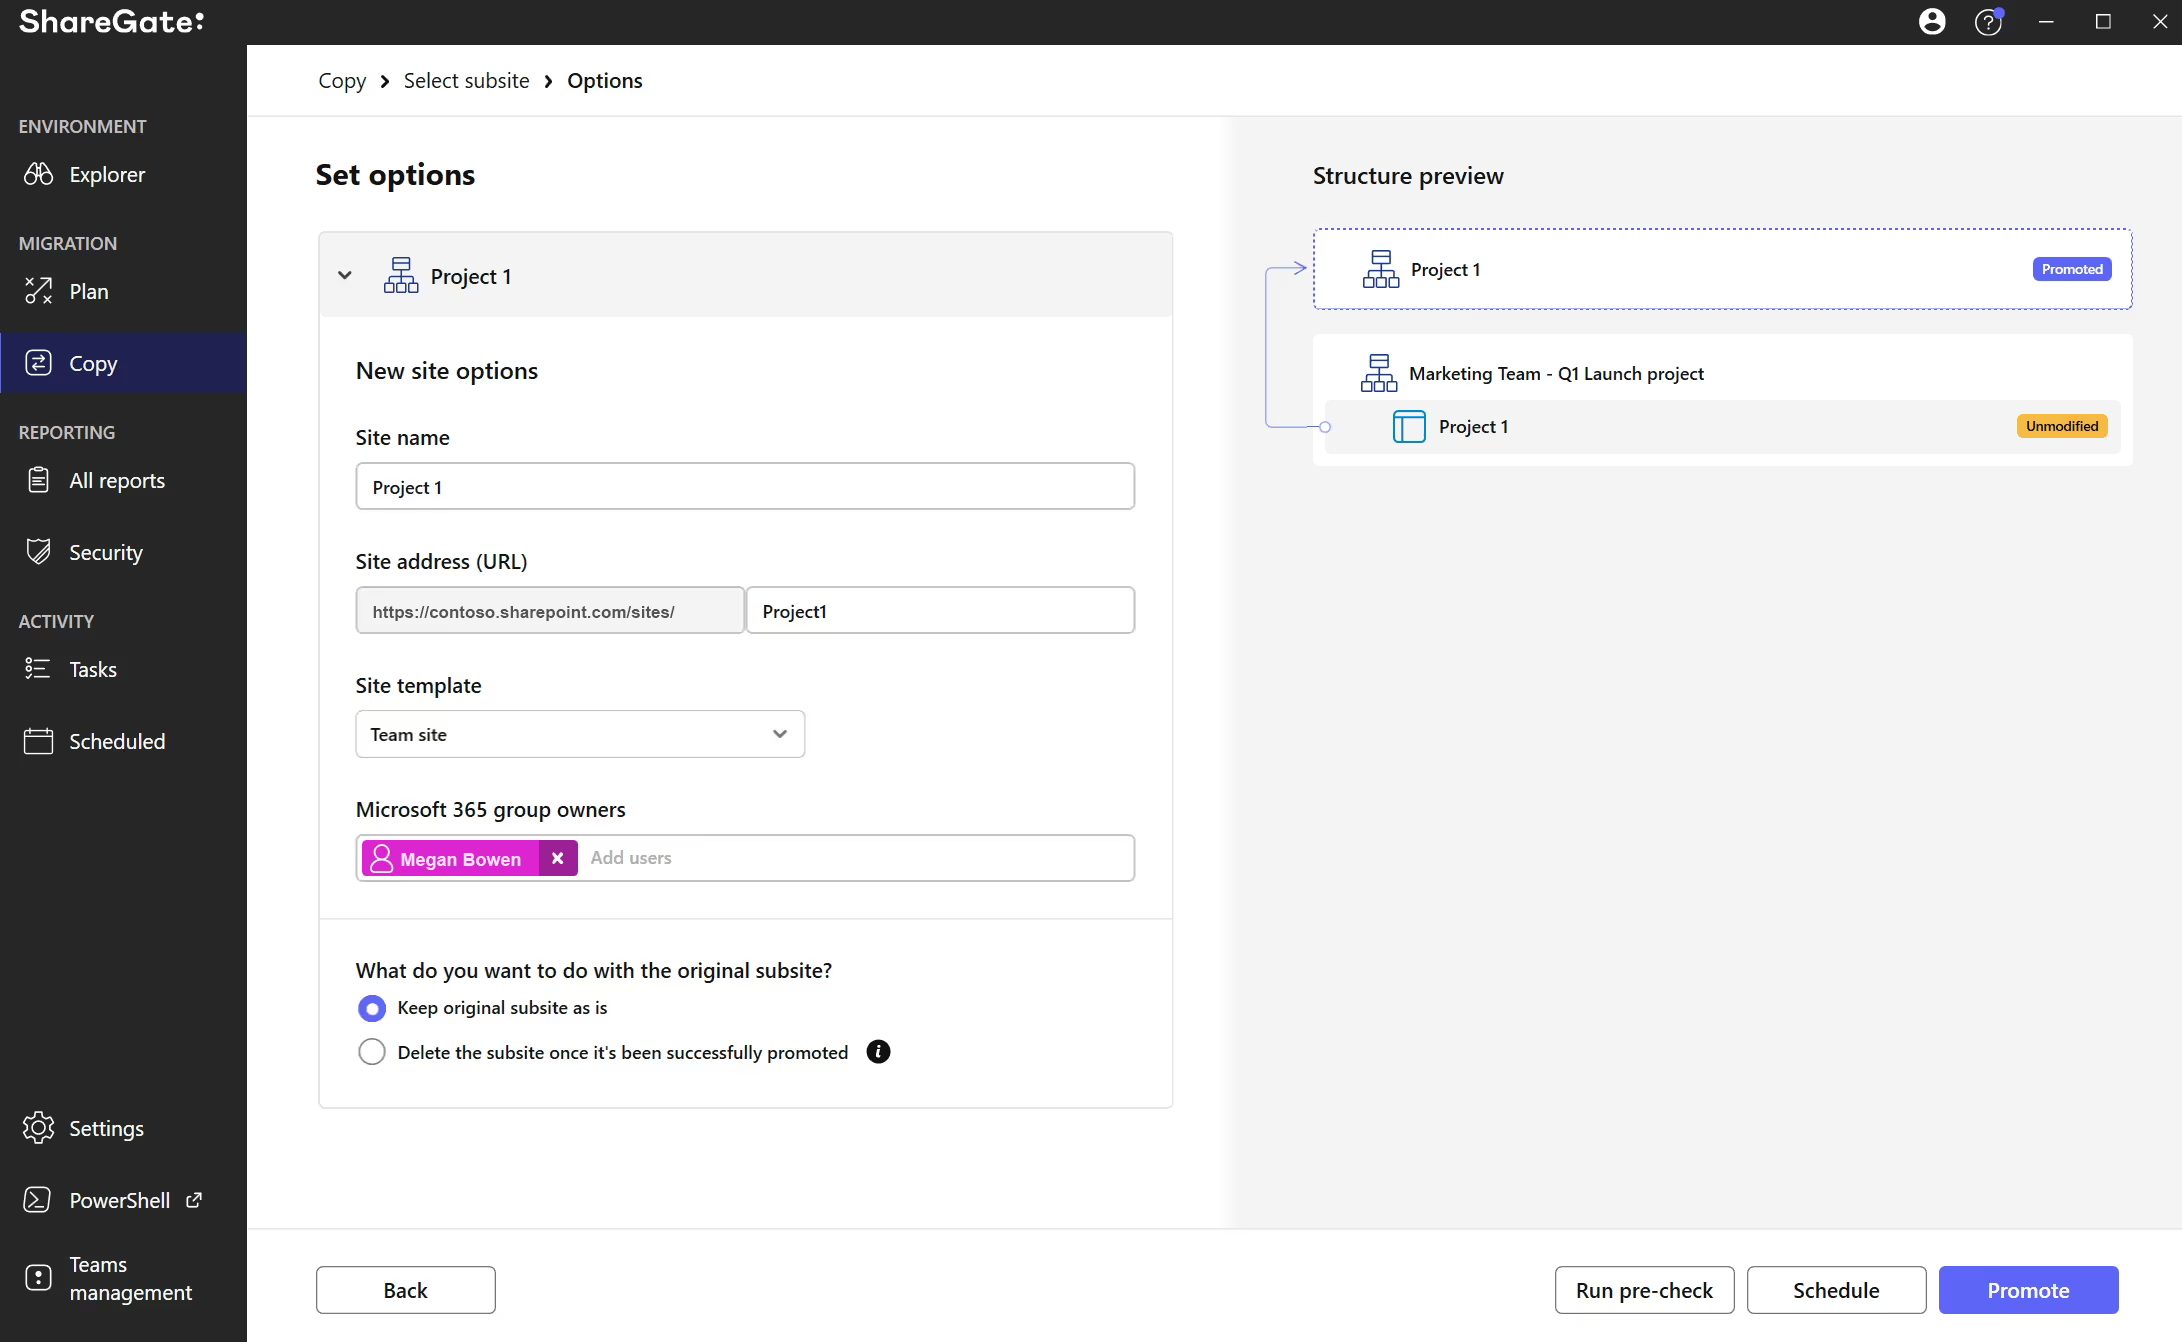
3. Tailor the operation to your needs. From the same interface, you can also customize your copy, with a new name, URL, and new site template. Then you can choose whether you want to keep the original subsite as-is or delete it once it’s been successfully promoted.
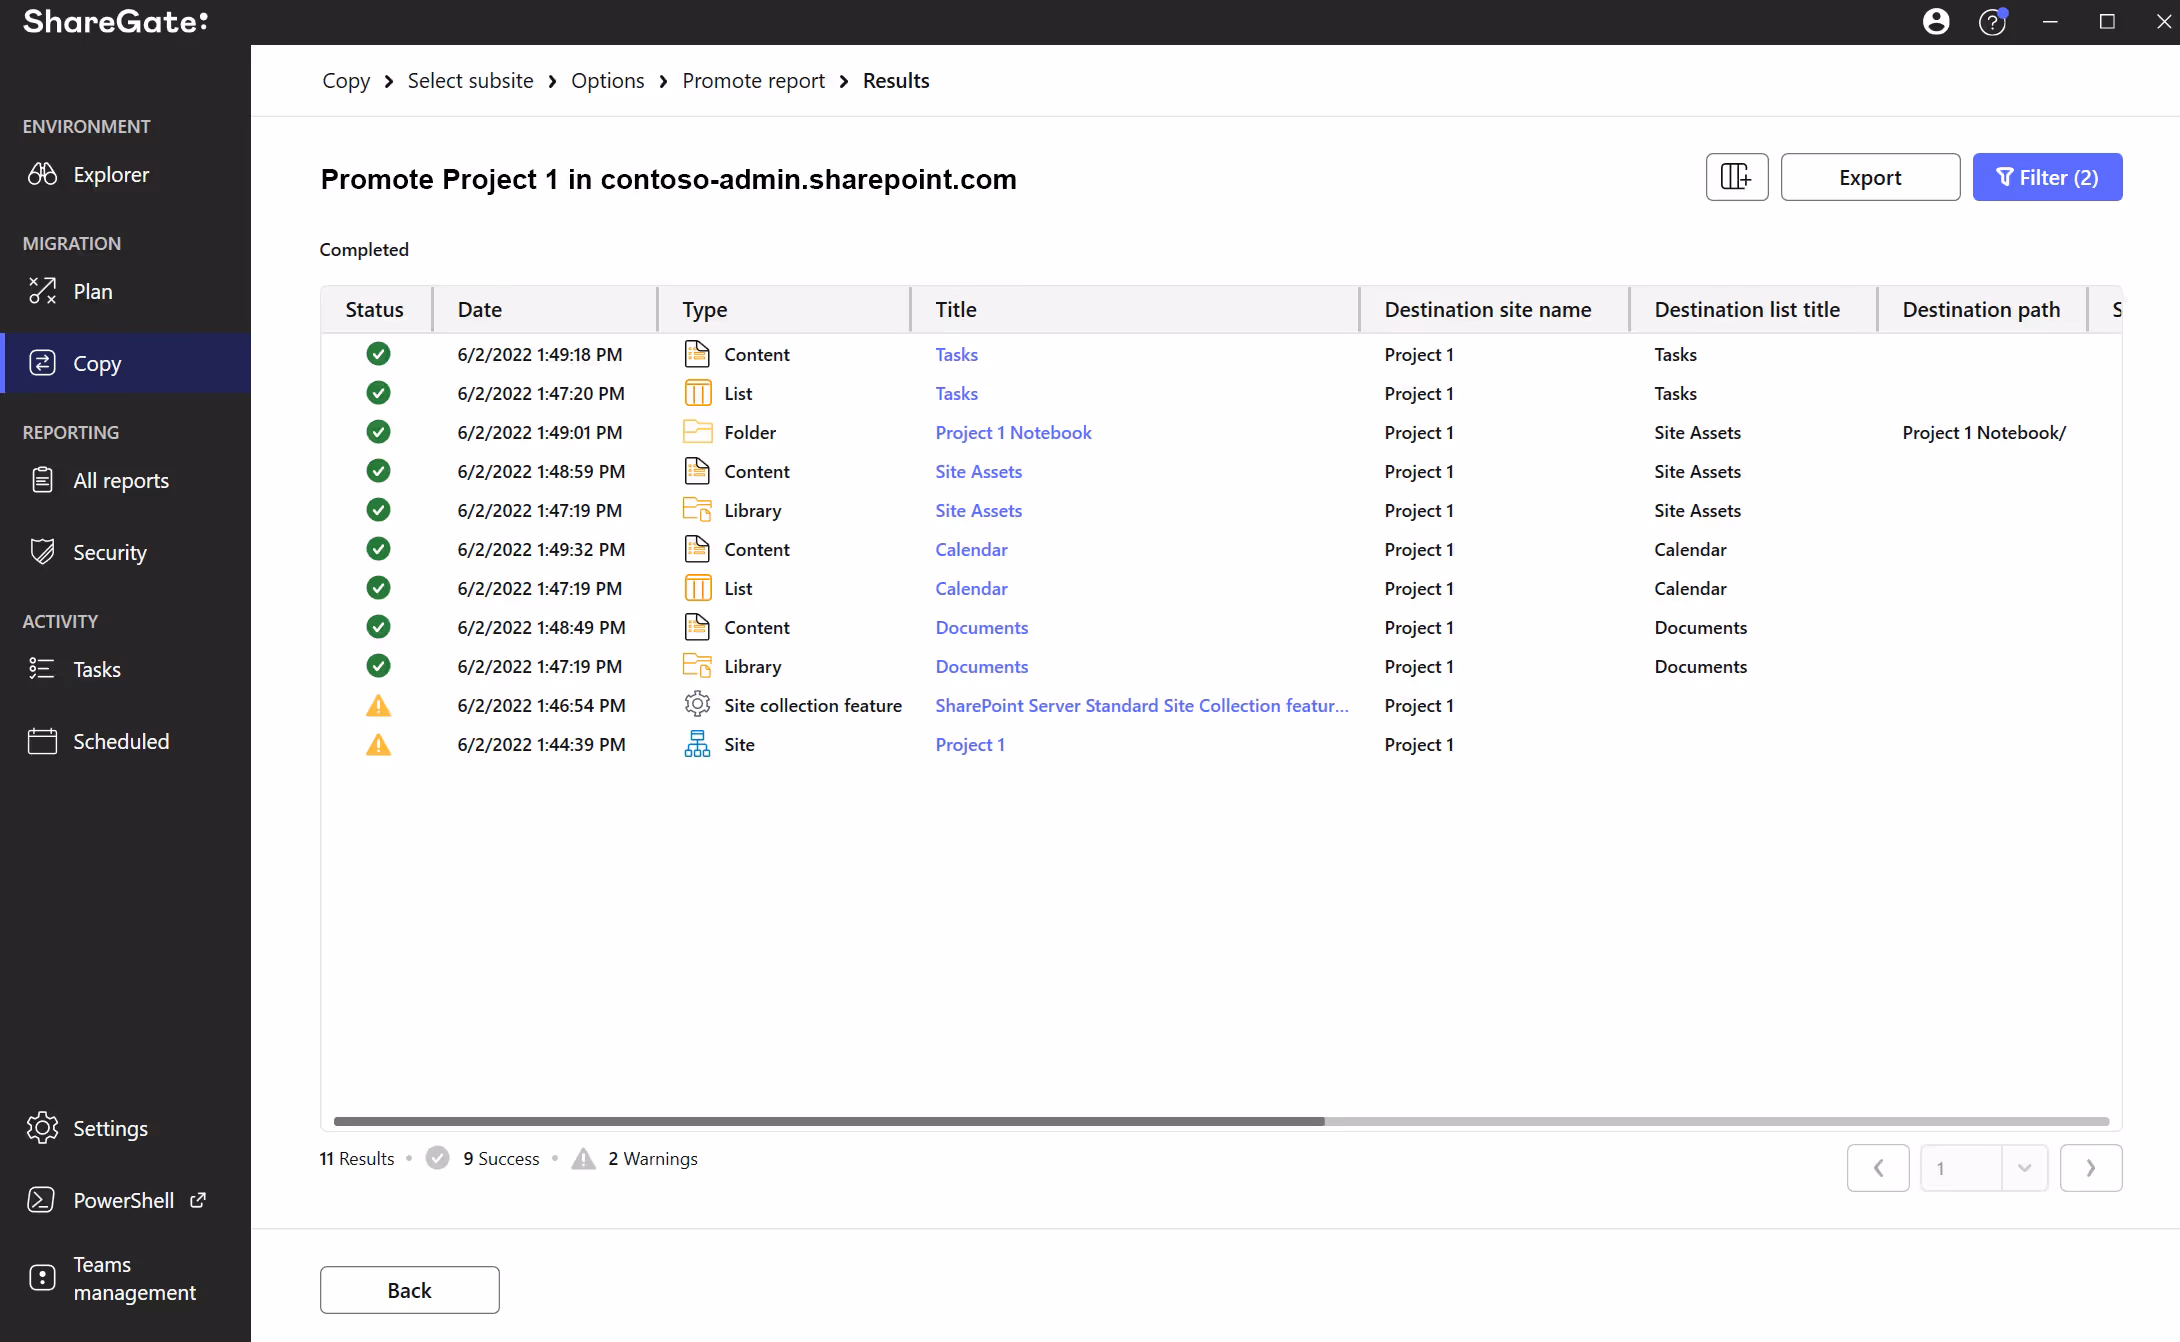
4. Track progress and results. Follow the progress with a detailed report of everything happening during your subsite promotion. Identify potential issues and implement solutions in real-time.
It’s all about restructuring, not recreating what you already have
The only thing in business you can count on is that things are going to change.
Adopting modern SharePoint’s flat infrastructure will transform the way your organization does work, and lay foundations flexible enough to adapt to the future—whatever it may bring.