How to bulk copy files from one SharePoint tenant to another without losing metadata
.svg)

.avif)
Microsoft 365 governance made simple
Fix what matters, faster, without complex rules or tool switching!
Free trial%20(1).avif)
Master Hacks: Migrate like a pro
Check out our video series to help you turn migration projects into masterpieces!
Table of contents
There are a couple of ways to preserve metadata when bulk copying file shares to SharePoint using Microsoft’s built-in and hands-on tools—and then there’s the ShareGate way.
Wondering how to move files from one SharePoint to another SharePoint while preserving metadata? Whether you need to migrate content between a SharePoint site, a SharePoint Online site, or a SharePoint document library, there are multiple solutions available. SharePoint offers two—the Multiple Upload function and the Windows Explorer view —and ShareGate has a quick and easy solution as well.
Let’s take a look at all your options more closely.
Option #1: Copy SharePoint files using OneDrive sync (formerly Windows Explorer view)
Once upon a time, the Windows Explorer view was a popular method for copying files between SharePoint document libraries. It lets you open your library in File Explorer and move files around like you would on your desktop. Easy, familiar—and very outdated.
With the retirement of Internet Explorer, this option has mostly faded into history. Instead, Microsoft now recommends using the OneDrive sync app for a similar experience—but with better performance and fewer headaches.
By syncing your SharePoint Online library to your device, you can access files directly through File Explorer, drag and drop content, and even work offline. Once changes sync back up, your files land in the correct destination site—at least in theory.
But before you go all-in on sync, know this: OneDrive sync is great for simple uploads but still struggles with complex migrations. For one, it doesn’t preserve permissions or version history—you’re just copying files, not the rich history of collaboration that lives with them. If your content includes sensitive data or regulatory requirements, that’s a problem.
Another pain point? Metadata. Required fields or specific SharePoint content types often trigger checkouts during upload, leaving IT with a messy cleanup job. There’s also no built-in way to automate folder structure recreation or ensure data lands where it should without manual effort.
And while Power Automate might help automate smaller tasks, it won’t solve for these larger migration gaps.
Bottom line: OneDrive sync can help with small moves, but when it comes to migrating large libraries, complex structures, or anything where permissions and version history matter? You’re better off using a migration tool built to handle the heavy lifting—saving your team from frustrating do-overs and late nights.
READ MORE: Learn how SharePoint metadata can help end users efficiently search and organize the content they need.
Option #2: Use SharePoint’s Multiple Upload function to bulk copy files
The Multiple Upload function in SharePoint Online is a step up from the Windows Explorer view—think of it as moving from dial-up to Wi-Fi. This method lets you select files directly from your computer and upload them into your SharePoint destination site while tracking progress in real-time. It’s simple, browser-based, and doesn’t require mapping network drives or opening up File Explorer windows.
Sounds pretty good, right? Well… sort of.
While the Multiple Upload feature works well for small batches, you’ll quickly hit a wall if you’re tackling a bulk migration. SharePoint limits uploads to 100 files at a time. You also can’t upload entire folders—you’ll need to recreate your folder structure manually in the destination library first. Only then can you upload files into the correct locations one tedious batch at a time. Not exactly a “set it and forget it” situation.
And here’s where it gets trickier: once your files land in SharePoint, permissions and version history don’t follow. You’re responsible for reconfiguring document-level permissions and rebuilding version history if that’s important for your team’s record-keeping. That’s a lot of manual work—and a big risk when you’re managing sensitive or collaborative content.
On top of that, document metadata properties—like required fields or content types—don’t carry over cleanly. Without proper automation or workflows (like with Power Automate), you’ll have to edit properties one file at a time, which is about as fun as it sounds.
At the end of the day, the Multiple Upload function is a decent option for quick, one-off uploads. But if you’re handling complex libraries or large amounts of content—especially when version history and permissions matter—it’s easy to see how this method turns into a time-consuming manual grind.
Option #3: Use ShareGate to bulk copy SharePoint files and preserve metadata
ShareGate’s migration tool streamlines the process of copying files or folders between SharePoint sites, ensuring metadata preservation and efficient document management.
During the copying process, ShareGate allows you to define a Property Template, automating the assignment of metadata to your files, thereby enhancing workflow efficiency.
And, ShareGate supports the migration of a large number of files simultaneously, allowing you to copy extensive datasets between SharePoint sites without issues.
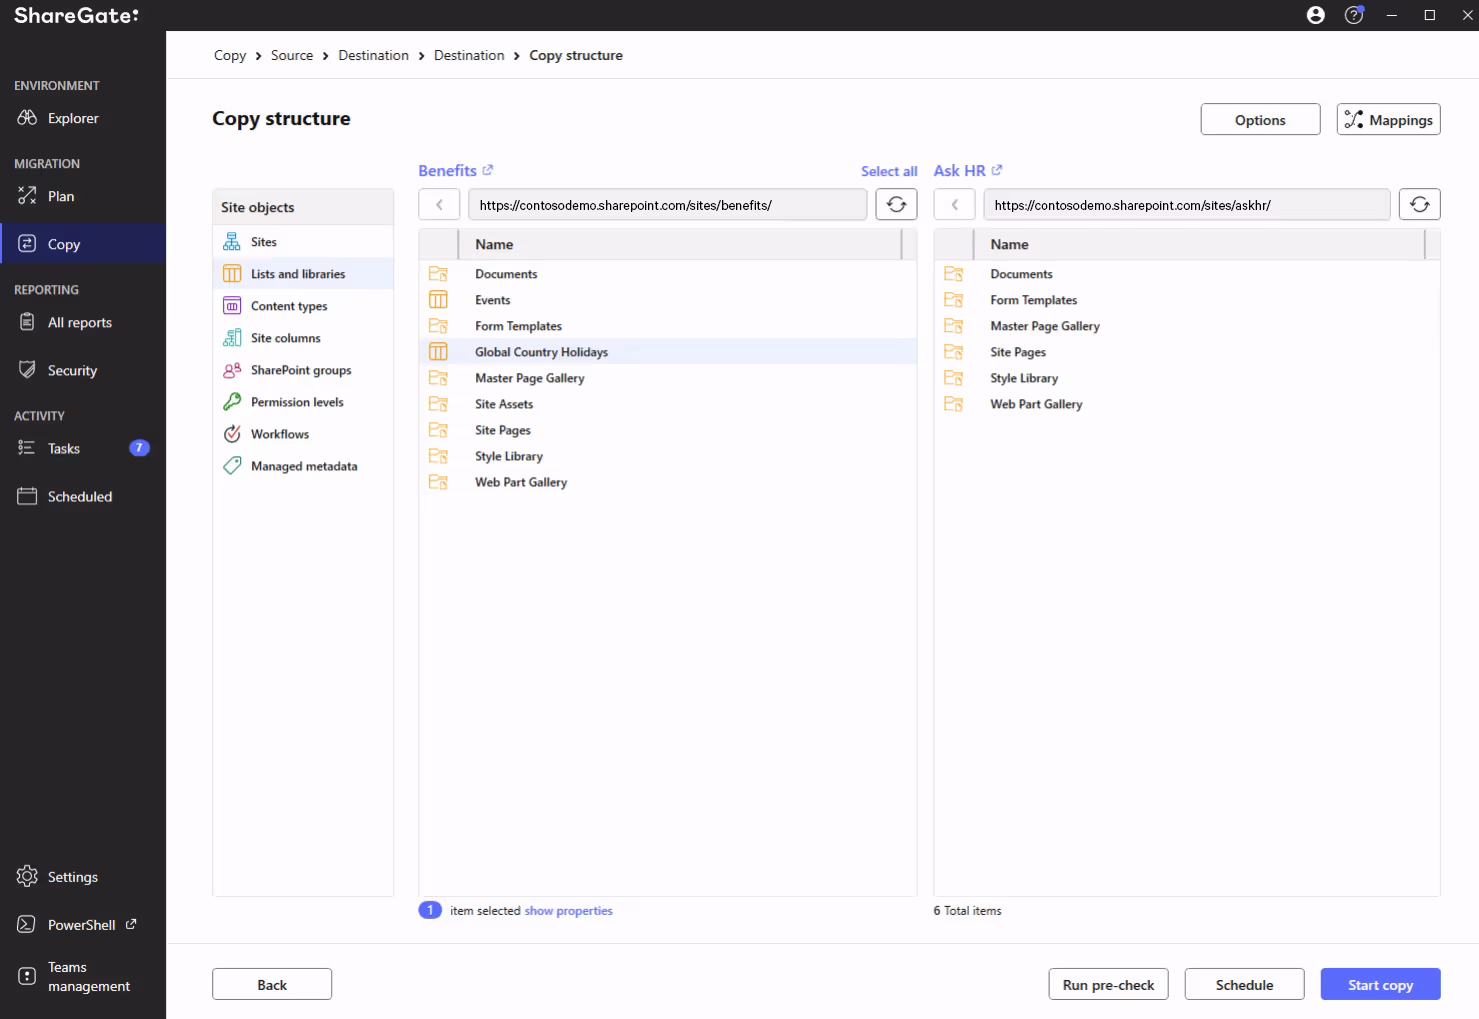
1) Access your file shares through ShareGate
ShareGate’s interface displays all your SharePoint folders in one place, facilitating the selection and preparation of files for bulk copying into the target SharePoint document library.
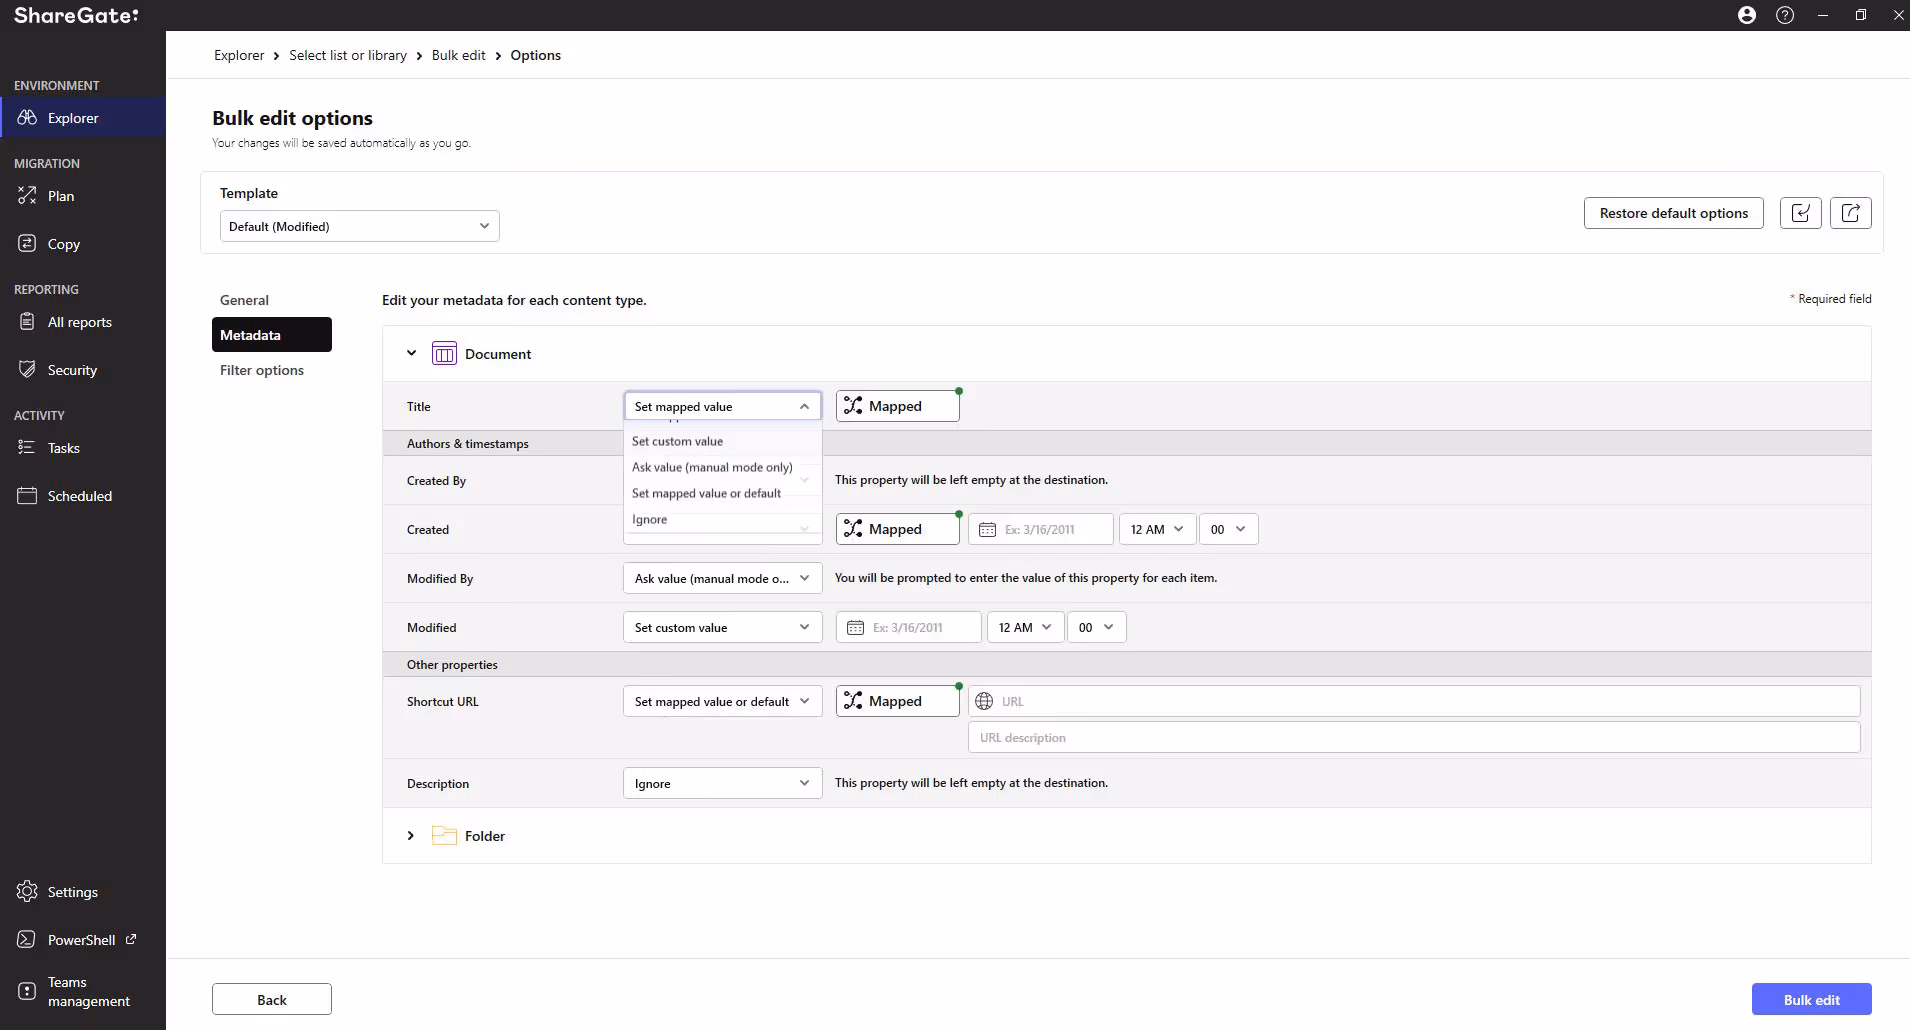
2) Define properties for your documents that you’d like to preserve during migration
Once you’ve selected the files to be copied to SharePoint, you can easily define the properties you’d like to carry over. This eliminates the tedious work of having to modify each document after it’s been copied. Once you’ve defined all your properties, you can simply click ‘Copy.’
3) Simple! All your documents are now in SharePoint, with their metadata preserved
ShareGate’s migration tool takes the heavy lifting out of your migration project. Intuitive features help you prepare, execute, and validate your move, whether you’re migrating an entire environment or just a few lists.
And our pre-built and custom reports can help you organize and secure your data after your migration.
.avif)
Want to see it for yourself? Book a call with one of our experts!
See for yourself with a free, full-featured ShareGate trial!