

.svg)

.avif)
The simplest way to migrate to Microsoft 365
Move your content efficiently with minimal downtime & maximum data fidelity!
Book demo%20(1).avif)
Master Hacks: Migrate like a pro
Check out our video series to help you turn migration projects into masterpieces!
Table of contents
Learn two different ways to migrate extensive document libraries to SharePoint Online.
People look to solutions such as SharePoint Online to work together by storing, organizing, and managing documents, files, and other content. Within your SharePoint Online environment, collaboration occurs in document libraries
Document libraries are a user-friendly interface that:
- Show everyone in the team where specific files are stored
- Provide additional information about those files
- Make it easier to share them and work with each other in real-time in a centralized environment
Other features—such as granular permissions that ensure only the right people have access to specific files and advanced search capabilities that categorize content through metadata and keywords—are a big advantage.
But what happens when many people work in these document libraries and you suddenly need to move everything to SharePoint Online? Tackling a large SharePoint document library migration involves meticulous planning to preserve document and version history, figuring out how to move large files, and metadata mapping in addition to migration downtime.
So, how do you pull this off effectively and without significant post-migration problems? We’ll walk you through two solutions to make the process seamless and ensure you’re not bogged down in planning this out. Let’s dive in!
Challenges of a large document library migration
When the stakes are high and the document library migration is large, a few challenges automatically spring up. These include:

Large files and size restrictions
When migrating a SharePoint environment where file sizes within the document libraries are large, you’re faced with the problem of size limitations. Beyond a certain file size, you won’t be able to move your data over to the target environment. This can be troublesome when these large files hold critical data that can’t be lost during migration. Another problem here is that transferring large files can lead to longer migration durations and issues related to network bandwidth and storage capacity.
Versioning and document history
The best part of working in SharePoint is version history and document versioning, allowing people to access previous versions of the same file. In many cases, this is a crucial part of the workflow. So when you’re migrating over to a new target environment, preserving version history and document versioning is essential but challenging at the same time. Here are two issues that can come up:
1. Migrating documents with embedded links or references to other documents or resources can have broken links/ references, impacting document functionality and disrupting user workflows.
2. Older documents in unsupported file formats may require conversion or updating before migration.
Metadata mapping and preservation
SharePoint Online metadata (such as tags, labels, and custom properties) allows users to locate, manage, organize, and categorize content within a document library and makes it easier for everyone to find what they’re looking for when they have to search for it at any point in time.
So when migrating documents to SharePoint Online, you’re also migrating metadata essential for maintaining data integrity and document organization. Some challenges that can arise include incorrect mapping of values, overwriting existing metadata, incompatible metadata fields if the source and target environment have different metadata fields and properties, etc.
Migration downtime
Finally, the biggest hurdle for everyone is the downtime faced across the organization during migration. This can obviously impact business operations and user productivity, as access to libraries must be temporarily suspended. Especially if there are any blindspots during the migration planning phase, it can increase downtime because any errors during migration will need to be sorted out.
It’s best to prepare users for the migration and provide clear communication on the process, potential disruptions, and changes in functionality after the migration. Also, before initiating the SharePoint document library data migration, it’s important to assess the existing data and identify large files that might pose challenges.
2 ways to migrate your large SharePoint document library (choosing the right migration tools)
You’ll want to enlist the help of a SharePoint migration tool to migrate your document libraries. Let’s look at these two solutions:
Microsoft’s SharePoint Migration Tool (SPMT)
The SharePoint Migration Tool SPMT is good for simple file migrations from file shares or a traditional file server. But there can be challenges when you’re migrating document libraries with document sets, lookups, or metadata, given the tool’s limited capabilities.
With Microsoft’s default tool, you’ll need to manually migrate document libraries to your target environment. Here’s a step-by-step guide on the process:
Step 1: Prepare the source and target environments
Here, install the SharePoint Migration Tool on your computer if you haven’t already, and make sure the necessary permissions are in place to access both the source and target.
Step 2: Migrate SharePoint Online document library content
Use the OneDrive sync app to sync your SharePoint Online document library to File Explorer. This makes it easier to review and organize files before migrating. Just keep in mind—syncing won’t capture permissions, metadata, or version history, so you’ll need a plan to preserve those.
Step 3: Archive SharePoint list to Excel
Archive your SharePoint list to Microsoft Excel through the following steps:
- Browse over to the desired SharePoint list
- On the list/library tab, click on ‘Export to Excel’
- Click on ‘Open’
- Choose where you want to put the data by checking under ‘Import Data’
- Next, the list will be exported to Excel
- Save the file to your local directory and follow the same process for all other SharePoint lists
Step 4: Provide source and destination details
After entering the source environment details, provide information on the target document library where the data will be migrated over to.
Step 5: Configure migration settings
Configure your migration settings, including permissions, metadata, and versions, among other options.
Step 6: Add the document library
Select the document library you want to migrate from the list of available libraries in the source SharePoint site.
Step 7: Verify and start the migration
Finally, it’s time to verify and start the migration process. Before the actual migration starts, the SharePoint Migration Tool will analyze the source document library to check for any potential issues or conflicts at each endpoint. If something comes up, review the analysis report and address any warnings or errors. Once everything is sorted, click ’Migrate’ to start the migration process!
Using ShareGate to migrate large SharePoint document libraries
Using ShareGate to automate the migration of document libraries and objects is an easy solution built to simplify complex migrations, with features allowing you to bulk-manage and migrate customized metadata. Plus, we always have more features coming out regularly (driven by user feedback).
Is the migration too large and complex? Lean on ShareGate. The tool has added functionality to tackle the limitations of Microsoft’s default migration tool. Here’s a step-by-step guide on how to migrate document libraries with this method:
Step 1: Confirm admin permissions
Start by checking if you have the necessary administrative permissions to perform a migration because this is a requirement with ShareGate. Check here for info about administrative mode.
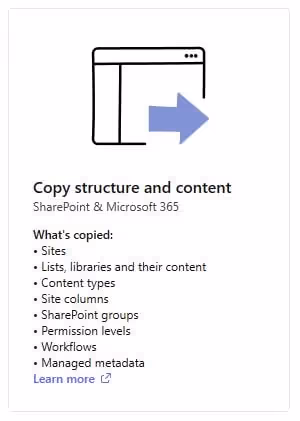
Step 2: Copy content
Next, select the document library content you want to migrate. To do this, select ‘Copy‘ from the menu and then select ‘Copy structure and content.’ Check out our documentation for more information about how to do this in ShareGate.
Step 3: Connect to SharePoint and Microsoft 365
Next, you’ll be prompted to add your source credentials and connect to your source environment. To connect to SharePoint and Microsoft 365, you’ll need to establish a connection by choosing the ‘explorer’ or ‘copy’ option from the sidebar menu. Once done, you’ll need to enter the site address and complete authentication to ensure secure access. Check here for more information about how to pull this off.
Step 4: Add destination credentials
Remember that the ShareGate migration will require you to enter your credentials at both the source and destination. So, the next step is to add your destination credentials to verify migration success within the target environment. During the entire process, no information is stored on ShareGate servers, and the process happens locally on your machine. Check out our documentation for more information about adding destination credentials in ShareGate.
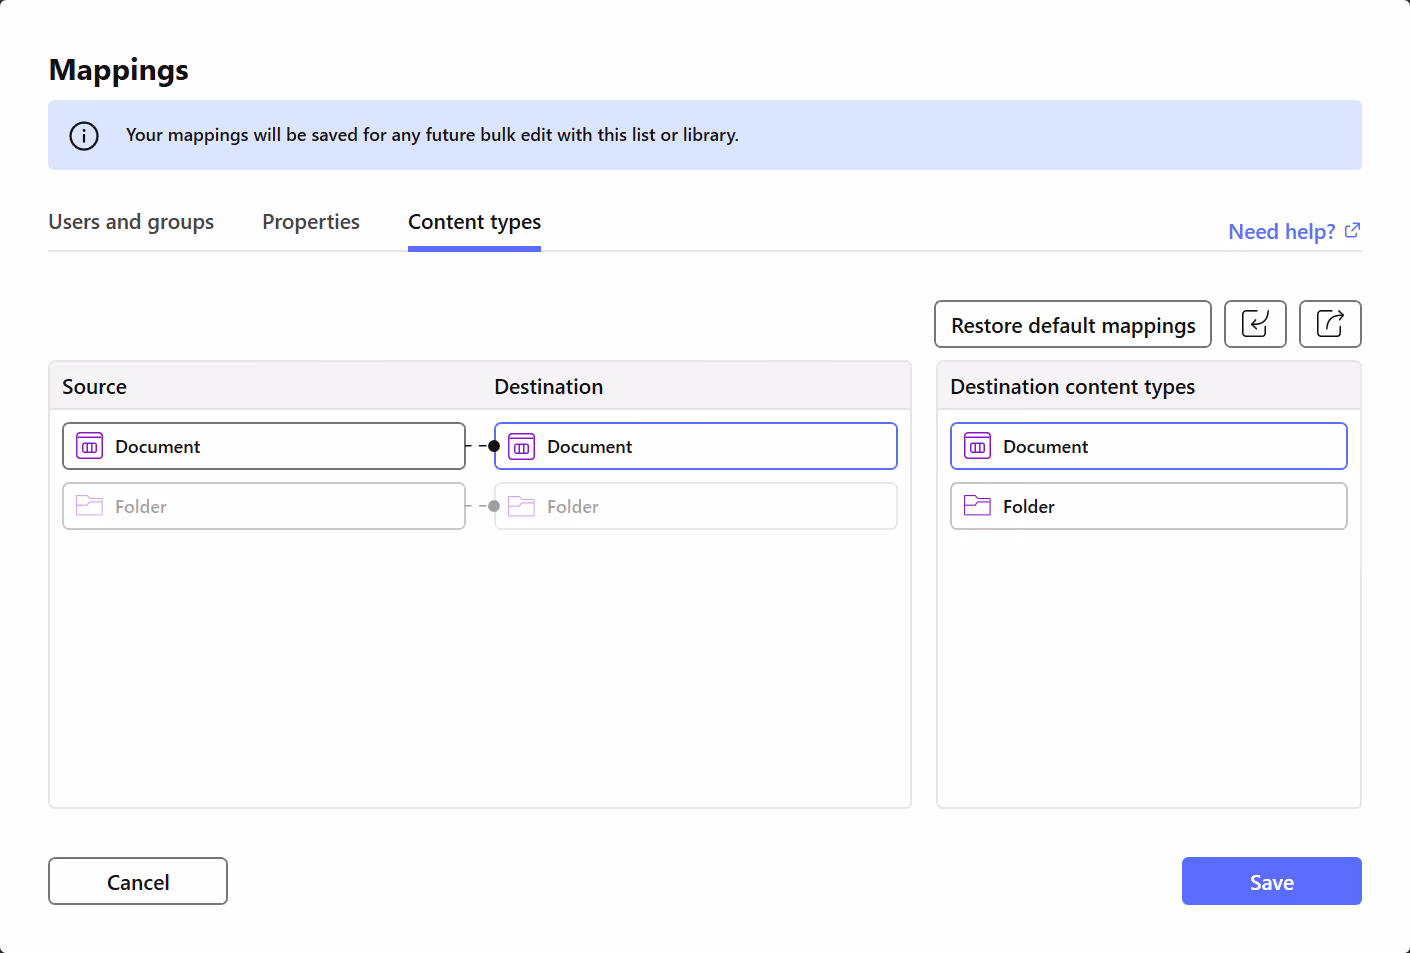
Step 5: Select the lists and libraries from the source
Next, when you’re connected to both the source and destination, select the lists and libraries from the source that need to be moved. With ShareGate, you can customize your copy options according to your migration and map content types when migrating your content.
Step 6: Drag and drop them into the destination
Finally, complete the migration by dragging and dropping the content into the destination.
Best practices for after migrating your document library
After migrating your document libraries, there’s some work to be done.
First, because the size of your migration is so large, it’s best to have a systematic approach to verify whether all content (including metadata, permissions, versions, document history, etc.) has been successfully migrated over. If you used the SPMT, you could run PowerShell scripts. If you used ShareGate, a migration report is automatically generated as your migration processes, and you can access it anytime by selecting ‘Tasks‘ from the sidebar and clicking on it.
Next, check to see how your SharePoint environment is performing post-migration using tools like SharePoint Health Analyzer or Microsoft 365 Admin Center reports. Because you had a lot of document libraries with large file sizes copied over to your new environment, it might start seeing issues like slow load times and search performance drops.
This can be fixed by breaking down large libraries, turning on indexing, or utilizing SharePoint’s Content Organizer feature to distribute documents across multiple libraries. Use a SharePoint migration tool with stellar reporting for the best results
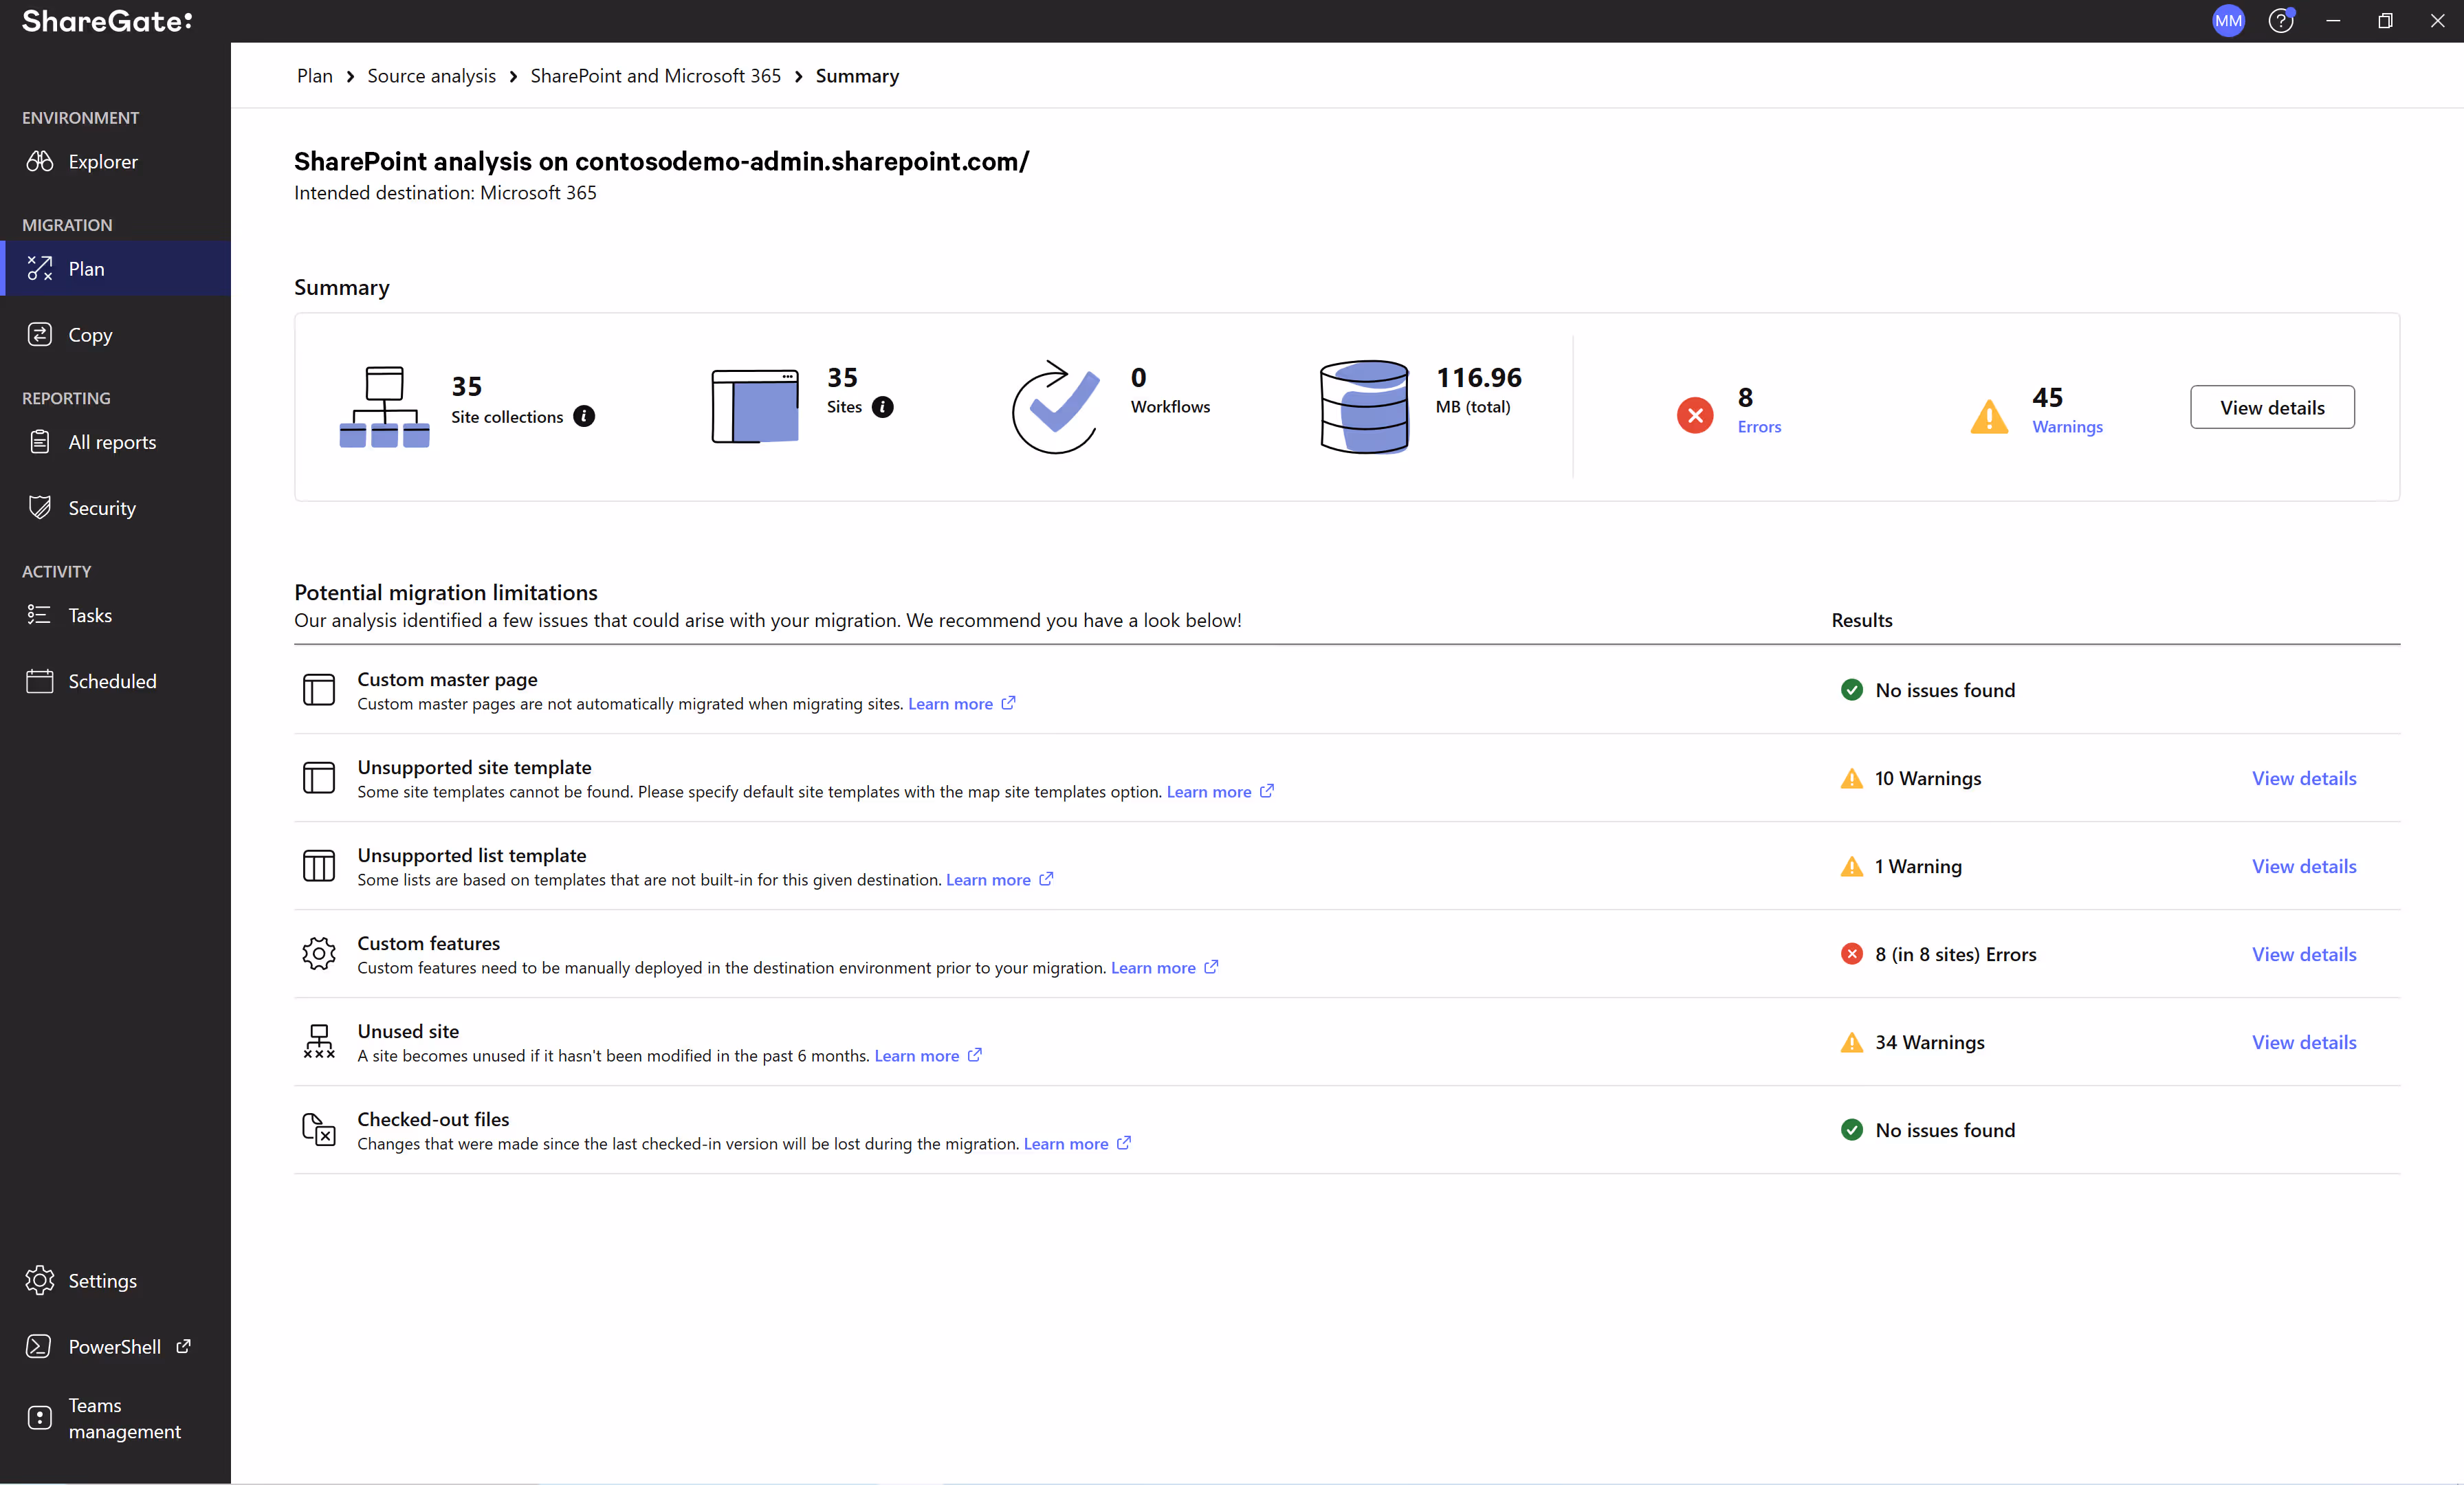
When companies face large migrations in SharePoint, ShareGate provides detailed reports to keep you ahead of the curve, from pre- to post-migration.
Take Avvenire—a company that shrunk its large SharePoint migration time by 15% using ShareGate’s stellar reporting features. Detailed reports like our source analysis helped them identify issues like unused content and orphaned user accounts and address them quickly before migrating to save them time.
Use a SharePoint migration tool with stellar reporting for the best results
When companies face large migrations in SharePoint, ShareGate provides detailed reports to keep you ahead of the curve, from pre- to post-migration.
Take Avvenire—a company that shrunk its large SharePoint migration time by 15% using ShareGate’s stellar reporting features. Detailed reports like Source analysis helped them identify issues like unused content and orphaned user accounts and address them quickly before migration to save them time.
Migrate smarter, not harder
For migrations where the size of the document libraries is not too big, IT admins can make do with the Microsoft default SharePoint migration tool. But, when tackling a large document library migration, cracks start to appear with the normal way of migrating. It’ll be tough to manage file size restrictions, metadata mapping, and preservation, and minimize downtime.
The solution here is opting for a tool like ShareGate that’s built to handle large SharePoint library migrations and can reduce costs, time, and resources required. From pre- to post-migration, you can stay on top of everything with an eagle’s eye view of your SharePoint environment. Take ShareGate out for a test drive and see for yourself!
Also, check out our migration checklist, where we break down all the steps you should consider during your SharePoint migration.
FAQs on SharePoint document library migrations
Here are some FAQs about migrating document libraries in SharePoint.
How can I ensure data integrity and prevent loss during the SharePoint Document Library migration?
Create a backup and run a test migration before proceeding with the actual migration to minimize the risk of data loss. Additionally, havea rollback plan to revert to the previous state for both the source and destination document library.
Are there any specific permissions required for executing a SharePoint Document Library migration?
Yes, you need specific permissions when executing a SharePoint document library migration. For example, you’ll need specific permission level access to copy content from the source environment and a different permission level access to migrate the content to the target environment.
How can I map users and permissions from the source to the destination during SharePoint Document Library migration?
There are two ways to tackle this. With the first, you use Microsoft’s default SharePoint migration tool to create a user mapping file for mapping users and permissions. However, check here to understand the limitations of this method. With the second, you use ShareGate for user and permission mapping, which is generally a more efficient and easier way.
How do I handle versioning during SharePoint Document Library migration? Do all versions of a document get migrated?
During your SharePoint document library migration, you can migrate versions of your document over to your target environment using a tool like ShareGate that supports this. Check here for more information about migrating document versions with ShareGate to SharePoint Online.
Can I schedule the migration process during off-peak hours to minimize disruption to users, and if so, how can this be done?
Yes, you can! This is actually recommended so you can minimize disruption for users. You can do this with Microsoft’s default tool through task scheduling in SPMT’s migration manager. Alternatively, you can also schedule a document library migration if you’re using the ShareGate migration tool.
Can I migrate a SharePoint Document Library to a different version of SharePoint or a different tenant, and what are the steps to do so?
Yes, this is possible. In the pre-migration stage, plan your migration and inventory existing content. Once you identify what needs to be migrated versus what doesn’t, schedule a migration and prep your users. Finally, migrate and rigorously test and validate your migration to ensure nothing gets left behind. You can do this by leveraging ShareGate’s automated reporting feature.
What is the optimal way to back up the SharePoint Document Library before initiating the migration?
Start by leveraging the SharePoint Online built-in backup and restore functionality, which creates a snapshot of the entire site collection, including document libraries. Then, export the back to a local storage for safety. Additionally, you can also use a third-party solution like ShareGate to leverage additional features like incremental backups and versioning.


.avif)


