.svg)

.avif)
The simplest way to migrate to Microsoft 365
Move your content efficiently with minimal downtime & maximum data fidelity!
Book demo%20(1).avif)
Master Hacks: Migrate like a pro
Check out our video series to help you turn migration projects into masterpieces!
Table of contents
Wondering how to transfer Microsoft 365 content after a merger or acquisition? We explain how ShareGate can simplify your next tenant-to-tenant migration.
You’ve successfully made the move to Microsoft 365 when one day, you discover your company is merging domains after a recent acquisition. Tenant migrations can be complex, especially when using Microsoft native tools, but ShareGate simplifies the process.
In this article, you’ll learn how to use ShareGate’s handy migration tool to facilitate your tenant-to-tenant migration and minimize disruption.
Preparing for your Microsoft 365 tenant-to-tenant migration
Like any other migration, comprehensive preparation is your first step.
These features in the ShareGate app’s Plan section help you get the info you need to plan your migration and manage your environment without building scripts:
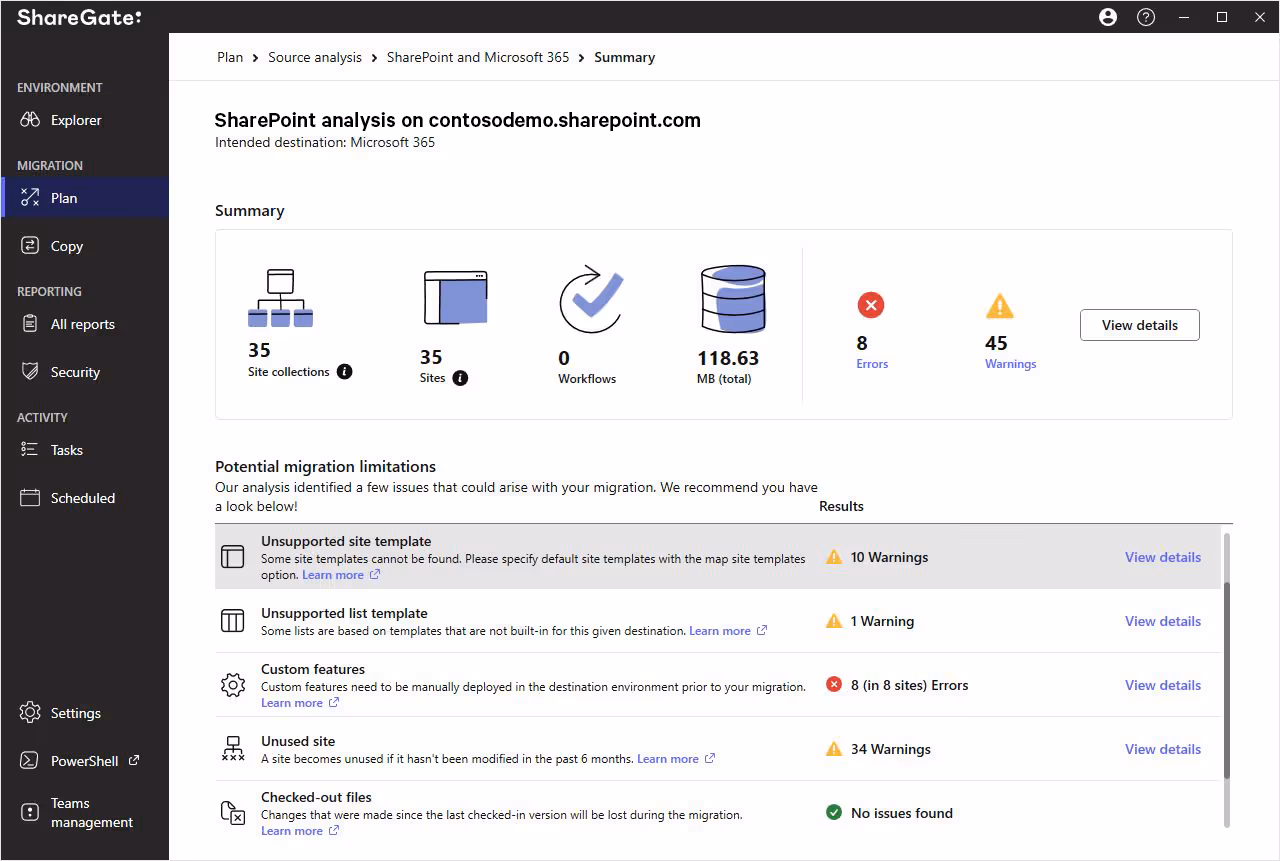
- Source analysis report: Assess your environment’s inventory and usage to determine what migrates.
- Permissions matrix report: Understand which users and groups can access what.
Leverage these other built-in reports when creating your Microsoft 365 migration checklist:
- Site report: View information about sites in your source environment. (e.g. owner, size, date created, date last modified.)
- Site collection report: Get insights about your top-level site (e.g. site collection admin, size, date created, data last modified).
- Checked-out documents report: Leave no data behind by checking in all checked-out files and files with no checked-in versions before copying them.
- Sites with custom permissions report: View sites that don’t inherit permissions from their parent.
- Unused site report: Determine unused or abandoned sites to exclude from your migration.
- Documents with migration limitations report: Discover documents that could hinder your Microsoft 365 migration.
- Workflow report: View list and site workflows.
- Lists with workflows report: Avoid losing progress while you’re copying a list.
Once you’re ready to set up your tenant migration, visit the Copy section in the ShareGate app:
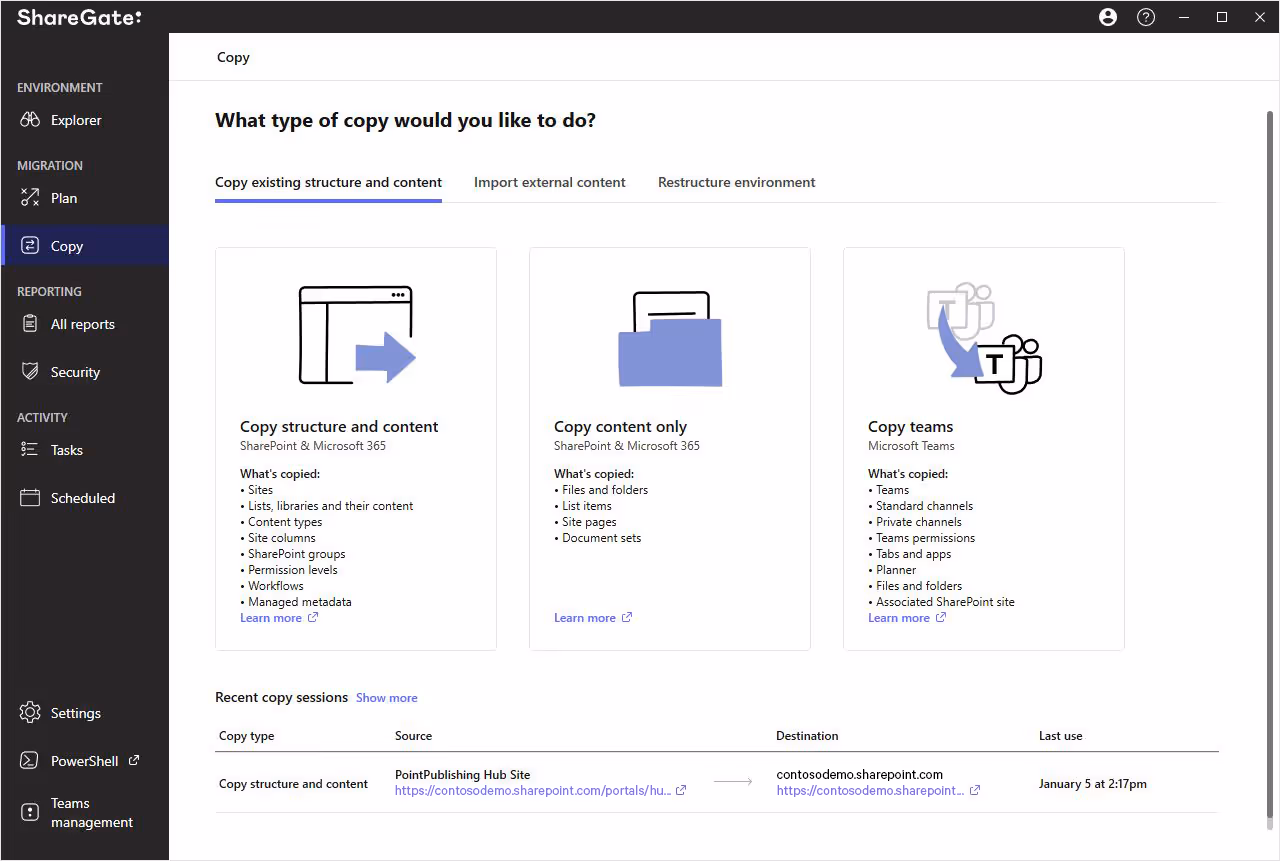
Select your migration type and follow the prompts to connect to your source and destination environments…
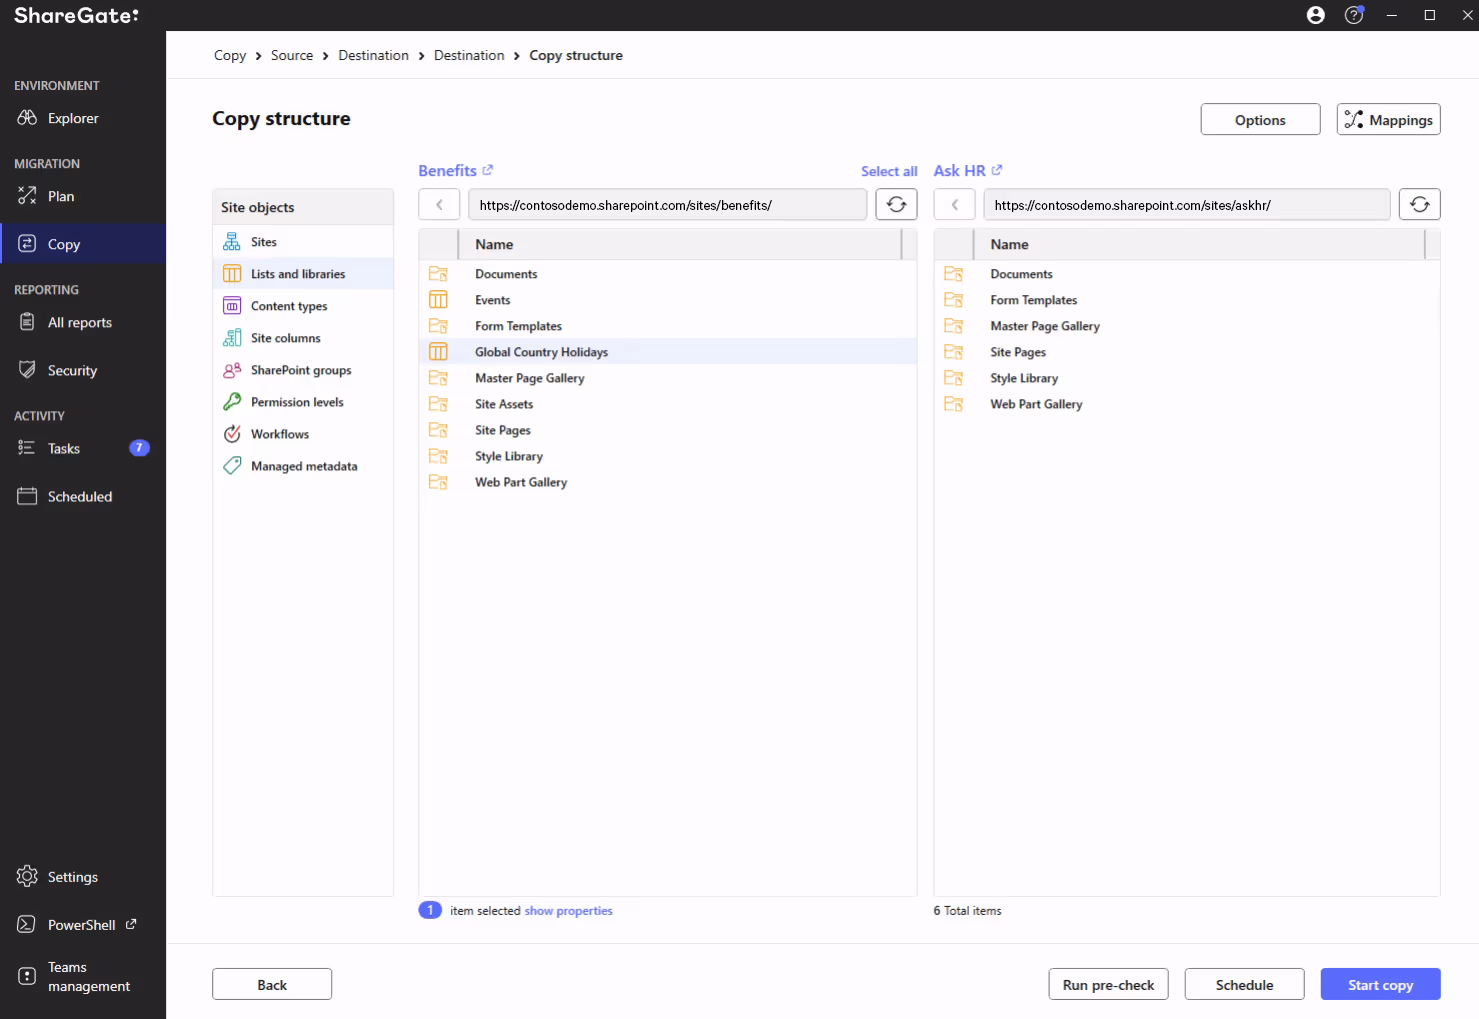
… then click Run pre-check to simulate your migration and address potential issues without impacting your live environment.
What to expect during your Microsoft 365 tenant-to-tenant migration
ShareGate goes beyond seamlessly handling a SharePoint to SharePoint migration to doing the same for other Microsoft 365 applications too!
Learn SharePoint Online: Best practices, tips, and tricks.
OneDrive for Business tenant migration
ShareGate can help you migrate between OneDrive for Business tenants:
- Follow this manual to create a CSV guide for your migration.
- Copy and paste the script found in this “How-To” for OneDrive migrations in your desired PowerShell application.
Note that:
- This script uses Copy & Replace by default. Use the New-CopySettings command to run an incremental migration.
- ShareGate stores its automatically generated migration reports in Tasks. You can also export the reports in your script with Export-Report.
- Schedule your migration using PowerShell off-hours to maximize performance.
- If migrating large data volumes, create multiple CSVs to run the migration in smaller batches.
Microsoft Teams tenant migration

Easily preserve your critical Teams resources during a Teams tenant-to-tenant migration by using ShareGate. We also migrate private channels!
To copy teams and their channels as part of a Microsoft Teams migration:
- Click Copy in the left-hand menu, then select Copy teams.
- Decide whether to copy an entire team(s) with all channels or only specific channels.
- Follow the prompts to connect to your source and destination tenants.
- Select Copy as a new team to migrate a team and channels as a new team to the destination.
- Or select Copy channels in an existing team to migrate your channels to a team in the destination.
Get more details in this detailed walkthrough of the Copy teams feature.
Exchange Online mailbox migration
Migrate mailboxes right out of the box with our tenant-to-tenant mailbox migration functionality! ShareGate includes Exchange Online migrations in our Migrate Pro and Migrate Enterprise plans.
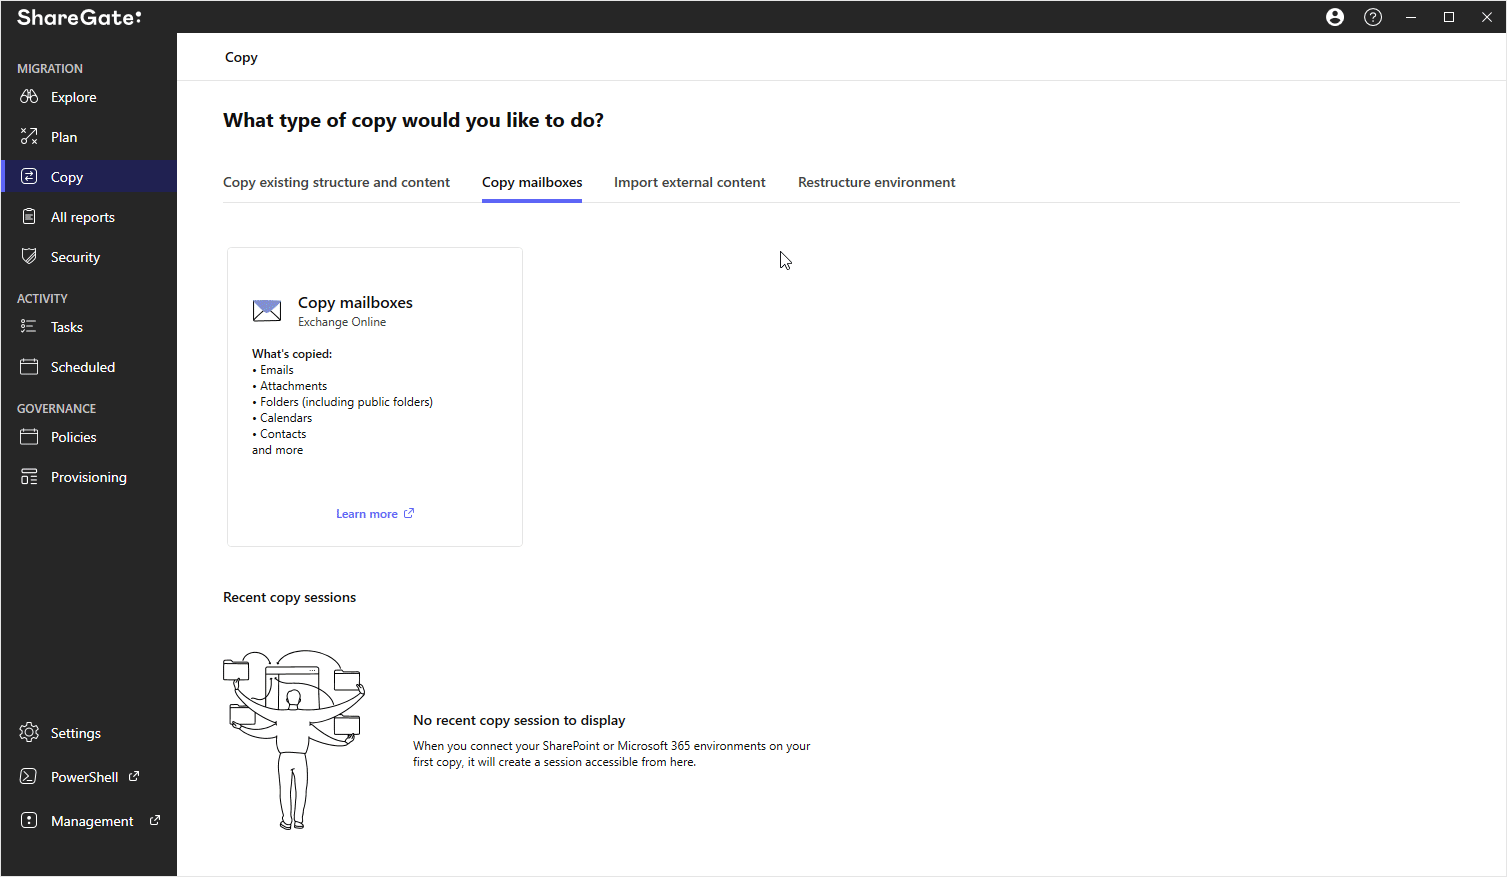
Read on: Get all the details about ShareGate's mailbox migration feature.
What about speed?
Your speed during a tenant mailbox migration or other type of migration isn’t entirely within your control. You may encounter throttling issues as Microsoft works to preserve platform stability.
Luckily, ShareGate Migrate lets you deploy migration tasks simultaneously across multiple machines, reducing throttling and accelerating data transfer for a faster tenant-to-tenant migration.
Remember, for a faster tenant migration with ShareGate:
- Consent to the Azure application in ShareGate to curtails requests and throttling.
- Use ShareGate’s Insane Mode to leverage Microsoft's Migration API and increase migration speed.
- Migrate during off hours using ShareGate’s scheduling feature.
- Ensure optimal bandwidth for speedier data transfer!
- Run a post-migration report to confirm a complete transfer.
ShareGate is an end-to-end, out-of-the-box migration and governance solution for Microsoft 365. With a single trusted tool, you can simplify and accelerate your migration project from day one, from planning to optimization to ongoing governance and M365 adoption.


.avif)