.svg)

.avif)
Put your Microsoft Teams management on auto-pilot
We identify potential issues so you can course-correct them before they escalate!
Free trial%20(1).avif)
Master Hacks: Migrate like a pro
Check out our video series to help you turn migration projects into masterpieces!
Table of contents
As a Microsoft Teams admin, you need to analyze team activity and performance using reports. But, not all reports are available in the Microsoft 365 admin center. Learn how to configure PowerShell reporting to get custom reports for Microsoft 365 and Teams.
Microsoft 365, particularly Teams, has become an integral part of the modern workplace, offering unified communications for businesses.
That's why reporting on your Teams is important to ensure employee productivity by identifying any disorganized team patterns. But Microsoft 365's built-in reports for Teams present limited information.
PowerShell reporting enables Teams admins to generate custom reports and understand employee activity. You can track meeting times, participants, team owners, team channels, and more on a daily basis without navigating to multiple admin centers.
In this article, we'll cover various use cases of PowerShell reporting and help you to understand how PowerShell works with your Microsoft 365 tenant. We'll also take a look at how reports are scheduled in Microsoft 365 using the admin center. And, we’ll discuss how PowerShell reporting adds value to Microsoft Teams.
Let's get started!
What is PowerShell used for?
The Microsoft 365 admin center can manage various Microsoft 365 accounts, licenses, and services, including Teams, SharePoint Online, and Exchange Online. However, PowerShell offers additional capabilities that allow more flexibility to admins.
Built on top of .NET Common Language Runtime (CLR), PowerShell for Microsoft 365 is a command-line scripting shell that makes information accessible that's otherwise not available in the admin center.
Let’s look at some of the additional capabilities offered by PowerShell:
- Display additional information: PowerShell can display additional information about Microsoft 365 accounts, groups, licenses, mailboxes, and sites. For instance, PowerShell can display the name and corresponding location of all users using a single PowerShell command (“cmdlets”). In contrast, an admin would have to open details for each user account to view its location information using the Microsoft 365 admin center. Additionally, admins can sort or group display results using command-line scripting in PowerShell.
- Enable PowerShell reporting across server products: The Microsoft 365 admin center offers a good reporting tool for each service. However, PowerShell lets admins choose information from multiple services like Skype for Business Online or Exchange mailbox to build reports across products. Admins can write scripts (compilation of multiple PowerShell commands) to enable PowerShell reporting across services.
- Configure additional management tasks: Microsoft 365 services have many configuration options that are not accessible via the admin center. These options can be configured through PowerShell, enabling admins to perform administrative tasks efficiently. For instance, admins can change the custom meeting invitation settings in the Skype for Business Online service. Using PowerShell cmdlets, they can stop anonymous users from entering the meeting and disallow attendees to record meetings or become presenters.
- Perform bulk operations: The Microsoft 365 admin center can perform individual operations easily. Like disabling a single-user account. In the case of multiple accounts, the admin would have to select each account individually to disable it. In contrast, PowerShell can perform such bulk operations quickly using commands. For instance, disabling multiple accounts, changing the prefixes of thousands of telephone numbers, adding or removing a particular user account from all SharePoint sites, etc.
- Advanced search and filtering data: PowerShell powers advanced search and filtering capabilities for various Microsoft 365 services that are not applicable using the admin center. For instance, admins can filter multiple Exchange Online mailboxes via combined filtering.
- Perform wildcard search: PowerShell for Microsoft 365 enables wildcard search capabilities. For instance, admins can search a user account based on a partial name using the PowerShell cmdlet. This is useful in cases where accurate information is not available. Wildcards can show all relevant information to admins.
- Print and save data: Using PowerShell commands, users can export or save information in their desired format, like CSV, XML, or HTML.
- Cloud management: PowerShell is not just limited to Microsoft 365 admins. CloudOps engineers can also use PowerShell to retrieve, update, and deploy cloud resources.
- CI/CD: Besides automating tasks for Windows, PowerShell can be used by DevOps engineers to build robust Continuous Integration/Continuous Deployment (CI/CD) workflows.
- Automate tasks: With PowerShell command-line interface, admins can create a new user account for Active Directory and Exchange mailboxes.
Getting started with PowerShell
PowerShell is installed by default in all the latest versions of Windows operating systems. If installed correctly, PowerShell is accessible via the Windows search bar. Open it using Windows administrator access to enjoy full system access.
If, however, PowerShell is not available in your Windows system, install the latest PowerShell released by Microsoft. Additionally, if you are running an older version of PowerShell, update the existing Windows Powershell version.
Not quite sure about your existing PowerShell version? You can open PowerShell and execute a cmdlet with the following PowerShell variable: $PSVersionTable. It'll display information such as the PowerShell version, build version, CLR version, and more.
Using PowerShell, you can either execute individual commands or run scripts. PowerShell commands are “Verb-Noun” pairs. For instance, the Get-AzureADUser cmdlet fetches user information from Azure Active Directory. PowerShell scripts are files containing multiple cmdlets written and executed in a particular sequence with a PS1 file extension. They're used to automate tasks and reports. These scripts enable advanced PowerShell reporting capabilities.
Now that we’ve discussed PowerShell basics, let’s look into how PowerShell connects with a Microsoft 365 tenant.
How to connect your Microsoft 365 tenant to PowerShell
Microsoft 365 tenants offer a specific set of services and configurations for organizations.
A tenant includes users, groups, licenses, and various Microsoft services. The first step is to set up your Microsoft 365 tenant. It involves planning for subscriptions, third-party certificates, licenses, and integration with Azure Active Directory services.
Next, deploy the tenant to configure the organization’s DNS domains and identity management structure, including multi-factor authentication, conditional access, groups, and password protection protocols.
Once the Microsoft 365 tenant is up, users can connect Microsoft 365 services with PowerShell. To do that, install one of the two PowerShell modules:
- Azure Active Directory PowerShell for Graph (AzureAD)
- Microsoft Azure Active Directory Module for Windows PowerShell (Msol)
Users can install both modules to use all PowerShell features. However, Graph PowerShell SDK will replace the Directory Module in the future. PowerShell version 7 and above don’t support Directory Module.
Here are the steps to connect Microsoft 365 services for both modules.
Connect your Microsoft 365 tenant using the AzureAD module
In this module, the PowerShell cmdlets contain “AzureAD” in their names. Use the following steps for connection:
- Step 1: Open Windows PowerShell and run the command Install-Module -Name AzureAD
- Step 2: Answer Yes to confirm (if prompted) module installation from PowerShell Gallery.
- Step 3: Import the PowerShell for Graph module using the command Import-Module AzureAD
- Step 4: Connect with your Microsoft 365 subscription (for instance, Office 365 Worldwide (+GCC)) using the command Connect-AzureAD
Connect your Microsoft 365 tenant using the Msol module
In this module, the PowerShell cmdlets contain “Msol” in their names. Use the following steps for connection:
- Step 1: Open Windows PowerShell and run the command Install-Module MSOnline
- Step 2: Answer Yes to confirm (if prompted) NuGet provider installation and MSOnline module installation from PowerShell Gallery.
- Step 3: Connect with your Microsoft 365 subscription (for instance, Office 365 Worldwide (+GCC)) using the command Connect-MsolService
If you don't get an error message upon completing this process, then you've connected successfully! For more details, refer to the Microsoft 365 and PowerShell connection guide. The following section will discuss how PowerShell can automatically schedule reports in Microsoft 365.
How to enable and automate PowerShell reporting in Microsoft 365
Microsoft 365 services such as SharePoint and OneDrive offer an admin center through which you can access different built-in reports. You can go to the admin center, access the Reports dashboard, view a built-in report, and schedule it to send to an address at a particular time. Reports are available for up to 180 days. But sometimes you need more information.
PowerShell reporting enables you to curate information related to user accounts and licenses, SharePoint sites, Exchange mailboxes, and more. To do that, a common approach is to build a PowerShell script that fetches information from all relevant Microsoft 365 services and displays it on the command-line interface to save the report in the desired format.
To build a custom report, install and connect the relevant module using PowerShell to automate relevant administrative tasks and reports. For instance, install the Exchange PowerShell module for Exchange mailbox management and the Microsoft Teams PowerShell module for Teams management. Using relevant cmdlets, admins can write scripts to access information available in the organization’s Microsoft 365 tenant services. A single script can maintain multiple reports as well.
But PowerShell scripts are not always the most efficient solution. They require a certain level of expertise in the PowerShell scripting language.
In the next section, we’ll explore an alternate solution to PowerShell using a third-party tool like ShareGate's reporting for SharePoint and Microsoft Teams.
Microsoft Teams reports: Using PowerShell scripts–or not
The Microsoft 365 admin center has the following three Microsoft Teams activity reports:
- Teams user activity
- Teams device usage
- Teams usage activity
Though these built-in Microsoft Teams reports deliver high-value information, admins often require more information to evaluate team productivity. You'll need to manage and monitor all teams, members, and channels simultaneously to identify any issues that may result in any changes to your team’s performance. You can manage Teams using PowerShell cmdlets, but that’s not the most efficient solution.
Skip PowerShell with ShareGate
ShareGate gives you various pre-built reports for Teams and SharePoint without the need to write PowerShell scripts. It also allows you to build custom reports quickly and flags important Microsoft Teams events and activities that require your attention so you can course-correct as needed.
ShareGate’s reporting services follow the best practices for Teams and SharePoint administration while offering central management for all reports.
Check it out: The most popular reports our customers are using to manage Microsoft 365
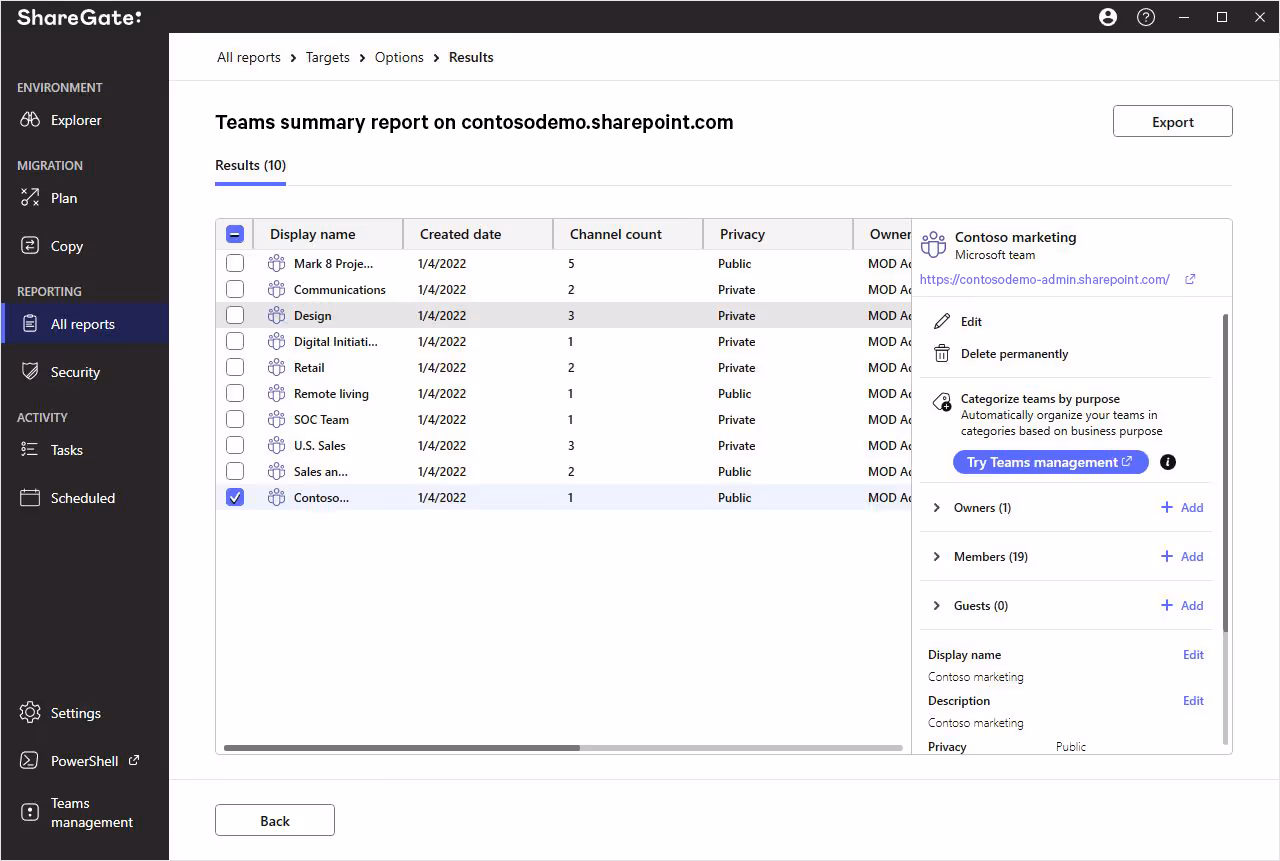
For Microsoft Teams, ShareGate offers reporting and automation tools to monitor each team in your organization. Using the Teams dashboard, you can see:
- newly created teams
- each team’s owner
- inactive teams
- orphaned teams
- teams sensitivity level
- membership details
- past activity details
- and more!
Windows 10 and Windows 11 devices have more than 1.4 billion active users, which means Microsoft 365 will see more growth in the coming years. If you want to automate PowerShell reporting without writing scripts, why not try ShareGate? Take ShareGate's reporting for a spin with a free trial today!