Bulk edit SharePoint metadata: The basics

Table of contents
One of my favorite features in SharePoint, has always been the option of using metadata to tag my content.
Properly set metadata will give you search abilities in your SharePoint environment that go beyond just the name of the document. It makes finding and organizing content so much easier. If you ask me, it beats using folders any day!
But before we get into to the subject of editing it, we should define precisely what metadata is and how it works in a SharePoint environment.
What is SharePoint Metadata?
SharePoint Metadata is information about documents or items in a list or library, that can be used to locate, manage, organize or categorize your content. Metadata can be anything from a file name, type, size, author, and so on.
Basically, you could think of it as the color coding your dad organized his files with back in the 60's. It's an efficient way to sort and access your files in given categories.
The only down side, dad had to do this manually, file by file... the same goes for editing your metadata in SharePoint. It can take ages to change each tag, especially when you have large lists containing tons of documents.
Editing Metadata in SharePoint
Unfortunately, without a third-party tool, you pretty much have to get your metadata right the first time, because SharePoint makes it a little complicated to edit in large quantities. Each tag must be changed manually, one by one. This takes a long time, and opens the door to human error.
Free Trial: Start editing SharePoint metadata in bulk with Sharegate. Try it out for yourself.
One of these possible scenarios, is if every content owner in your organization has a different way of tagging their content. It can be a huge pain if you’re given the task of standardizing that metadata, because you would have to manually change the information of each item within each list or library.
Just seeing the sheer number of documents in a list or library can cause an impossible feeling of dread.
Bulk Editing Metadata with Sharegate
Now, with Sharegate, you can bulk edit SharePoint Metadata in less time it'd take you to say "amazing". Whether it’s to check-in multiple documents, to approve or reject large lists of items, or to simply tag your content all at once. Here's how we do it.
- Plan your SharePoint metadata Before you begin, be sure to plan the edits you want to make. Identify what metadata should be changed, and what it should be changed to. This will make the process quick and painless, and you'll avoid last minute quick decisions. All content owners should be aware of the changes, to keep the metadata standardized in the future.
- Launch Sharegate Launch Sharegate, then go into the Explorer tab to connect your site. If you don't already have Sharegate, you can download it here.
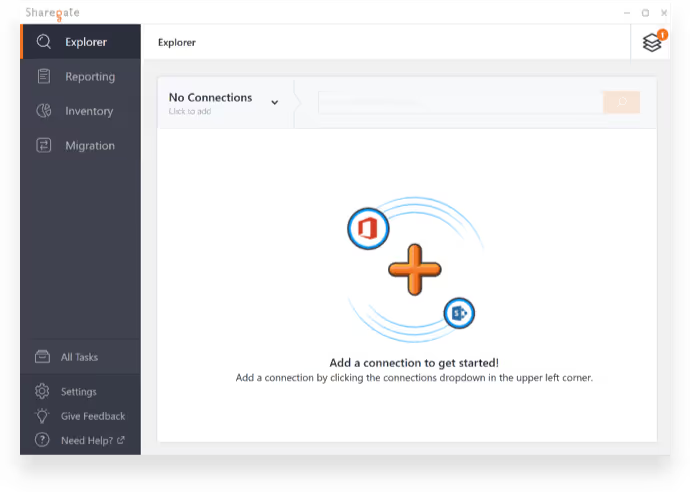
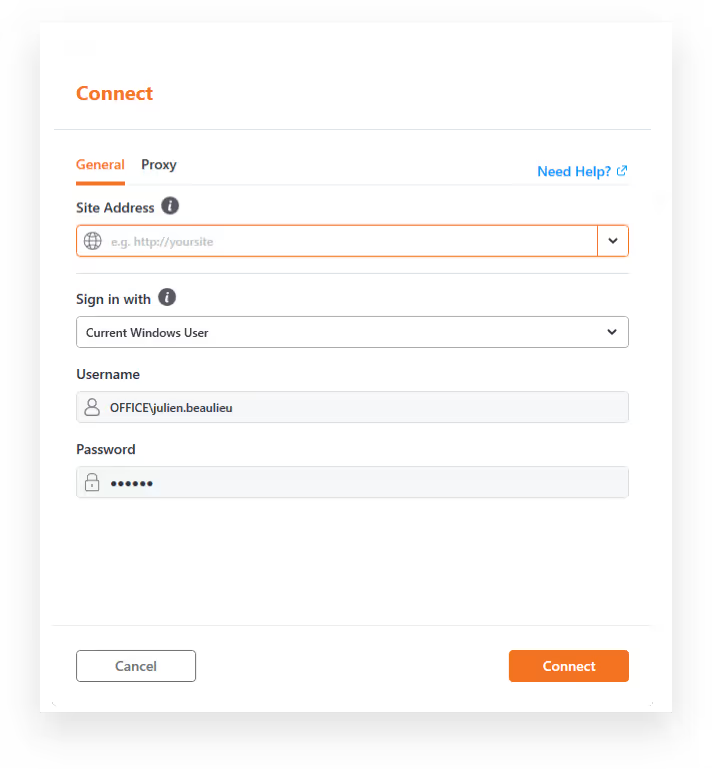
- Connect to the site where your list or library is located Click on the box at the top left to add a connection to a site. Enter in the Site Address bar the site within which you want to edit the metadata of your lists or libraries. The easiest way here would be to copy and paste it from a browser. However, you can also type it in as you go.
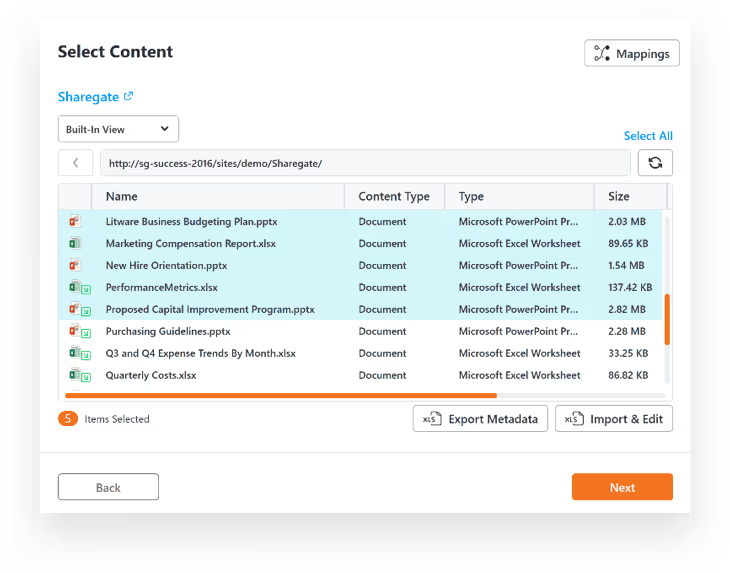
- Choose your list or library Navigate inside your Site Collection and choose the list or library in which you want to bulk edit the metadata. Hit the bulk edit button in the quick action panel, at the top right of Sharegate.

- Editing the Metadata Select the documents you want to bulk edit, and hit the Next button. Note: if you want to bulk edit all the SharePoint items' metadata in the list or library you've picked, there's a select all button in the top right corner of the window.
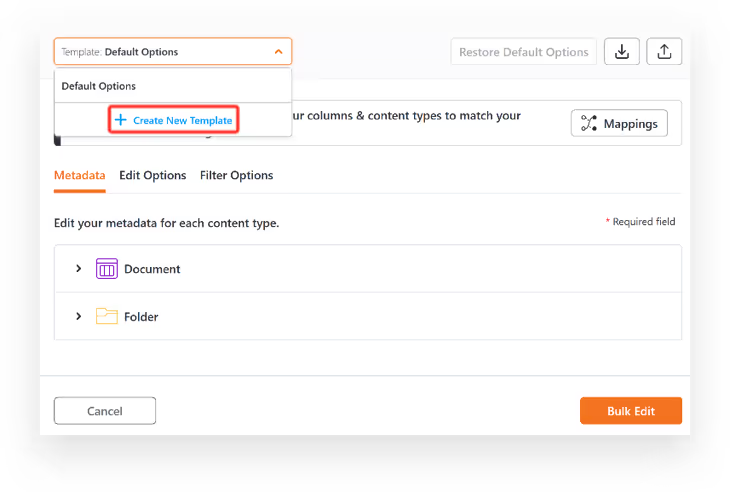
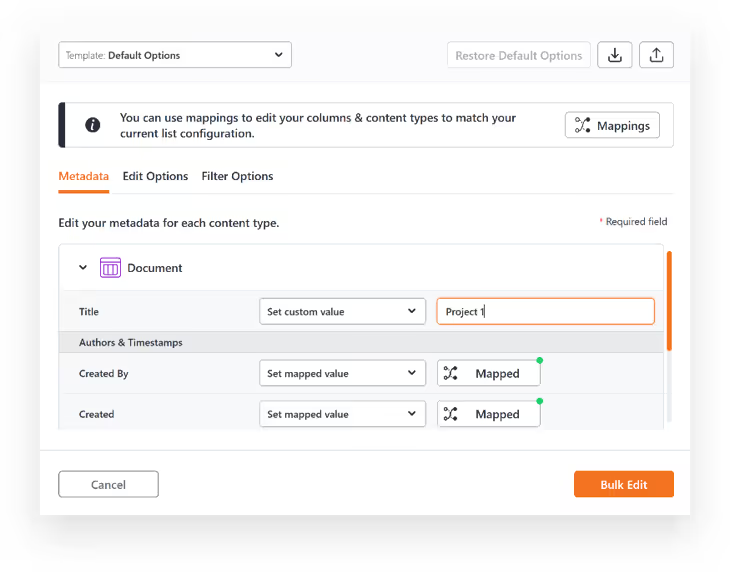
- Create a Property Template This is a key step. It’s by creating a property template that you are telling Sharegate what changes need to be applied to the documents within the selected list or library. To create the property template, click on "Template: Default Options" in the upper left corner and then click on "Create New Template".
- This is what the template edit section looks like. In our example, we’ve chosen to “Set a custom value” for the column “Title” to assign all the documents to "Project 1". Click on the "Bulk Edit" button to make the changes and you'll be taken to a screen that will give you the status of the changes.
And that's how you bulk edit SharePoint Metadata using Sharegate.
When Would I Need to Bulk Edit Metadata in SharePoint?
It's great that Sharegate allows you to edit this information in large quantitates, but when exactly would bulk editing come in handy?
Here a few scenarios our readers have identified as being reasons why they would need to use the bulk edit tool.
Before a Migration
If you're planning a SharePoint migration, you've probably already created an information architecture for you new environment.
This plan typically contains metadata requirements for documents within the new SharePoint, so bulk editing this information before the migration process could make it easier.
However, in this case, you wouldn't need to use the bulk edit tool, because Sharegate allows users to map metadata during the migration process with their tool, so you don't have to spend time changing everything beforehand.
Standardizing Metadata
Often in organizations, there are multiple content owners that are constantly adding documents to lists or libraries.
If each person has his or her own way of tagging and organizing their content, it could create a chaotic mess of metadata that isn't coherent from one document to the next, or from one list to the next.
This situation would require that someone standardize all of the metadata within the affected sites. If there are a lot of items in the list or library, the bulk edit tool would definitely come in handy for making this task faster and easier.
Cleaning up a Large List or Library
We've all had those facepalm moments when opening up a list or library and being faced with ridiculous amounts of items, all tagged and organized differently.
Bulk editing the metadata with Sharegate will make cleaning up and organizing the list seem like a breeze, compared to using SharePoint and changing one file at time.
After Bulk Editing, What's Next?
No more lost files in SharePoint! Now that documents are properly categorized and organized with standardized metatags, collaboration with multiple content owners will be that much easier. Bulk editing of SharePoint Metadata has no secrets for you!
Bulk editing is a feature available in every version of Sharegate. Try it free today!


.svg)
.avif)
%20(1).avif)
